
We purchased your 2003 35R in August 2020. It has only 25k miles on it but it was still 17 years old. It spent a lot of time in the sun and a lot of time in the heat. The flooring, both vinyl and carpet, was in dire need of replacement.
Before
10 months later I finally got around to tackling this particular renovation. Lets examine some of the before photos:
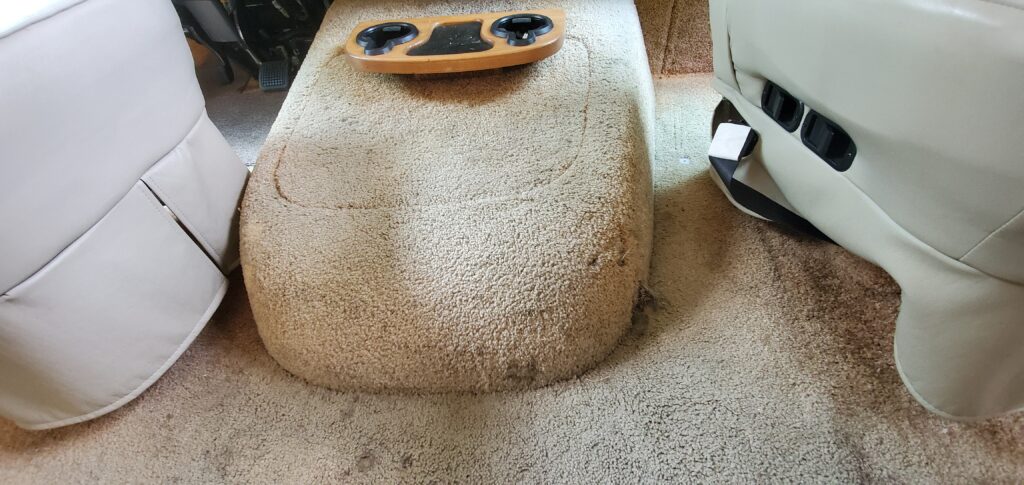
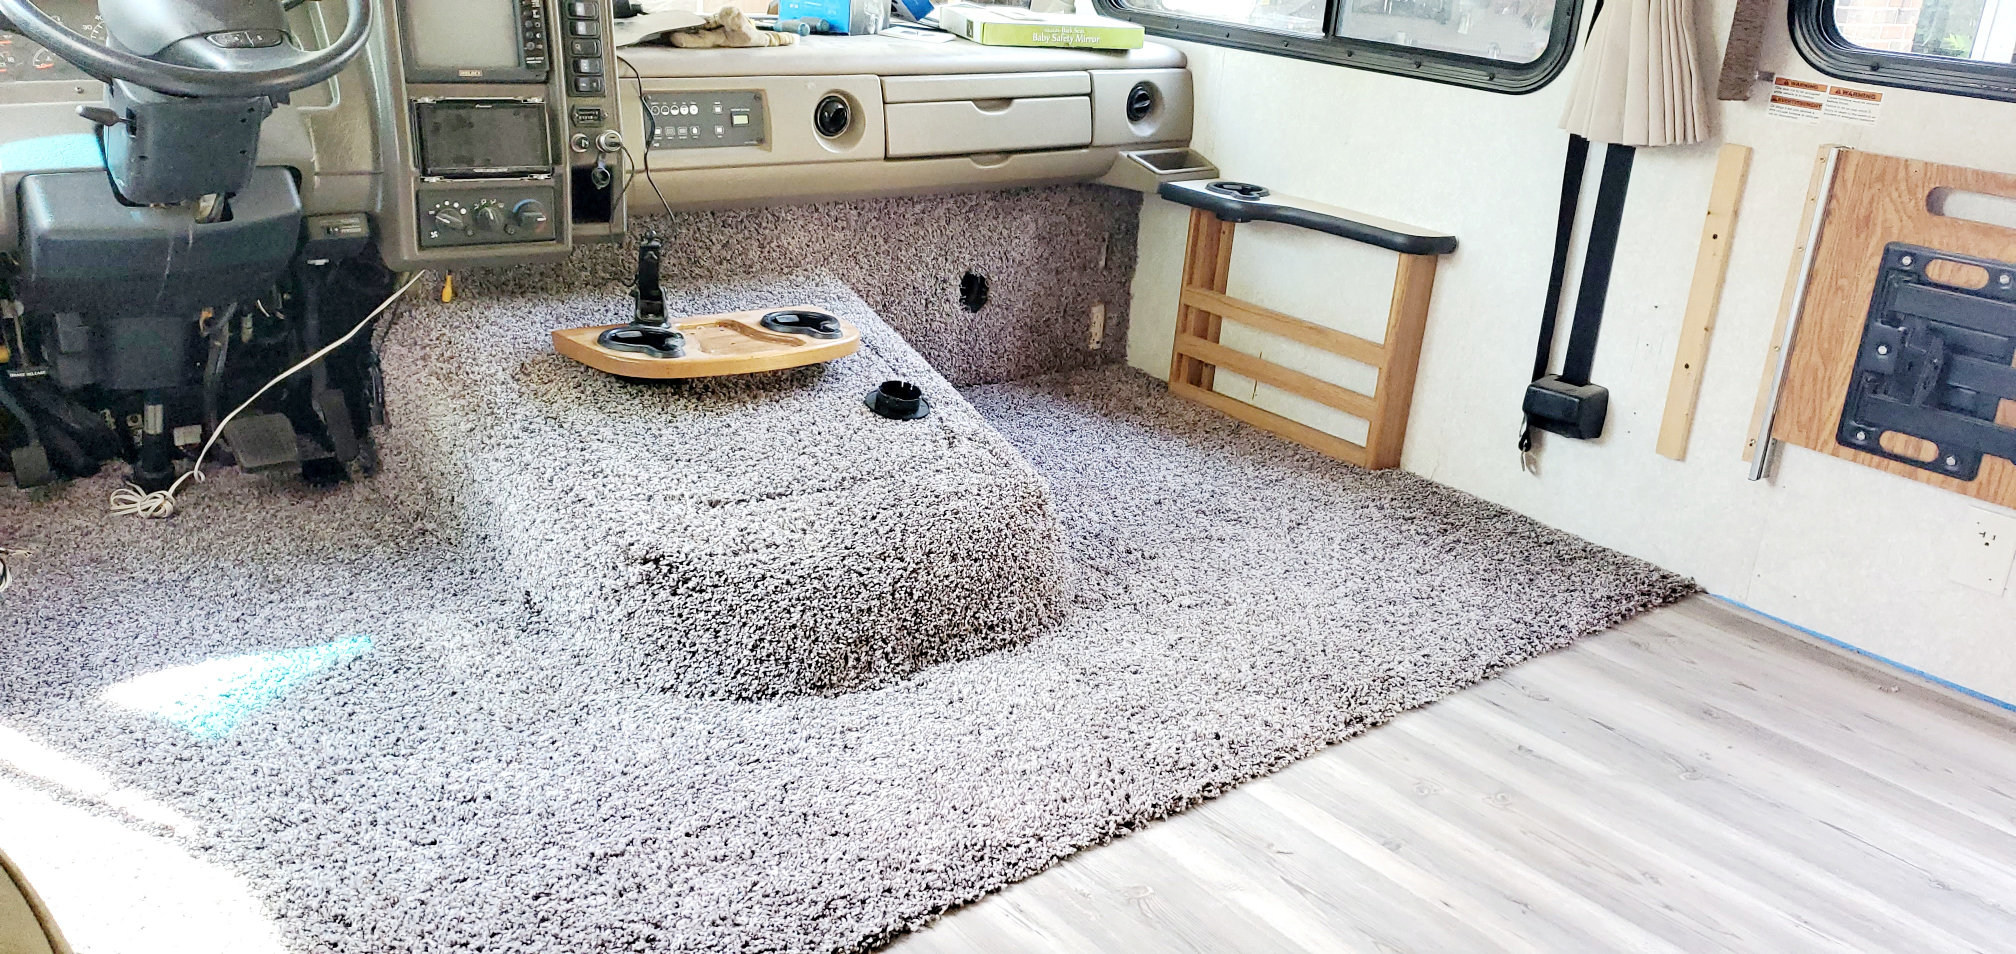
Front carpeting
As you can see from, the carpet was stained and very sun-faded. We contemplated replacing this flooring with vinyl but chose to keep it carpeted there for sound and comfort while driving.
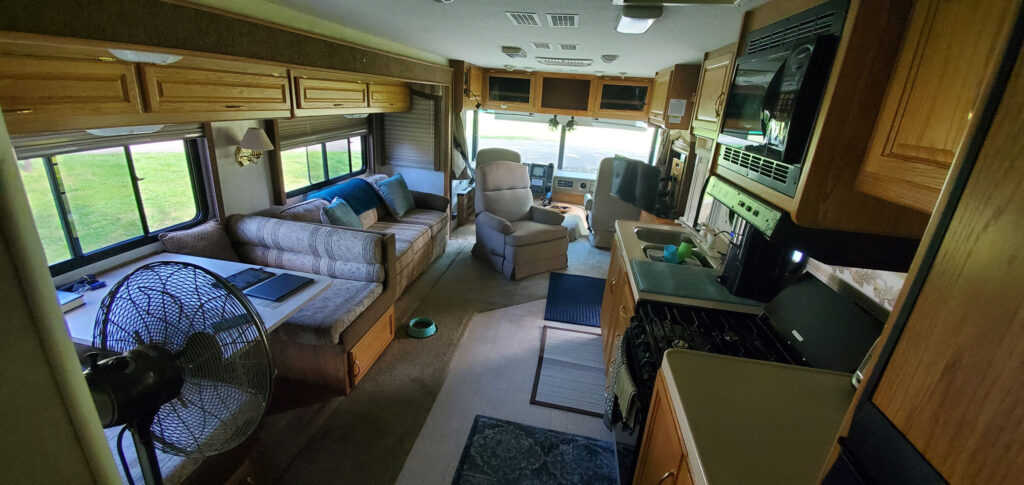
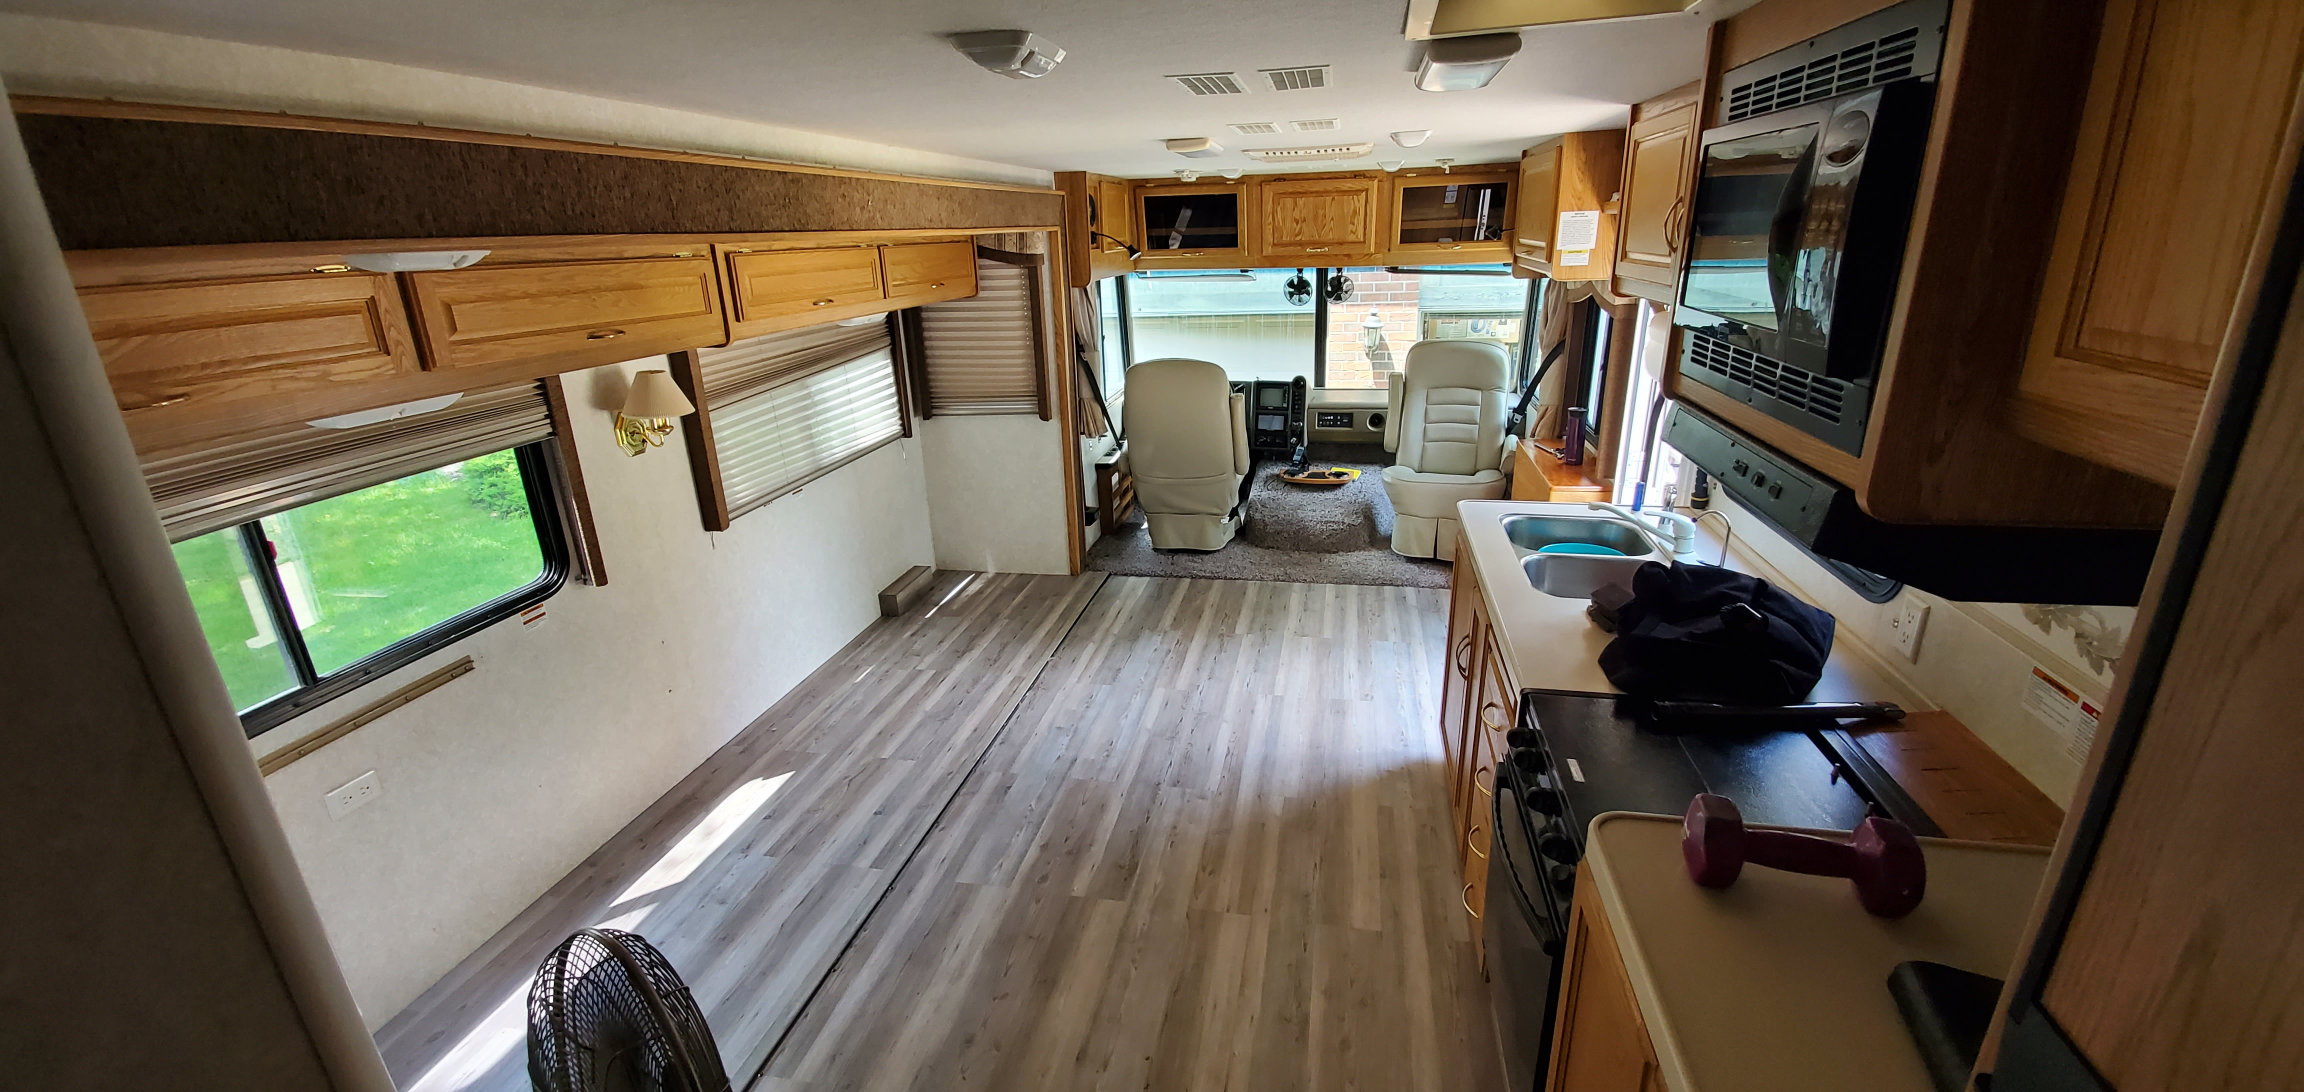
Before: general interior
Preparation
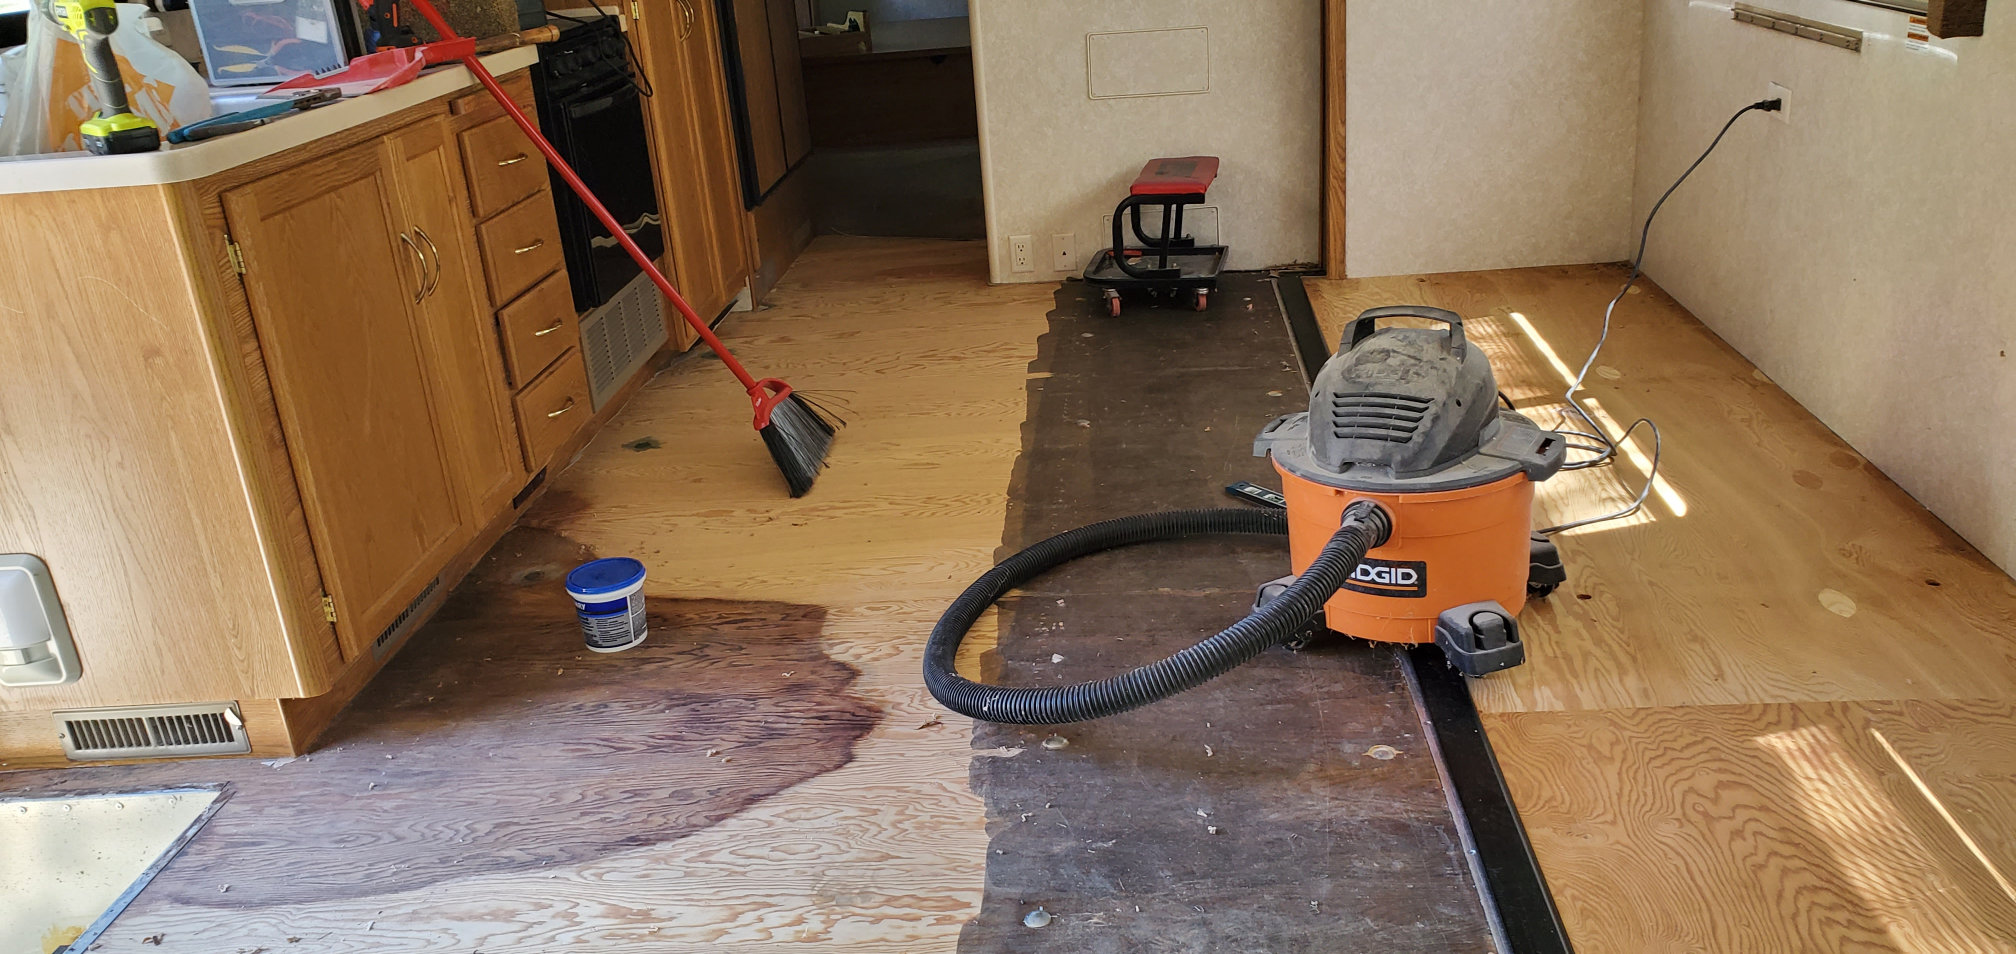
Prepping the Floor
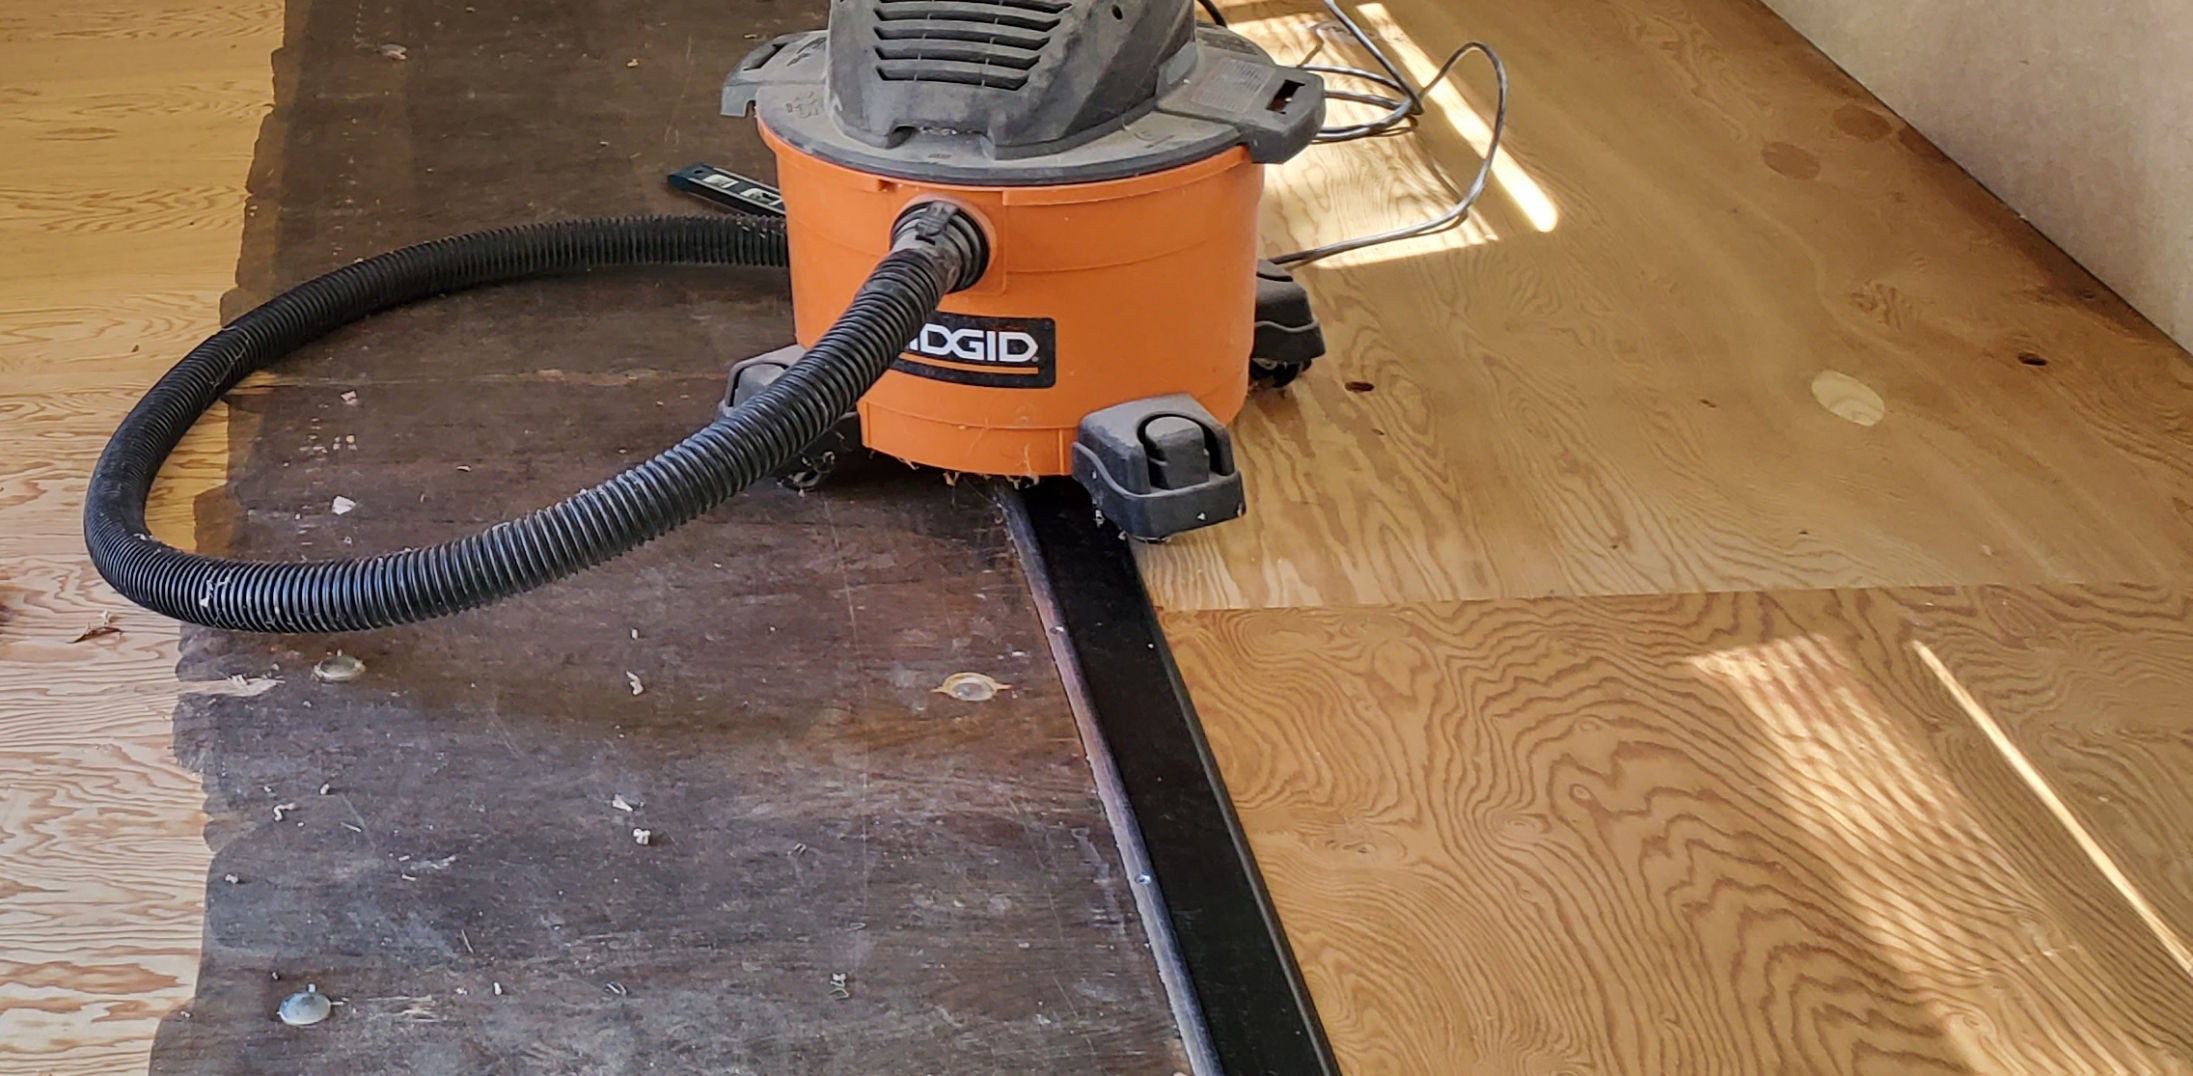
Before you can begin laying your vinyl, you must ensure the floor is clear of all dust and debris. This is a very important step as anything that is left behind will eventually show itself in the form of a bump or lump in your vinyl floor and it will be very difficult to remove. Vacuum as often as you can to make sure even little pieces of litter is gone.
It is also important to either remove or pound down any staples or nails left over from the prior flooring material. If there are any cavities or divots, fill those with floor leveling compound and sand it down.
The stain you see in front of my sink is just that, a stain. The prior owner must have had a leak or something. It is not pertinent to this step. However, if you do have water damage, now is the time to fix it!
Also Remove
There may be other parts of your rig that you should remove prior to laying the flooring. Examples include:
- Any handle bar used for going down the stairs that may be screwed into the floor
- The wood framing around the slideout since you will want the vinyl under this frame. You may need to trim it a little to make room for the vinyl.
- Metal edging around the steps.
- Just be smart!!
The Flooring Material
I chose to use a vinyl floor over a structured or solid wood solution. It is thinner, very very waterproof and easy to put down. In addition, this is a “floating” floor that does not require it to be glued down.
I want to make it clear that I did glue some of it down. Specifically anything along the edging by the slideout and near the bathroom. Again, just be smart about this. I used 3/8″ brad nails along the front of the cabinets and also near the slideout to be doubly sure it stays secure. As for the rest of the floor, it “floats” on the blue protective material.
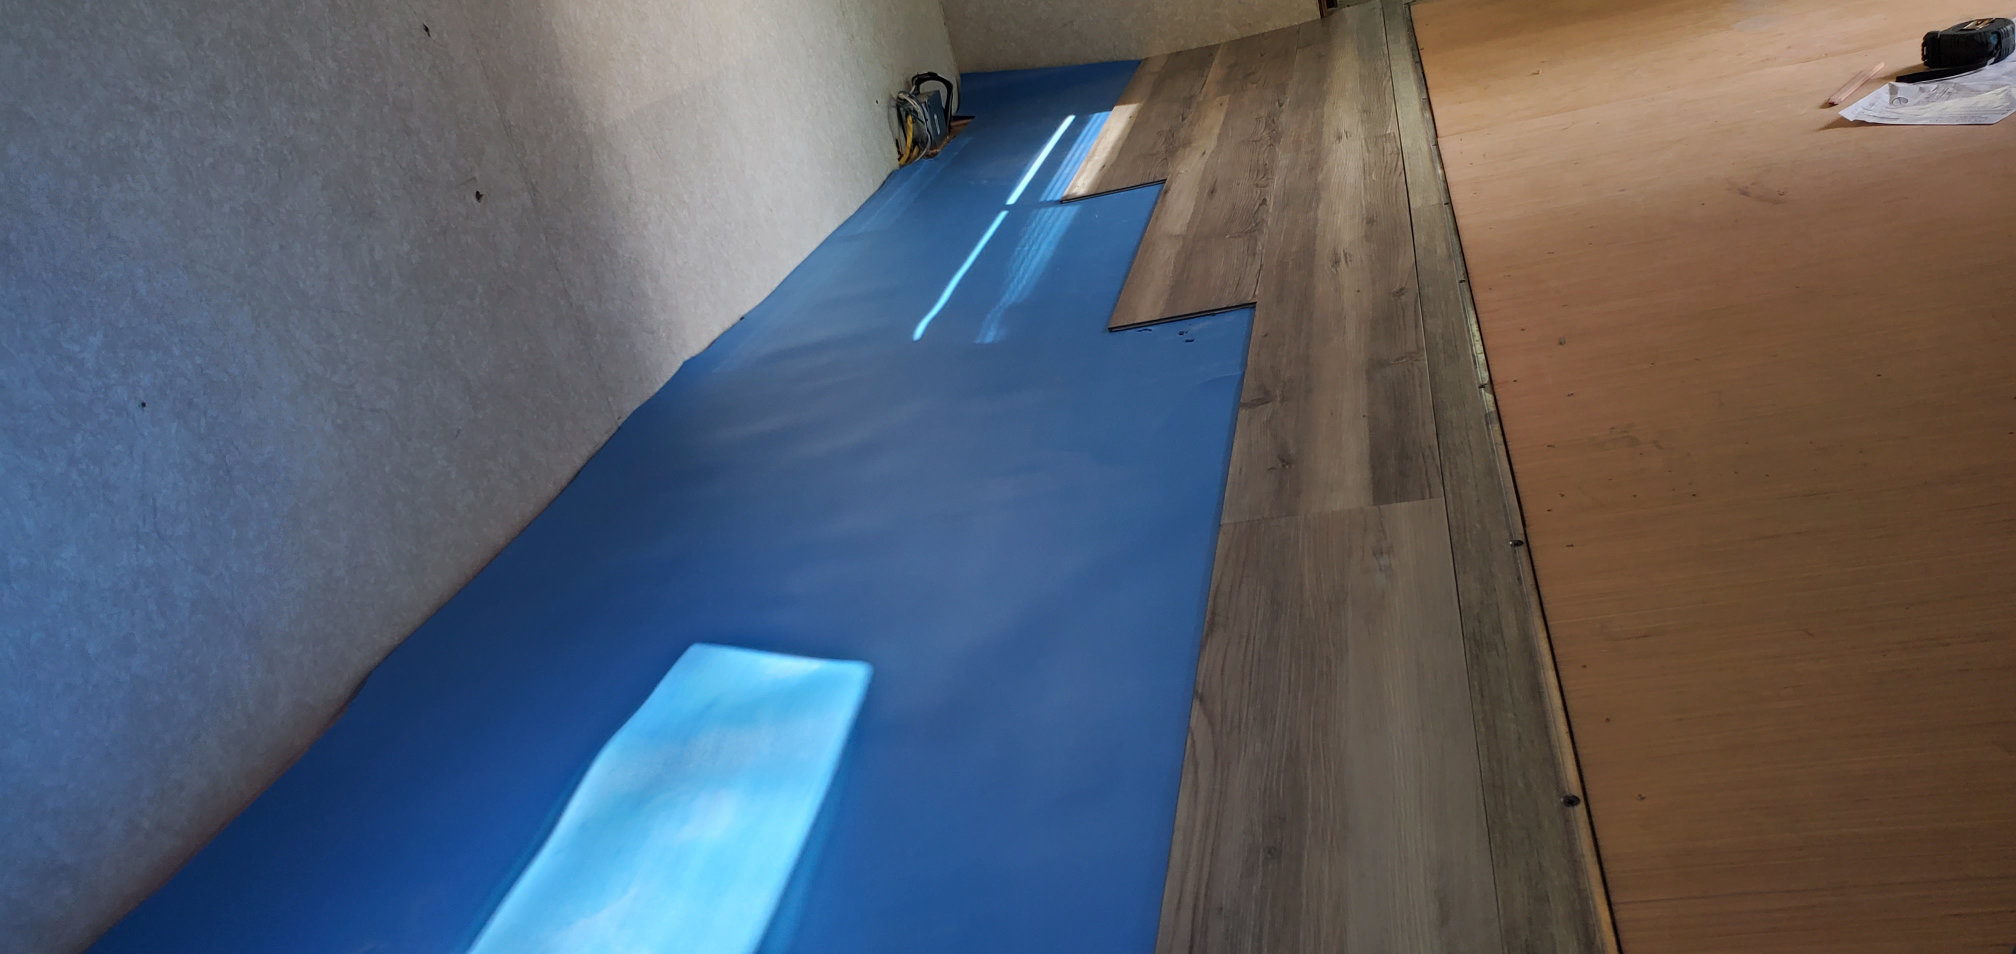
Starting to lay the vinyl
The Slideout
There was a lot of thought about how to handle the slideout. We decided to remove the carpeting from it and put down vinyl but something had to be done about the leading edge to give it a “finished” look. The vinyl we purchased included options for various transitions including a “blunt nose” piece that would work well for this purpose.
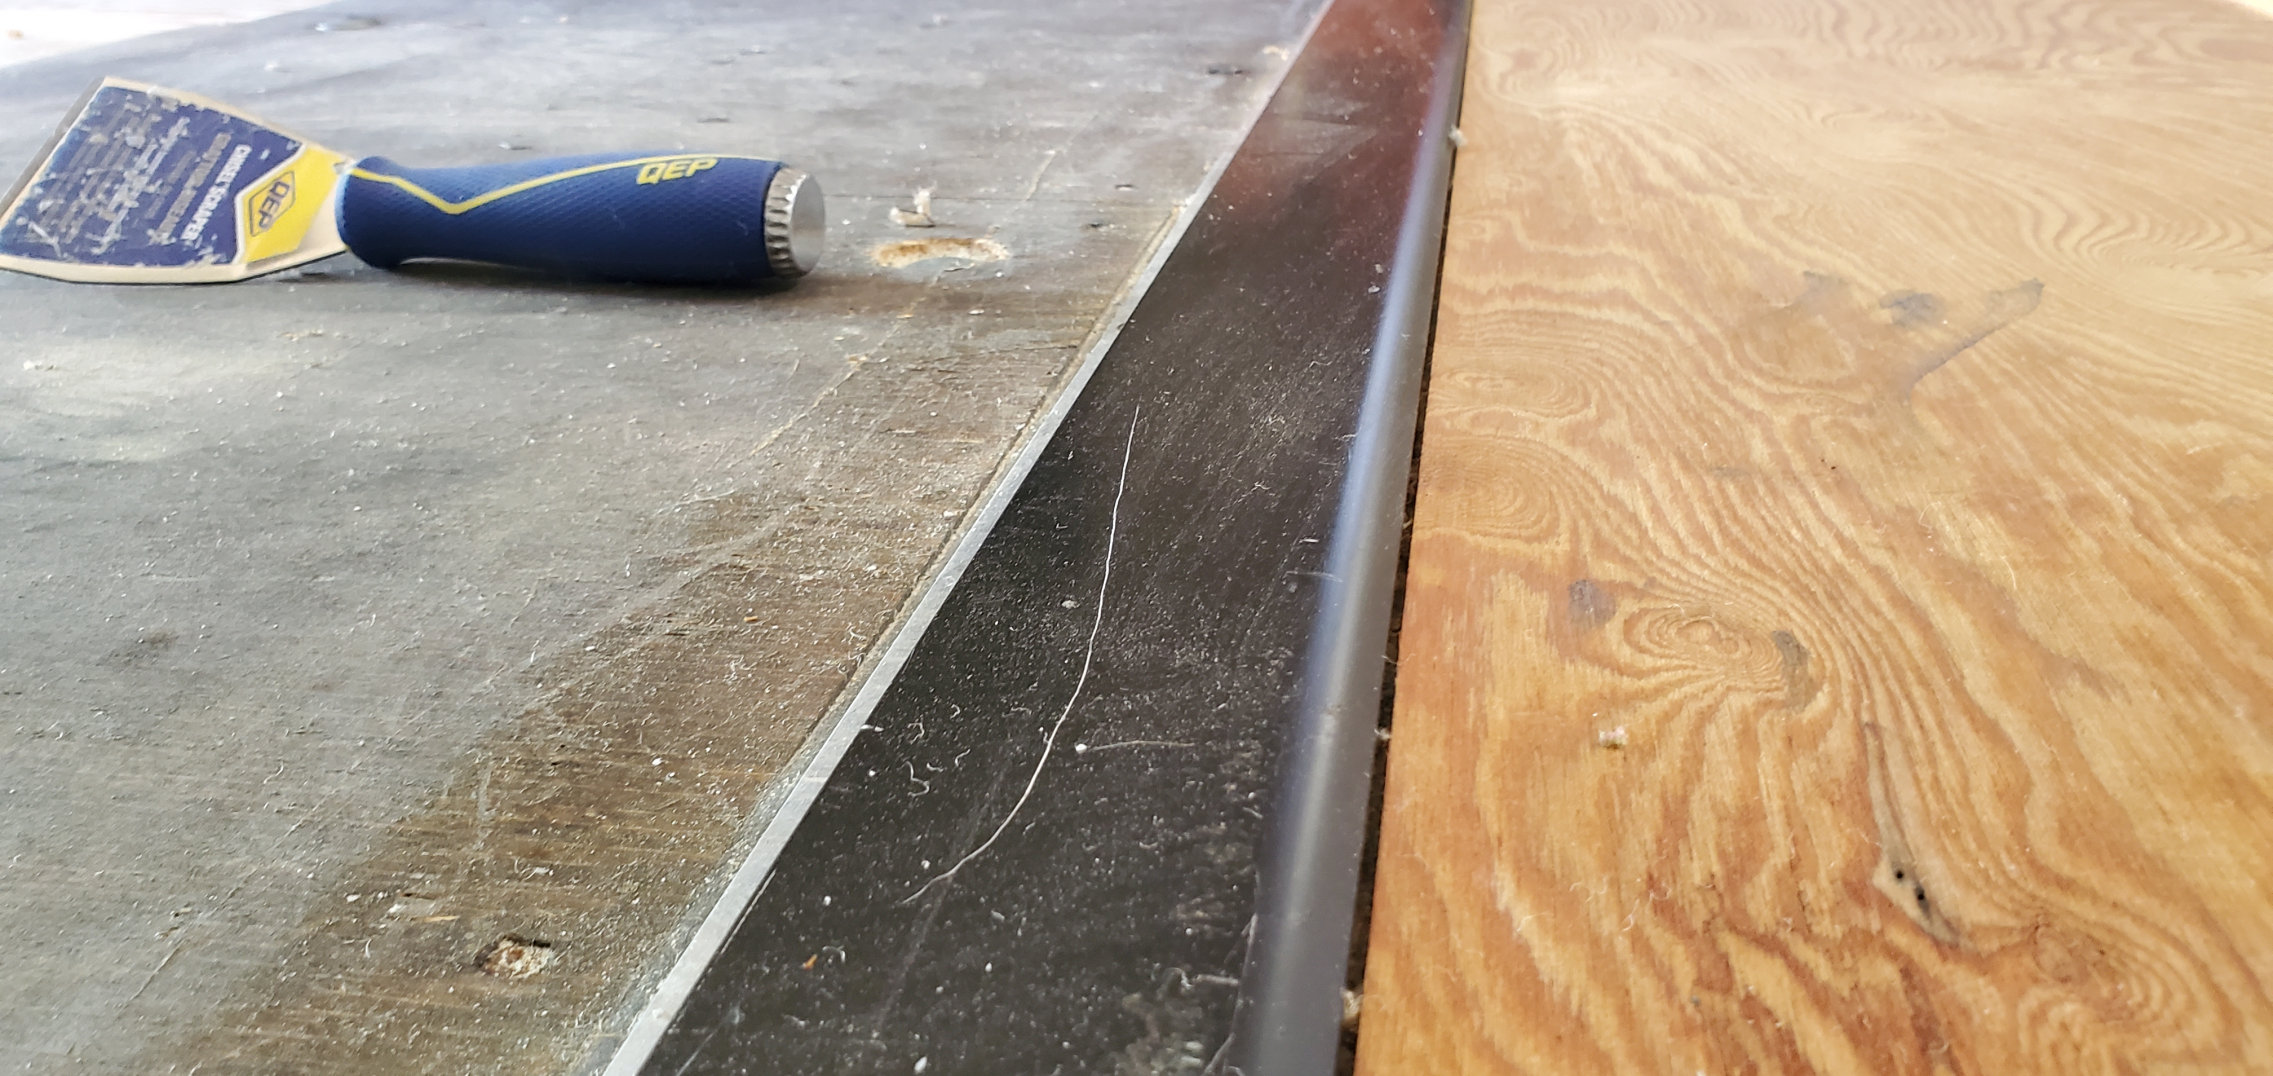
Before putting any of the vinyl down, however, we needed to “raise” the floor slightly so that it would be more level with the steel plate at the leading edge.
 |
 |
As you can see, there is quite a drop from the metal edge to the slideout floor.
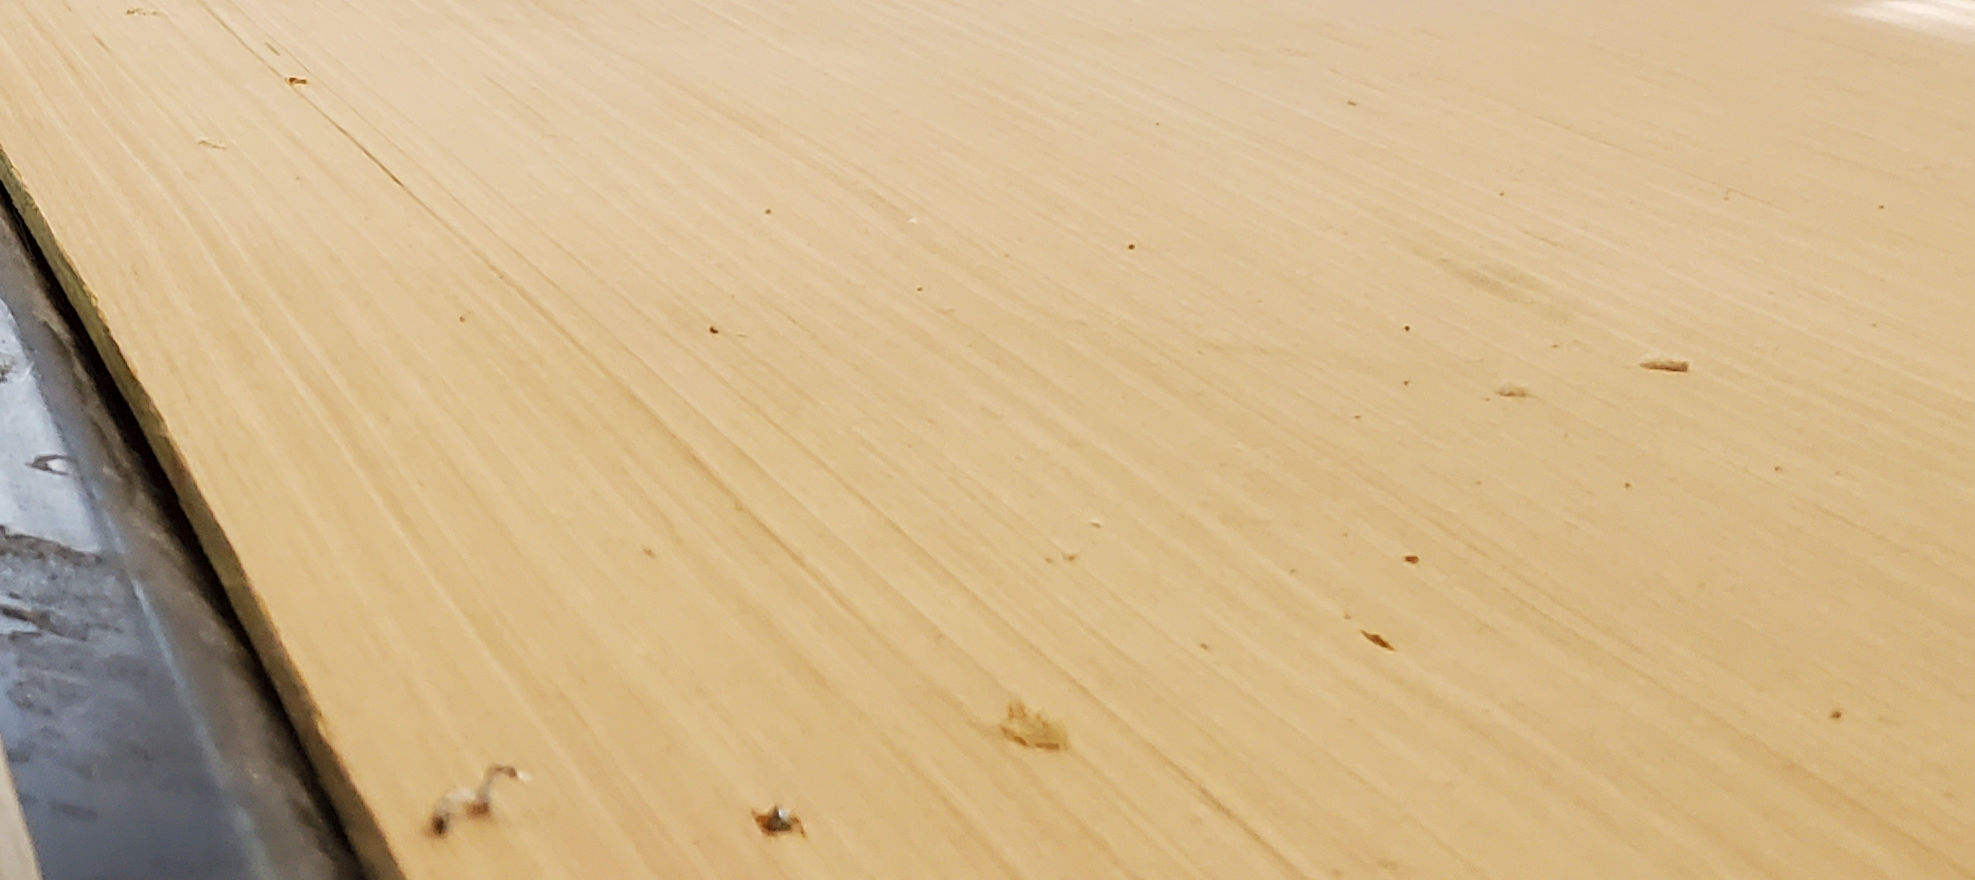
Adding 1/4″ subfloor to the slideout made the floor ore level with the top of the steel.
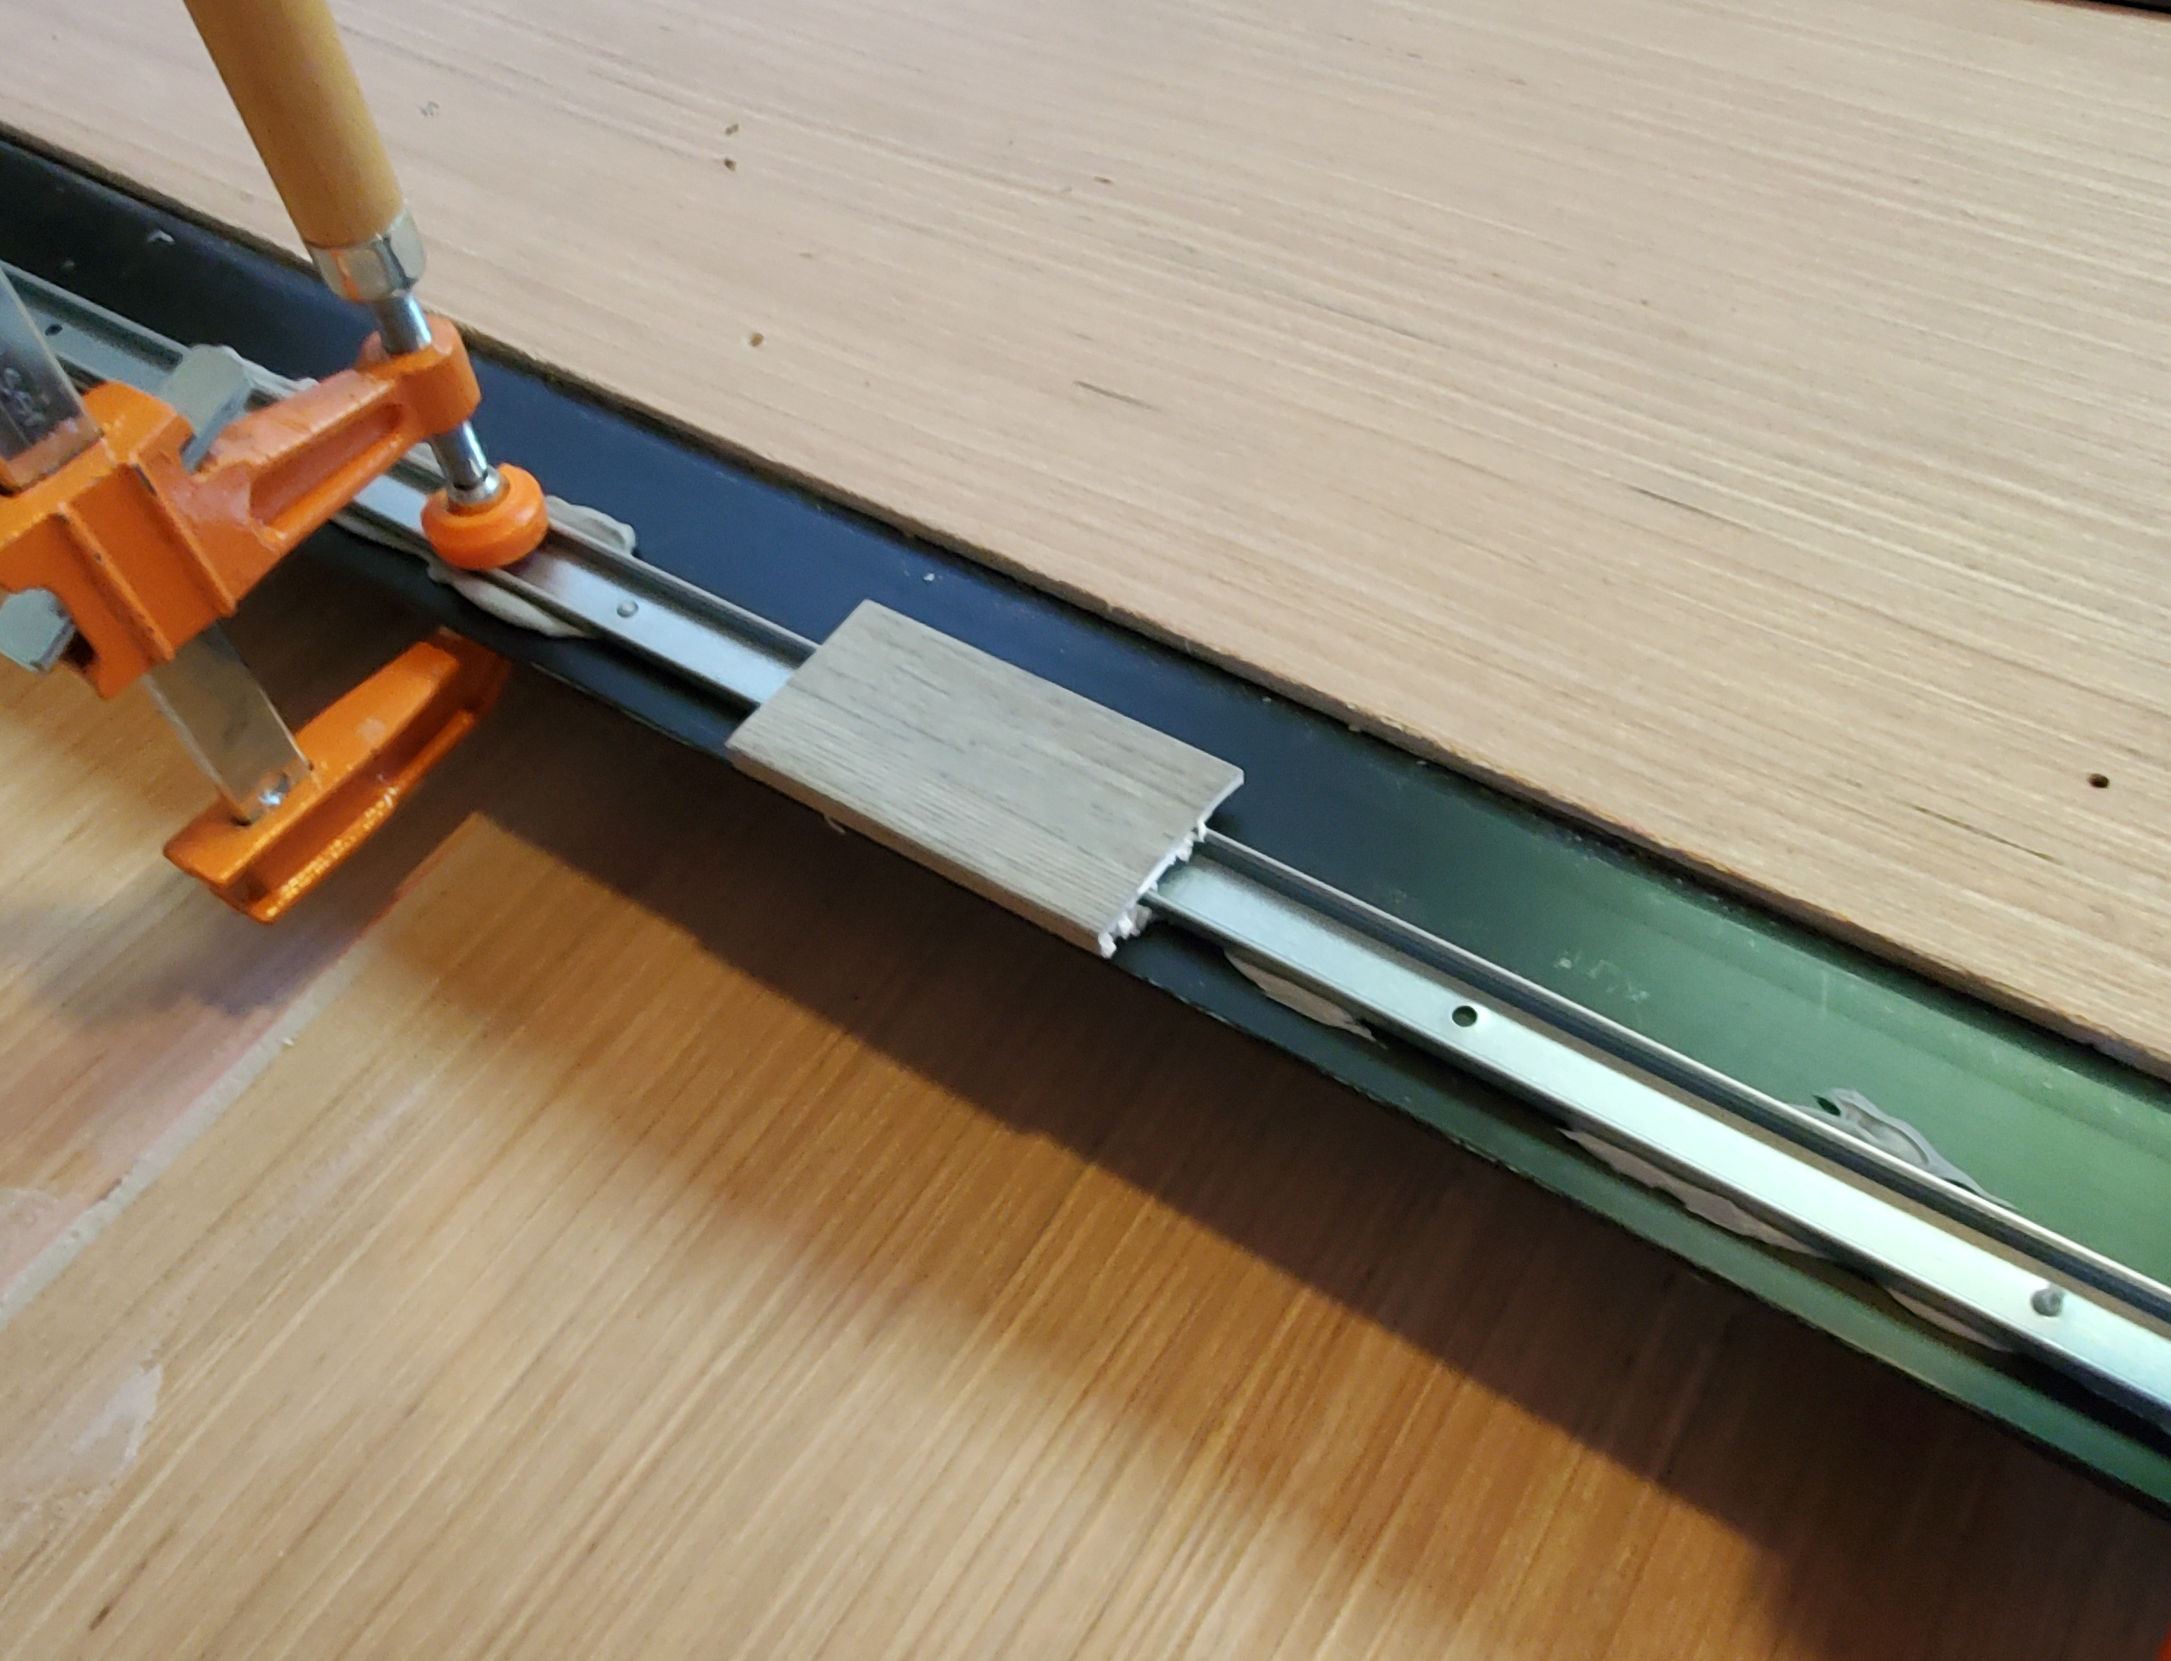 I started adding the transition piece by gluing the mounting bracket to the steel lip of the slideout. I used a small piece of transition to ensure that it was straight and that the final transition would be even with the front of the lip.
Go slowly and apply sufficient clamps to hold the bracket in place while the glue dries. Simple construction adhesive was sufficient for this purpose.
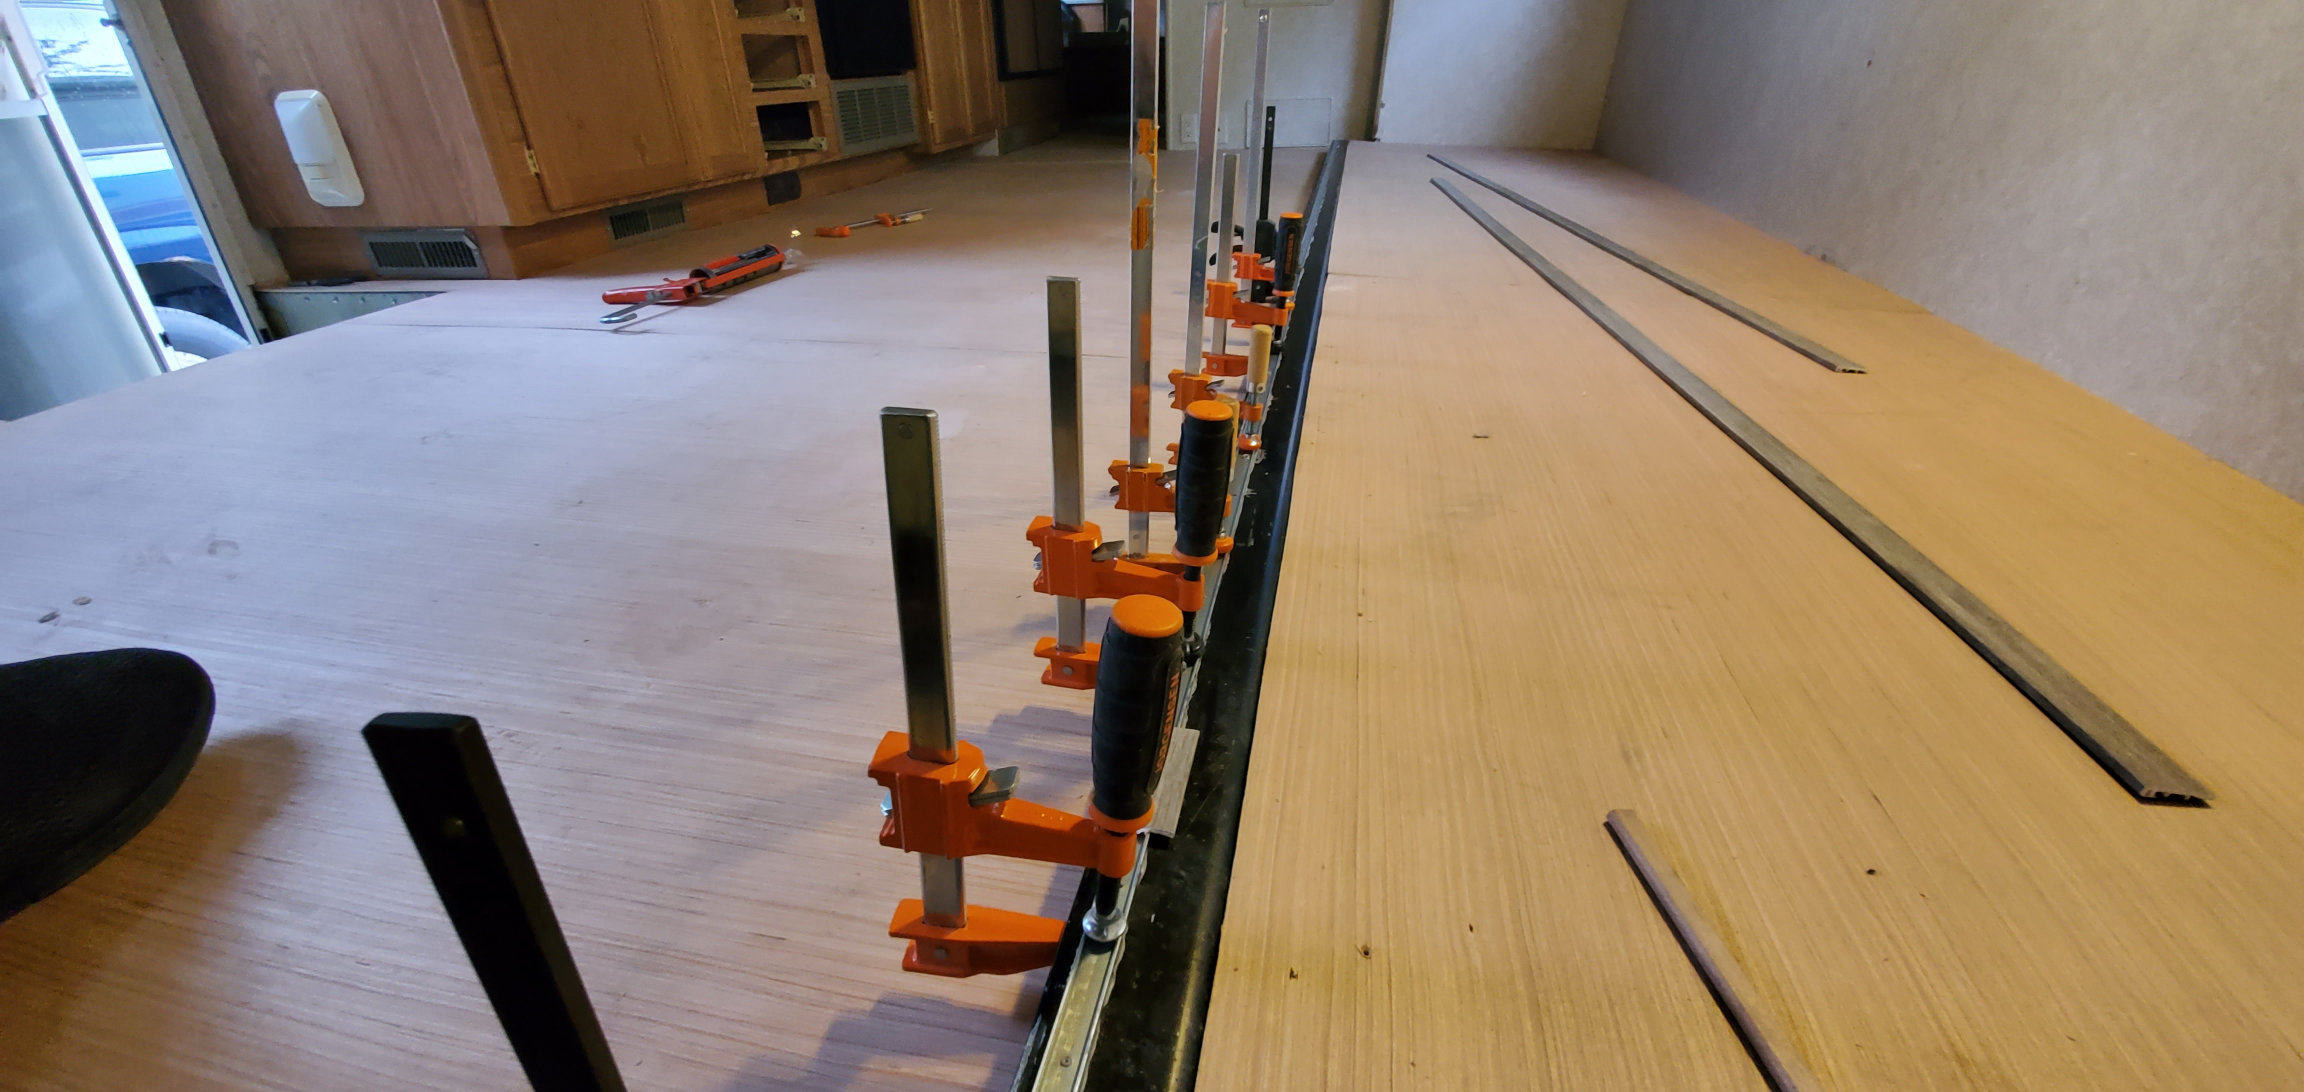
Gluing the mounting bracket
Once the glue has dried, I used screws to complete the process. This will ensure that if anyone steps on the transition piece that it won’t buckle. After you screw down the bracket, you will want to grind off any protruding screws from below the steel lip so it does not damage the floor as it pulls in and out.
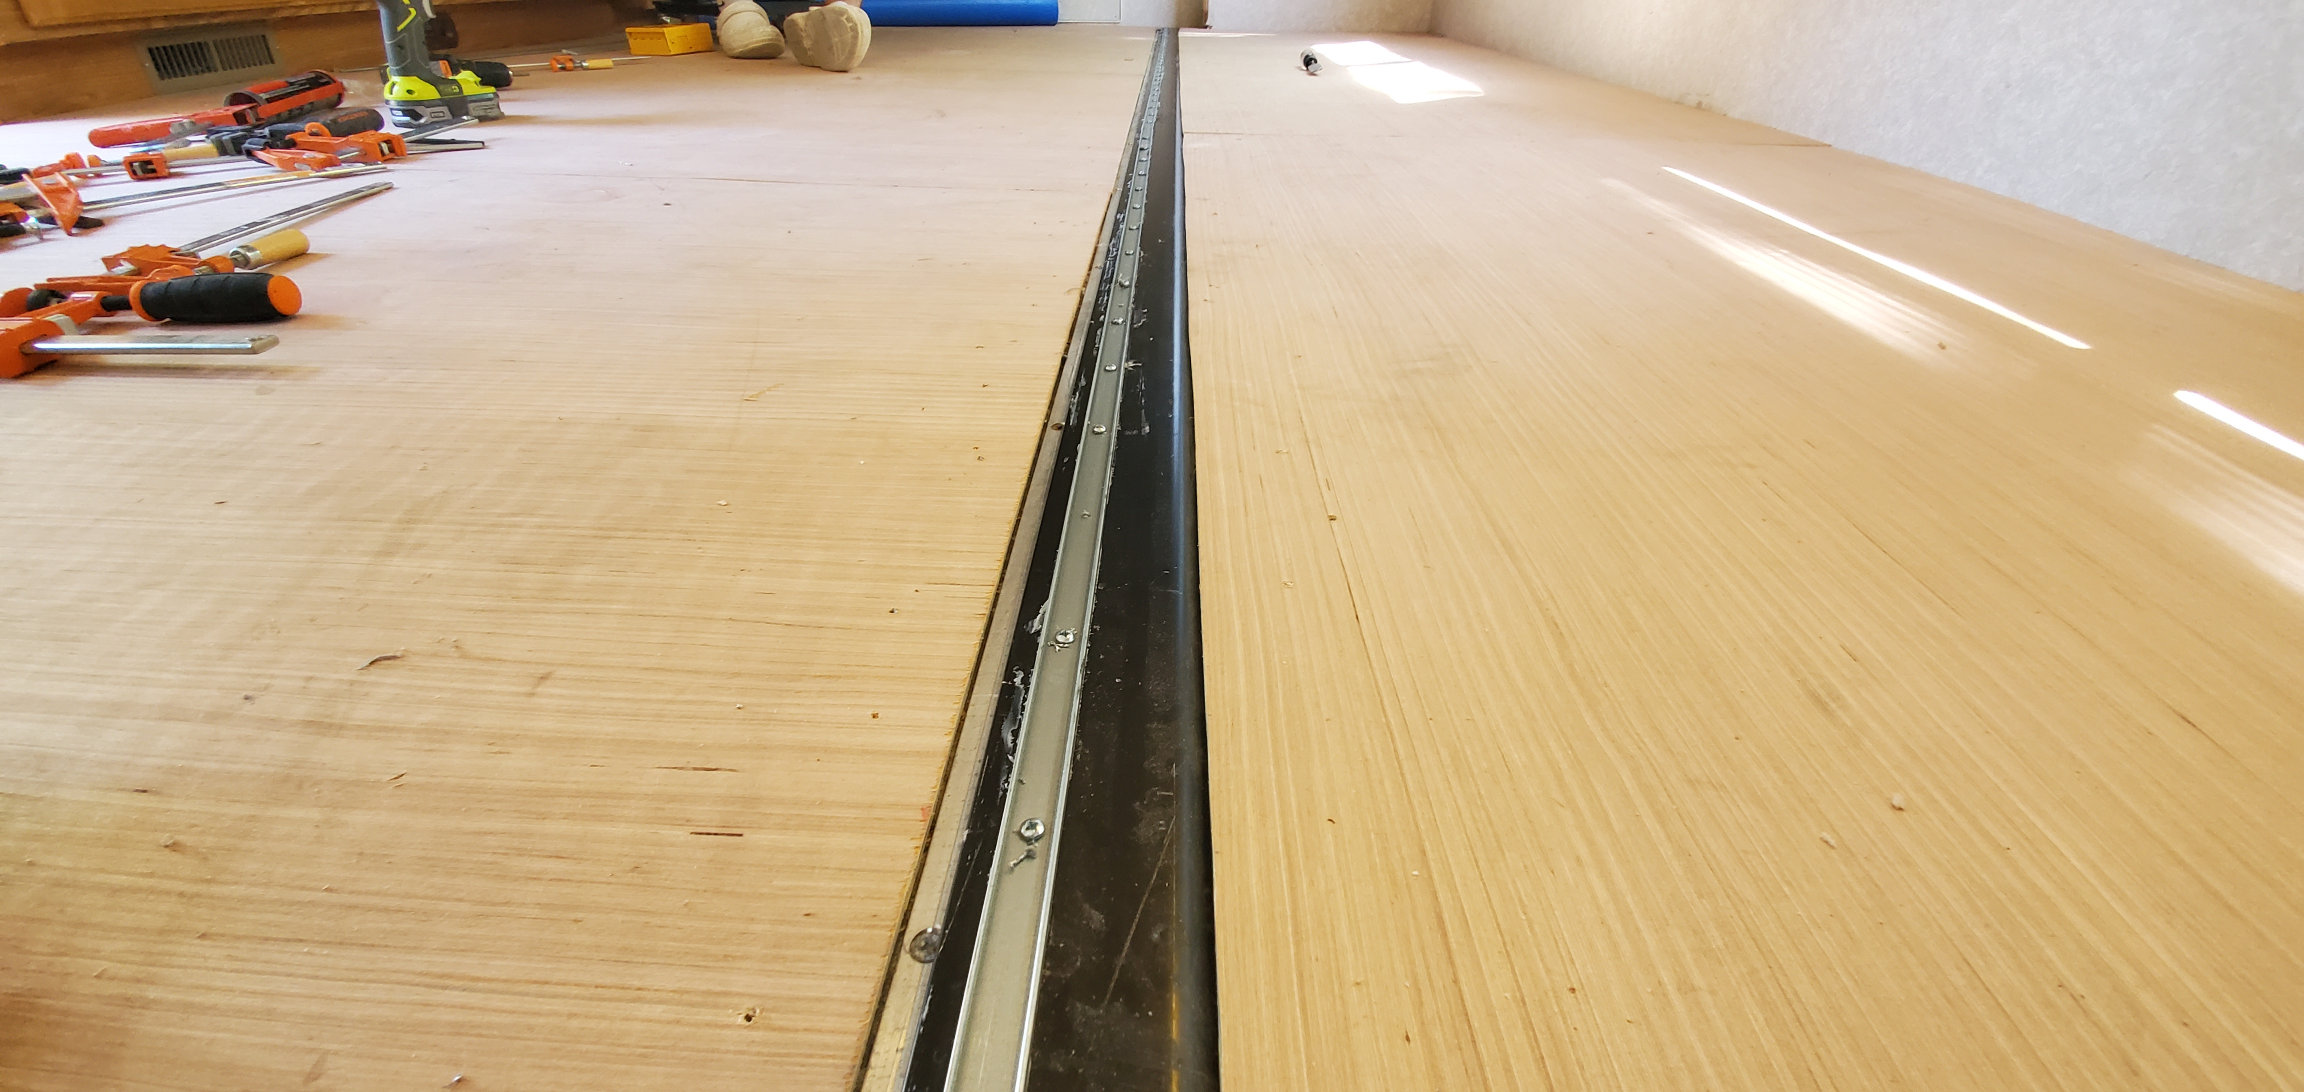
Glued Down and Screwed Down
The final transition piece simply snaps down over the bracket.
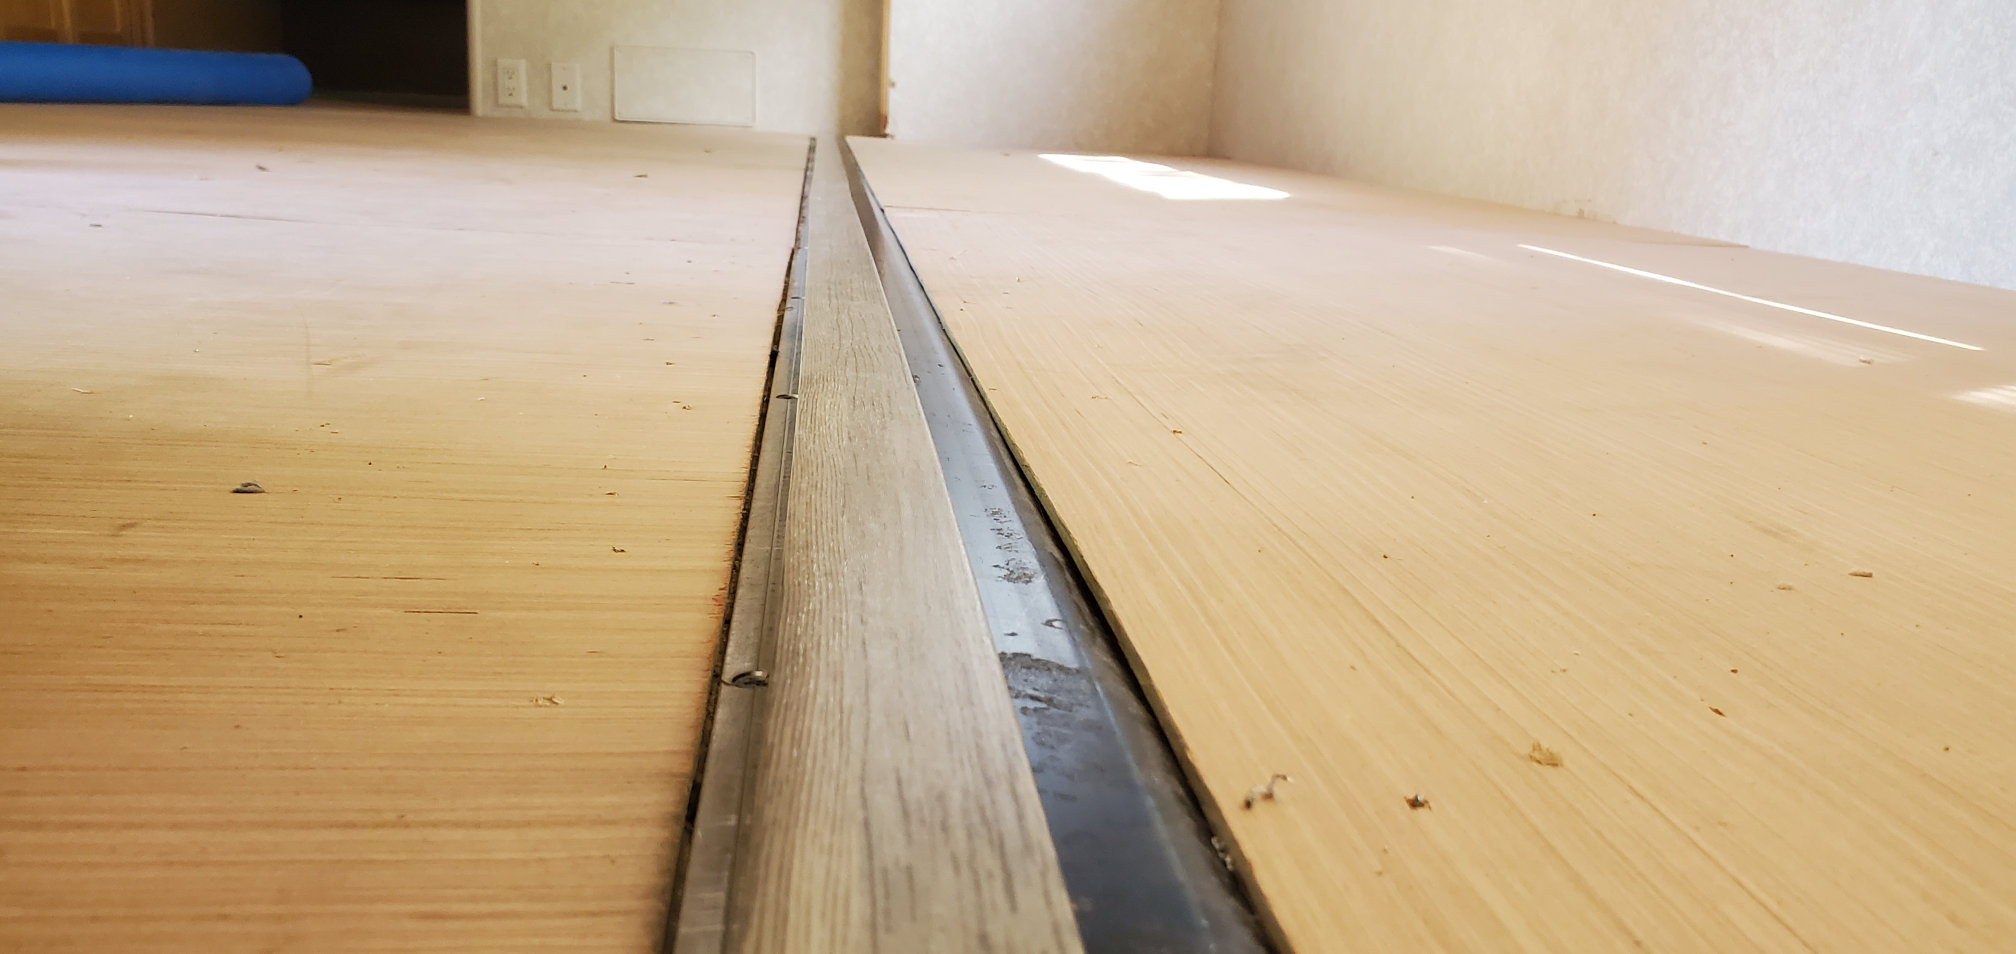
Snapped Down!
The transition is designed to have a solid “front” edge and a covering rear edge. The vinyl simply slides up underneath the transition, snugly, to give a very nice finished look.
I have had a lot of experience laying vinyl tile and feel that staggering the flooring at the halfway point is sufficient. Some may suggest doing at the 1/3rd mark but this will lead to more waste and take much more time. This is my opinion. Either way, in a space this small, I don’t think there is much to be gained going at the 1/3rd mark.
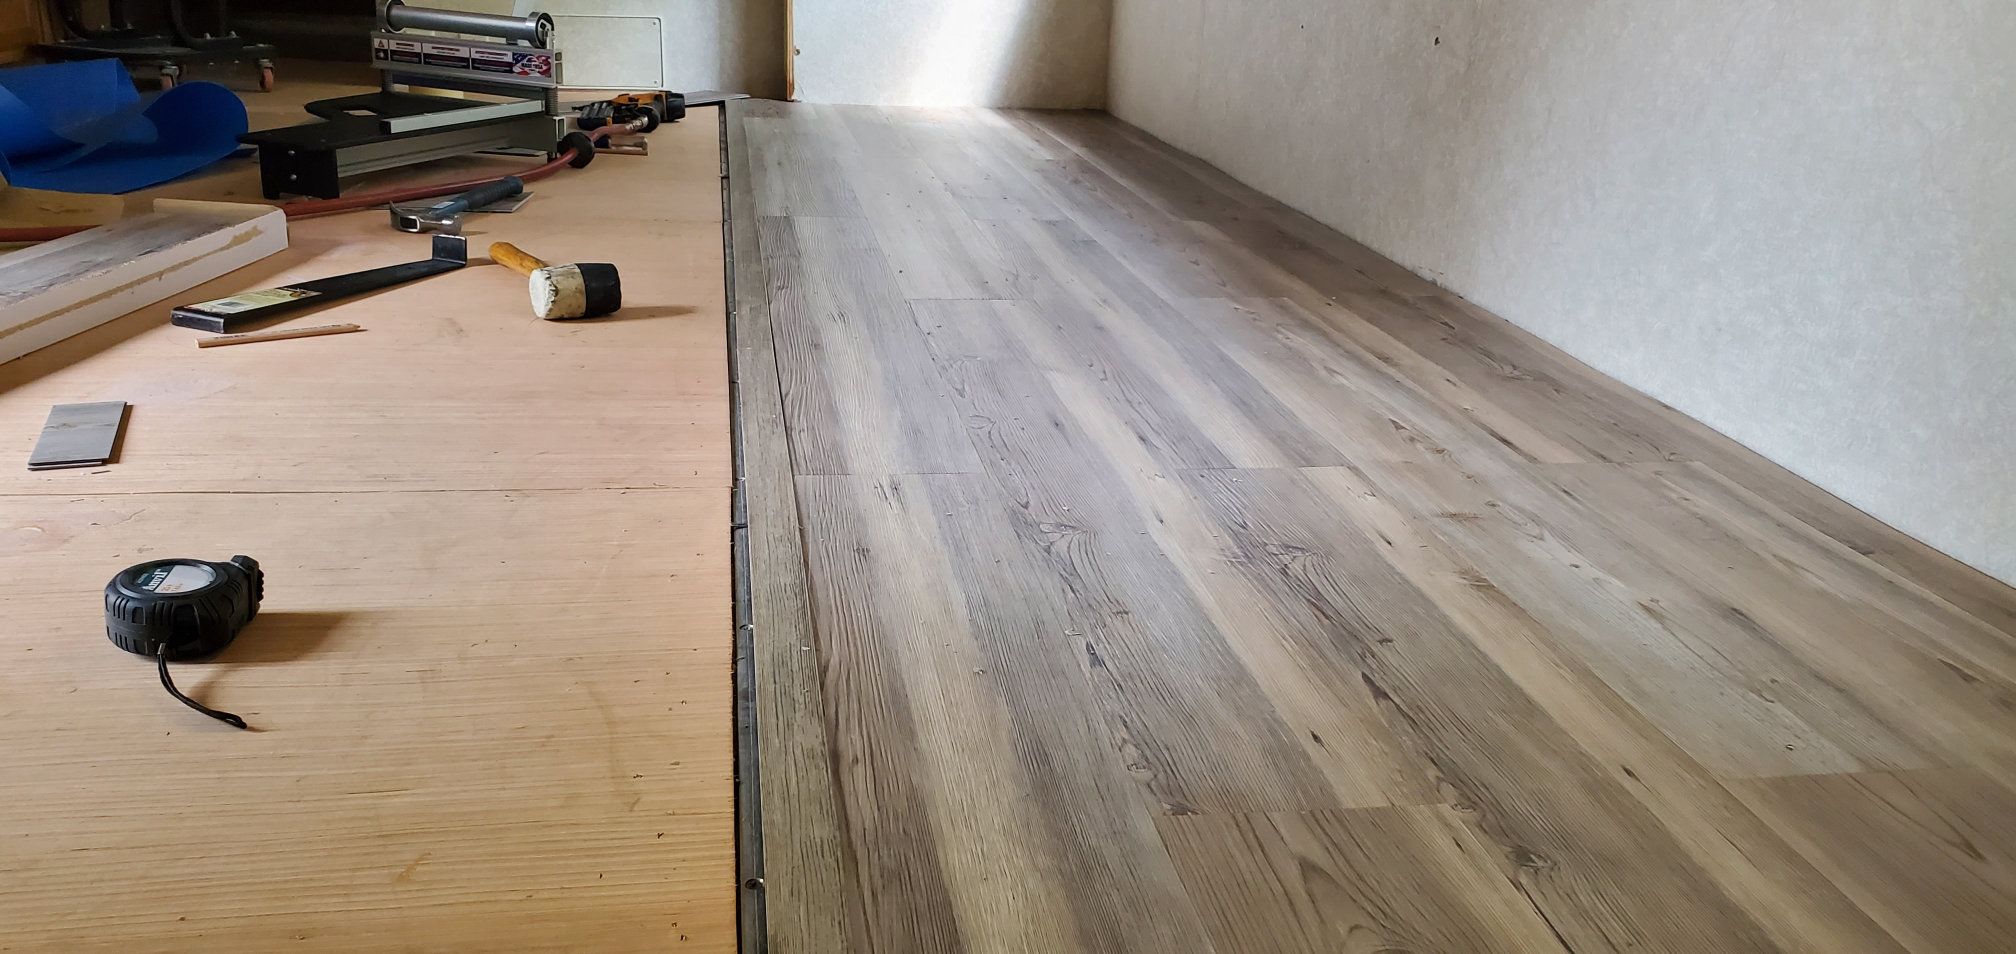
Finished Slideout
I think the final result worked out very well!
Dealing with the Bolts
This is a photo of the interior of the rig prior to any renovation. We removed all the furniture in preparation of the project.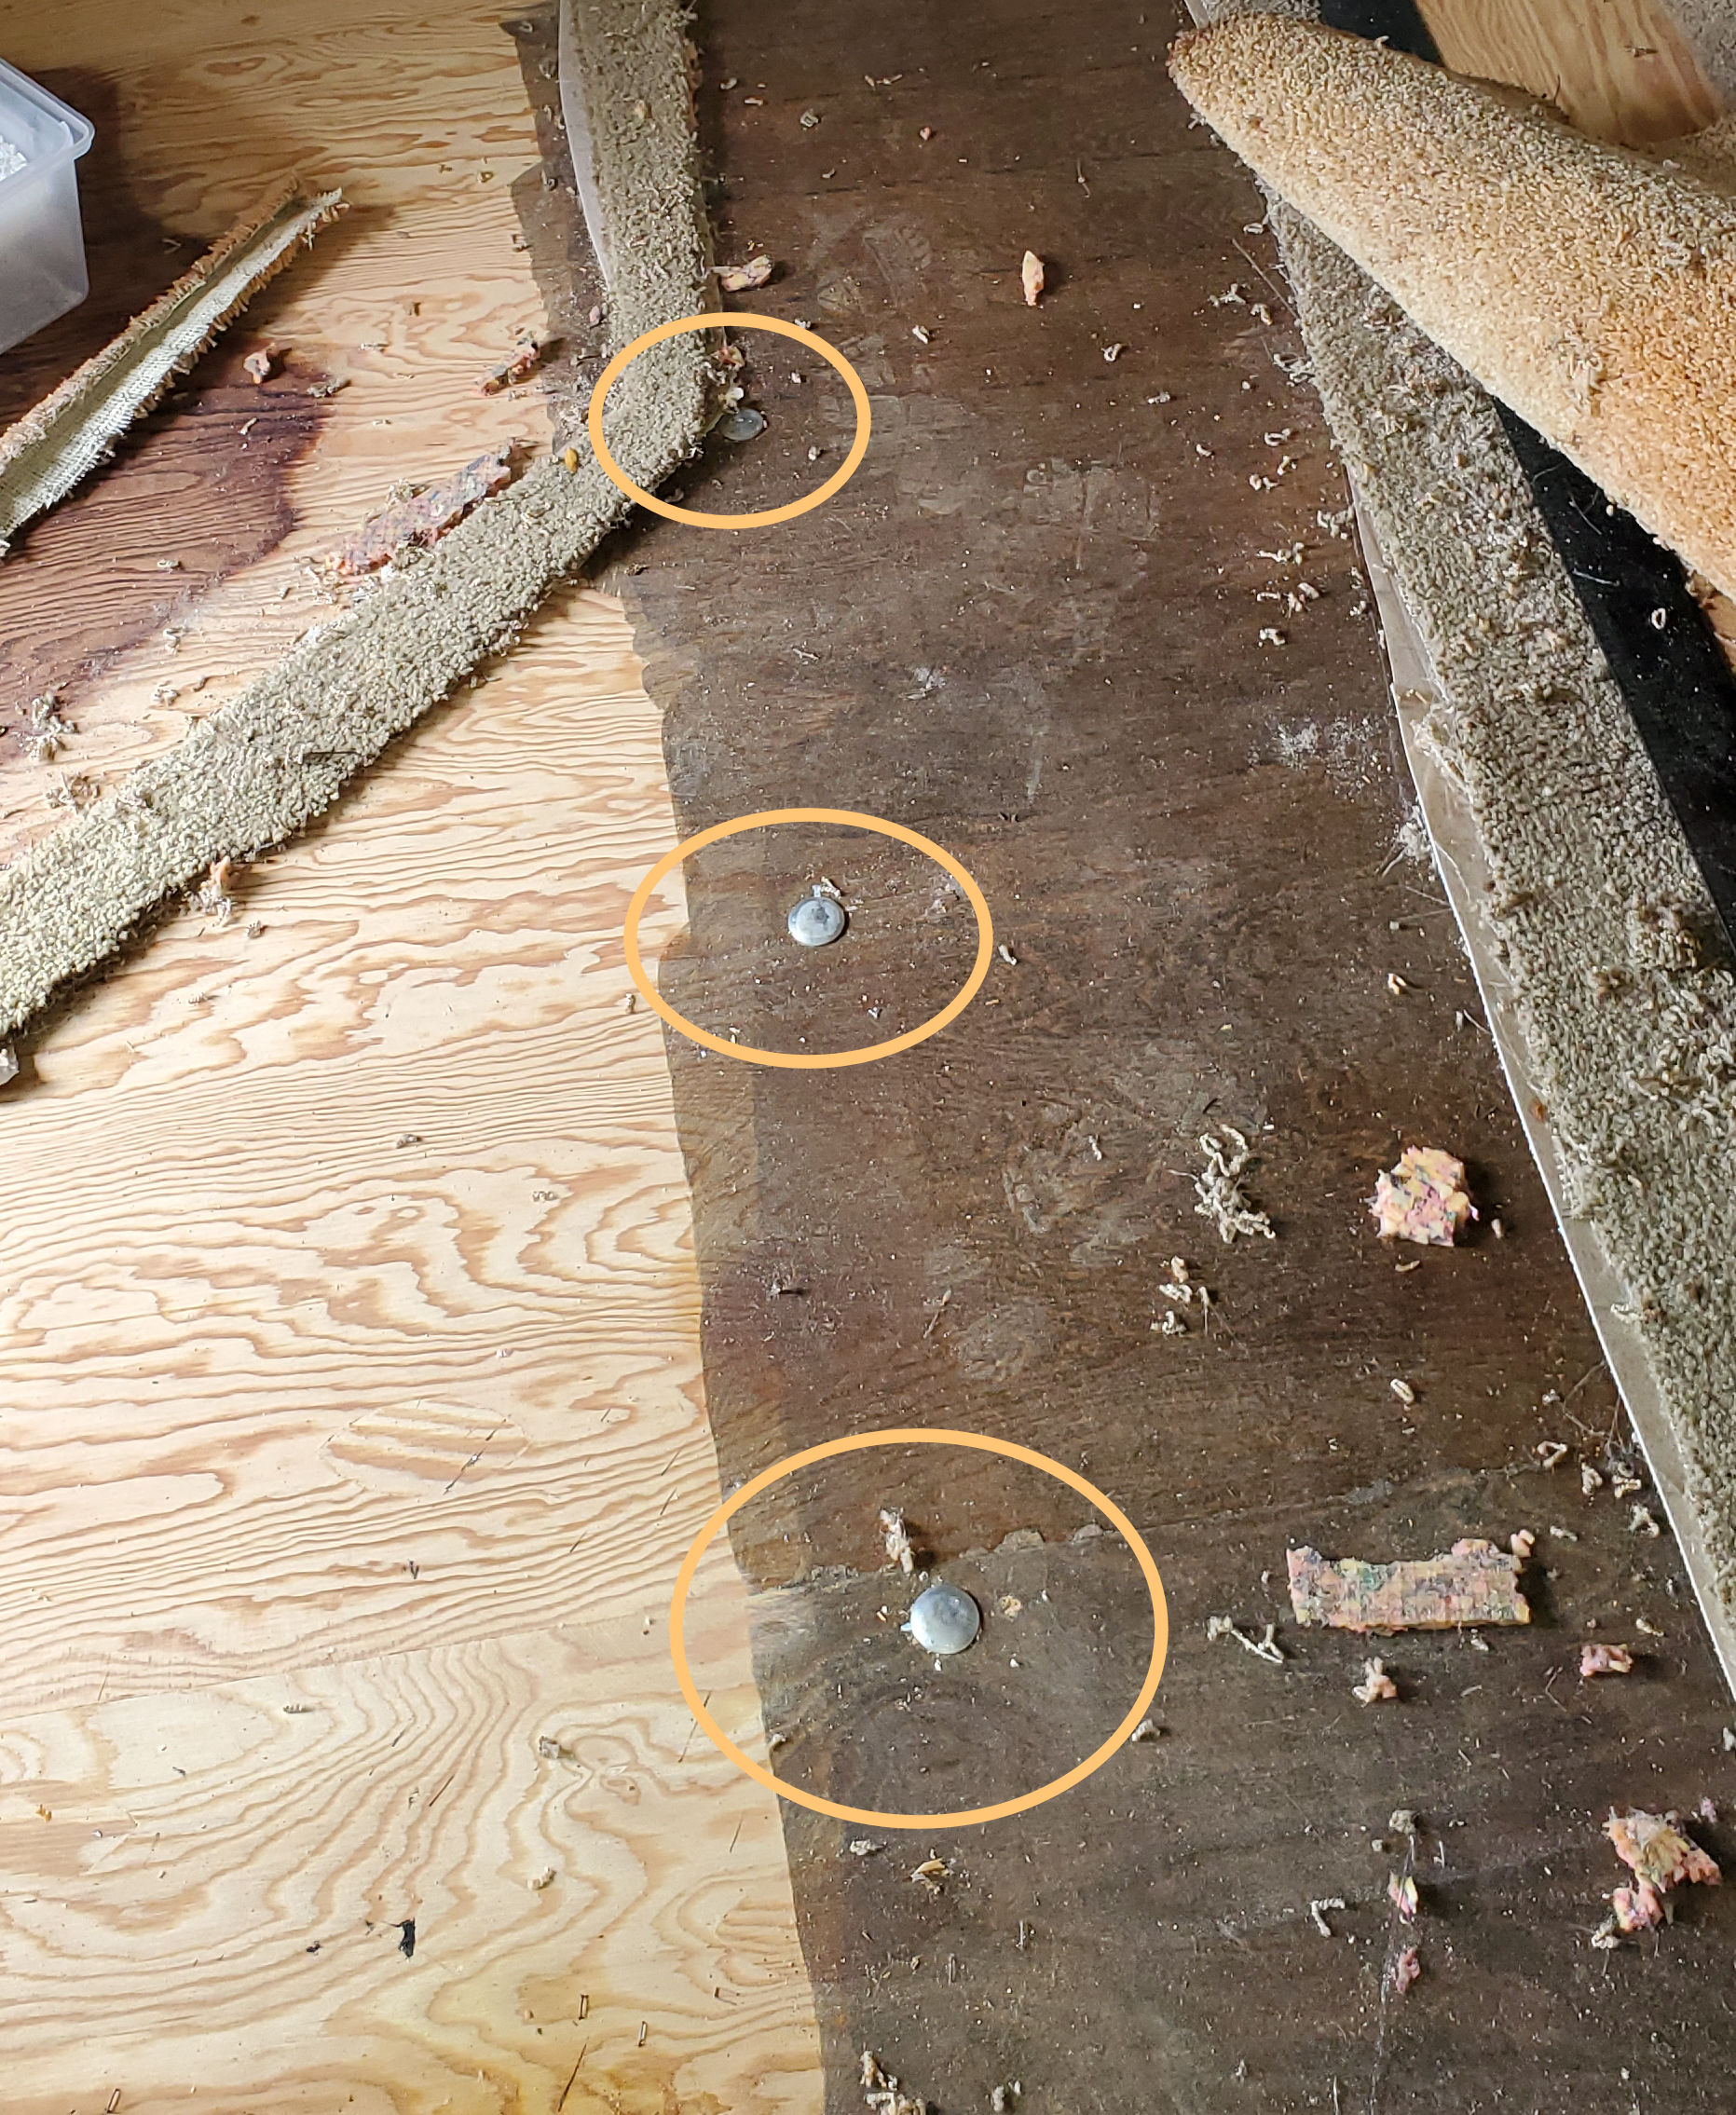 As we removed the carpet, we found that the manufacturer did not countersink the carriage bolts in the floor. These bolts hold the carriage to the chassis of your rig so grinding them down is probably not a good idea. We had to find a way to deal with them as the vinyl is going to go over them.
Thinking about this for a while I came up with two possible solutions with varying levels of success. Below are descriptions of the two methods I worked with and which one worked best for me:
Method 1: Subfloor and Leveling Compound:
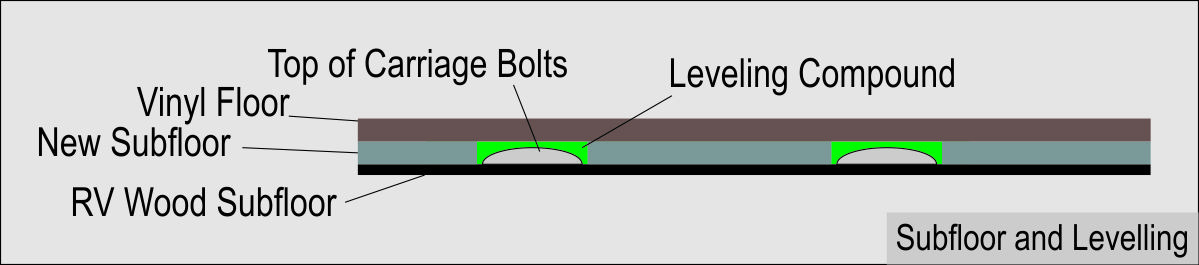
The first attempt and covering the bolts involved putting down subfloor and creating holes to accommodate the bolts.

The subfloor is about 1/4″ thick and the vinyl is also about 1/4″ thick. Use a floor leveling compound to fill in the the space around the exposed carriage bolts and provide a foundation for the vinyl to sit on. The subfloor was both glued down and nailed with 3/8th inch nails using a nail gun.
Unfortunately the combination of the subfloor and vinyl made the floor 1/2″ thick which turned out to be too high for the slideout to function. Pulling the slideout in simply ripped the flooring away from the base RV floor so that was a no-go.
In preparation for method 2 (below) I had to rip up the subfloor, which was glued down very well. Then pull or pound any nails that were left over. I also had to sand down the residual glue. I highly recommend testing as much as possible with your slide to be sure it will work with your flooring if you chose to go the sub-floor route in your main area.
Method 2: Carving a Cavity
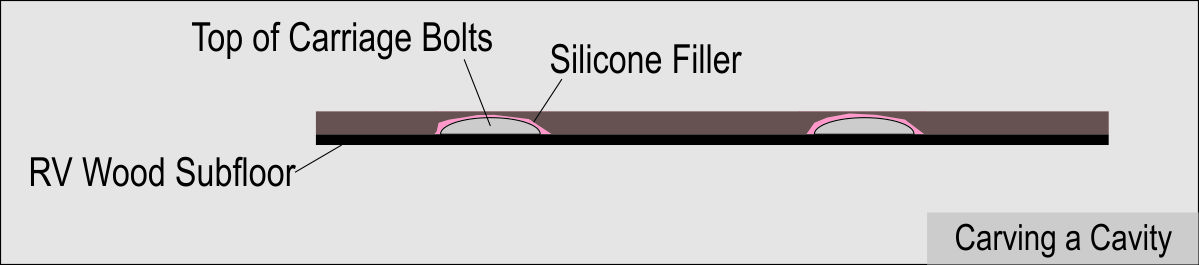
As an alternative to the subfloor, I decided to try to carefully carving out a cavity in the vinyl to cover the bolts. You need to apply some sort of filler to provide some substance behind the now very thin flooring. This will help keep those areas from wearing through. I applied silicone to the cavities prior to putting down the floor for this reason.
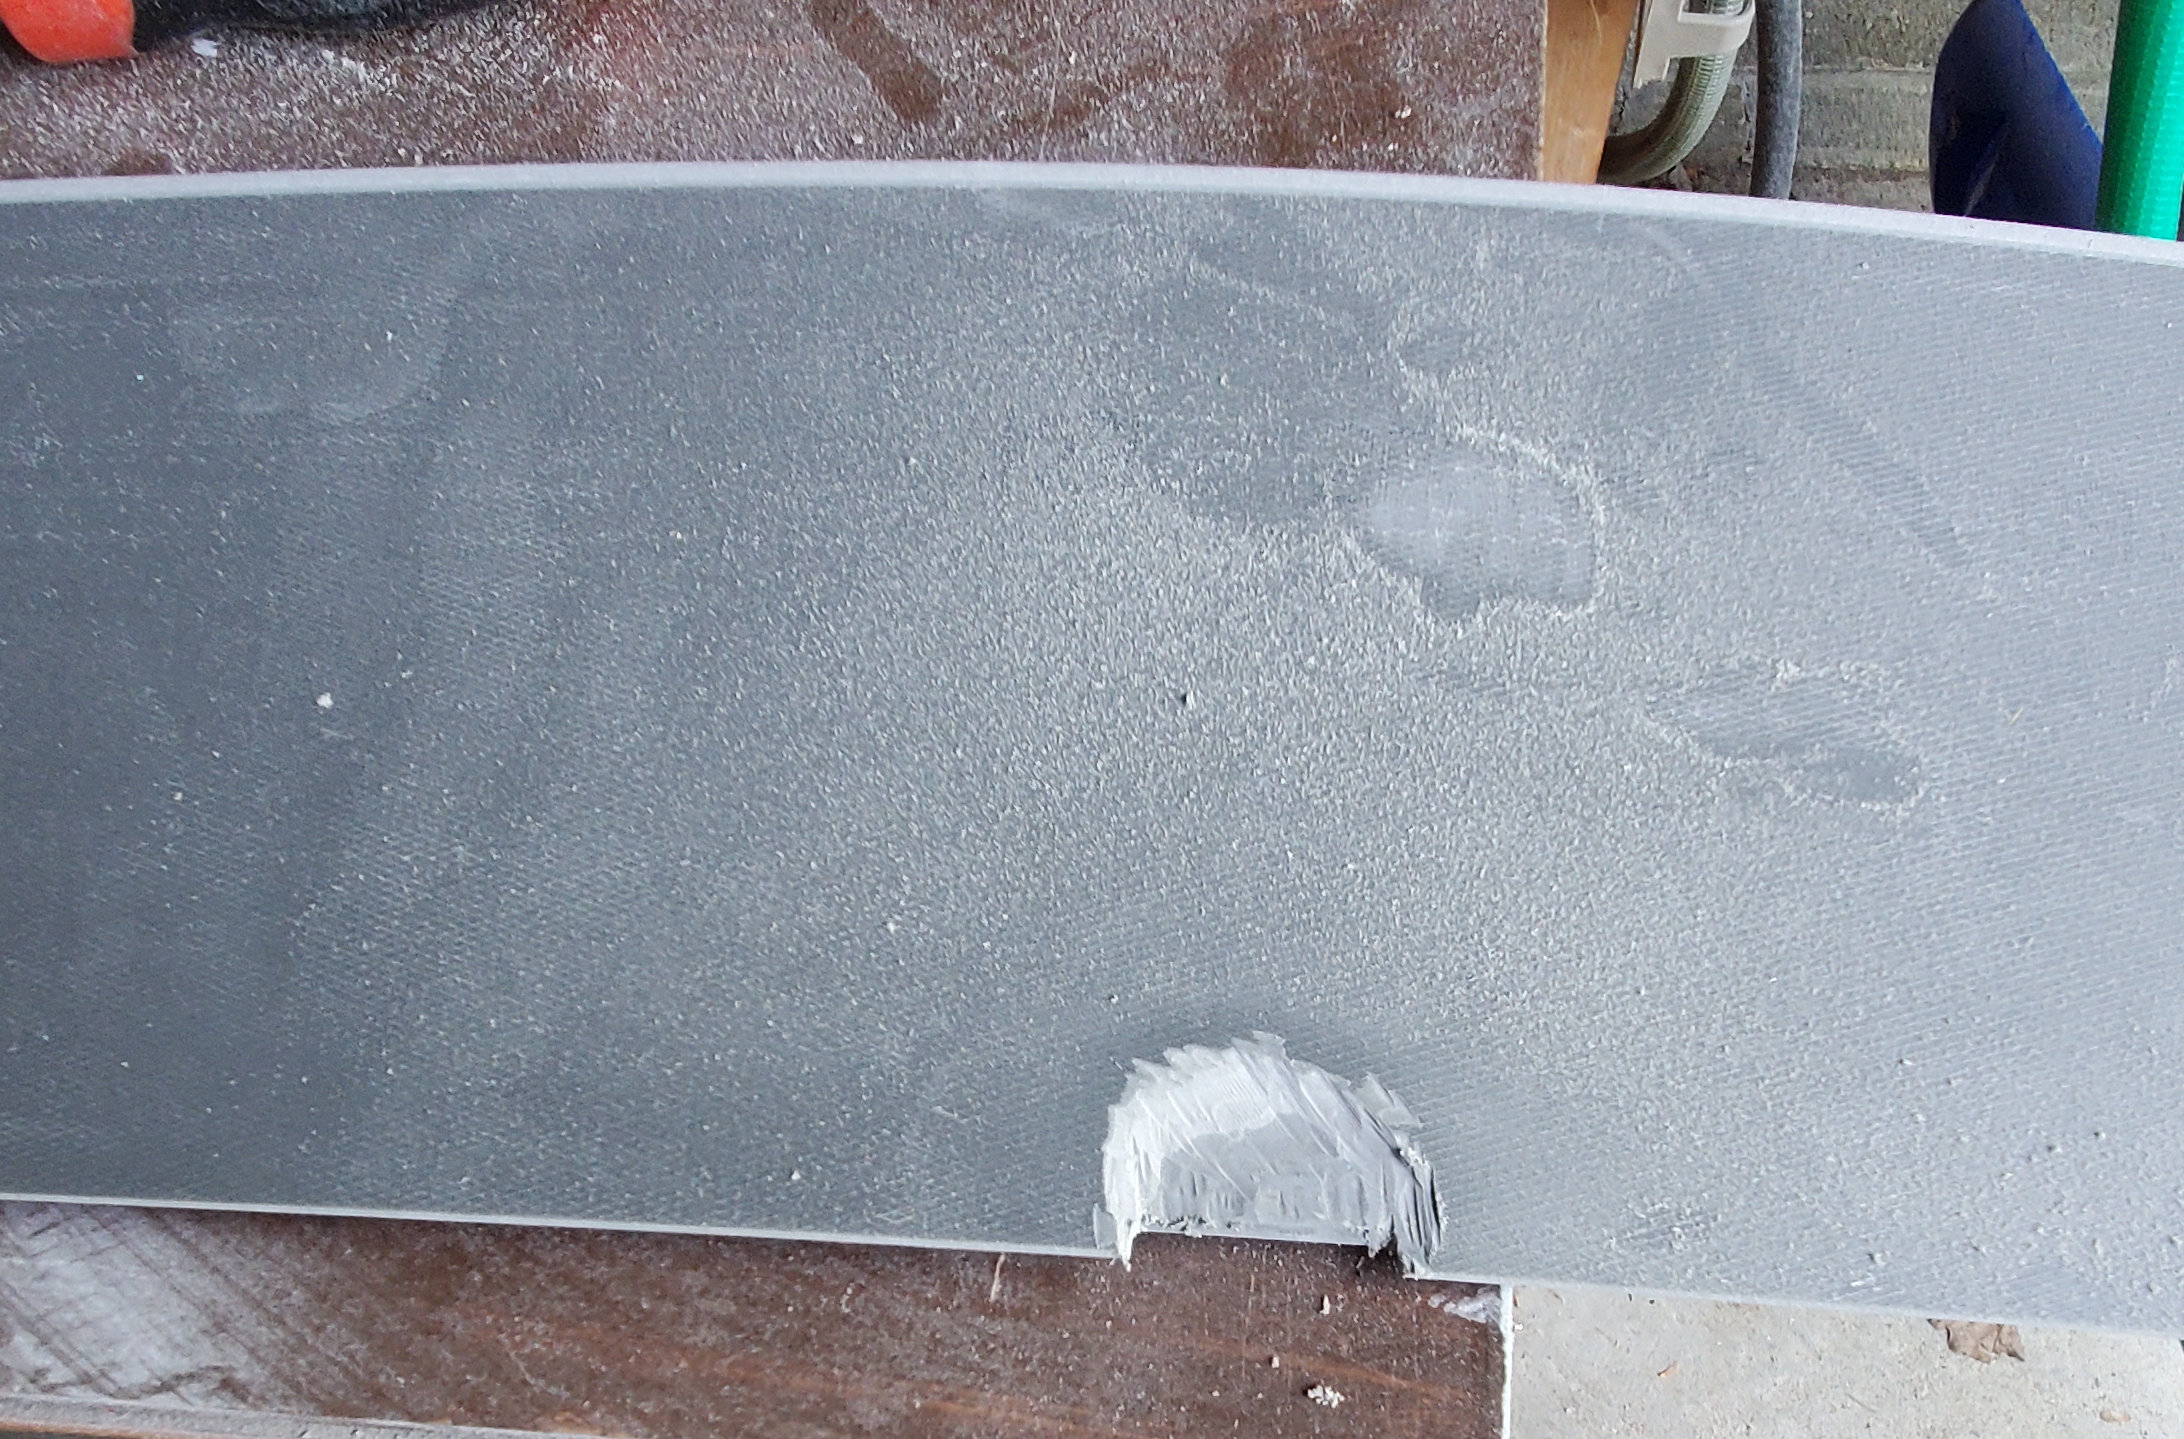
As you can see in this photo, I have carved out a cavity. It may take a couple times before you are able to do this without progressing through the top of the vinyl.
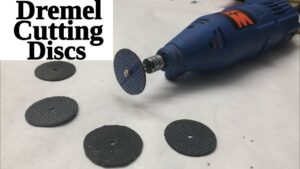
To do the actual carving, I used a Dremel (or rotary tool) with cutoff disks to slowly shave material off the vinyl a bit at a time. It might be worthwhile to run to the hardware store to get a sample carriage bolt to “test” your results as you go.
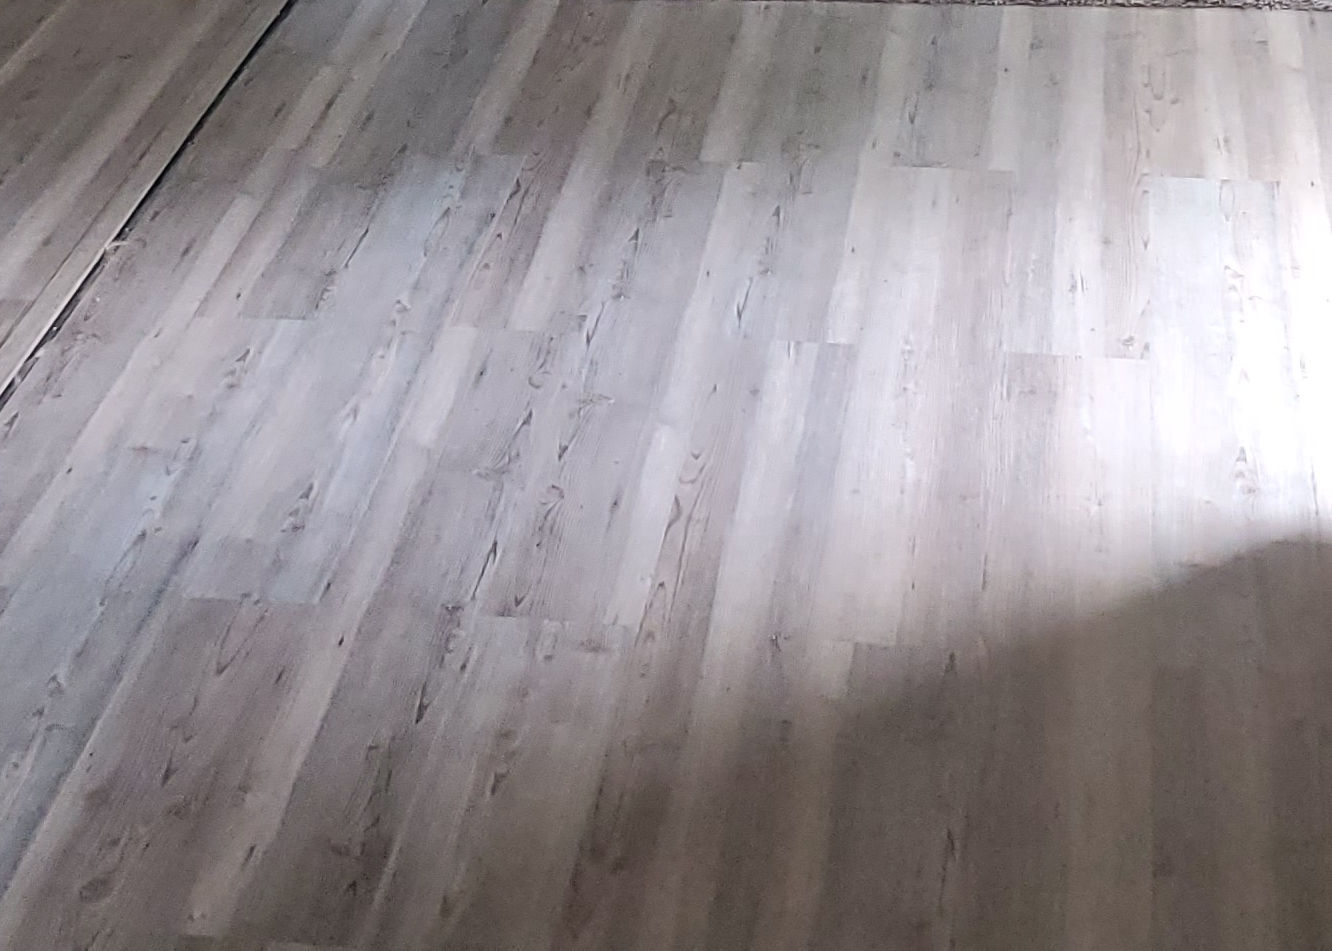
Finished floor
As you can see there is no blemish or bump after laying the vinyl over the bolts.
Carpeting
As mentioned above, we chose to keep the front area carpeted. I thought this would help with a bit with the noise and also make it “feel” a bit warmer. I’ve seen photos of vinyl all the way to the front and it sorta looked sterile to me. Again, that is just my preference. It looks fine, it is just a preference.
New Carpet!
I chose to remove the chairs to facilitate the installation. It made getting rid of the old carpet much easier and allowed me to fix a couple things under the dash while I was at it! The carpet on the doghouse is simply glued down with rubber cement.

Here it is with the chairs remounted. I think it came out wonderfully!
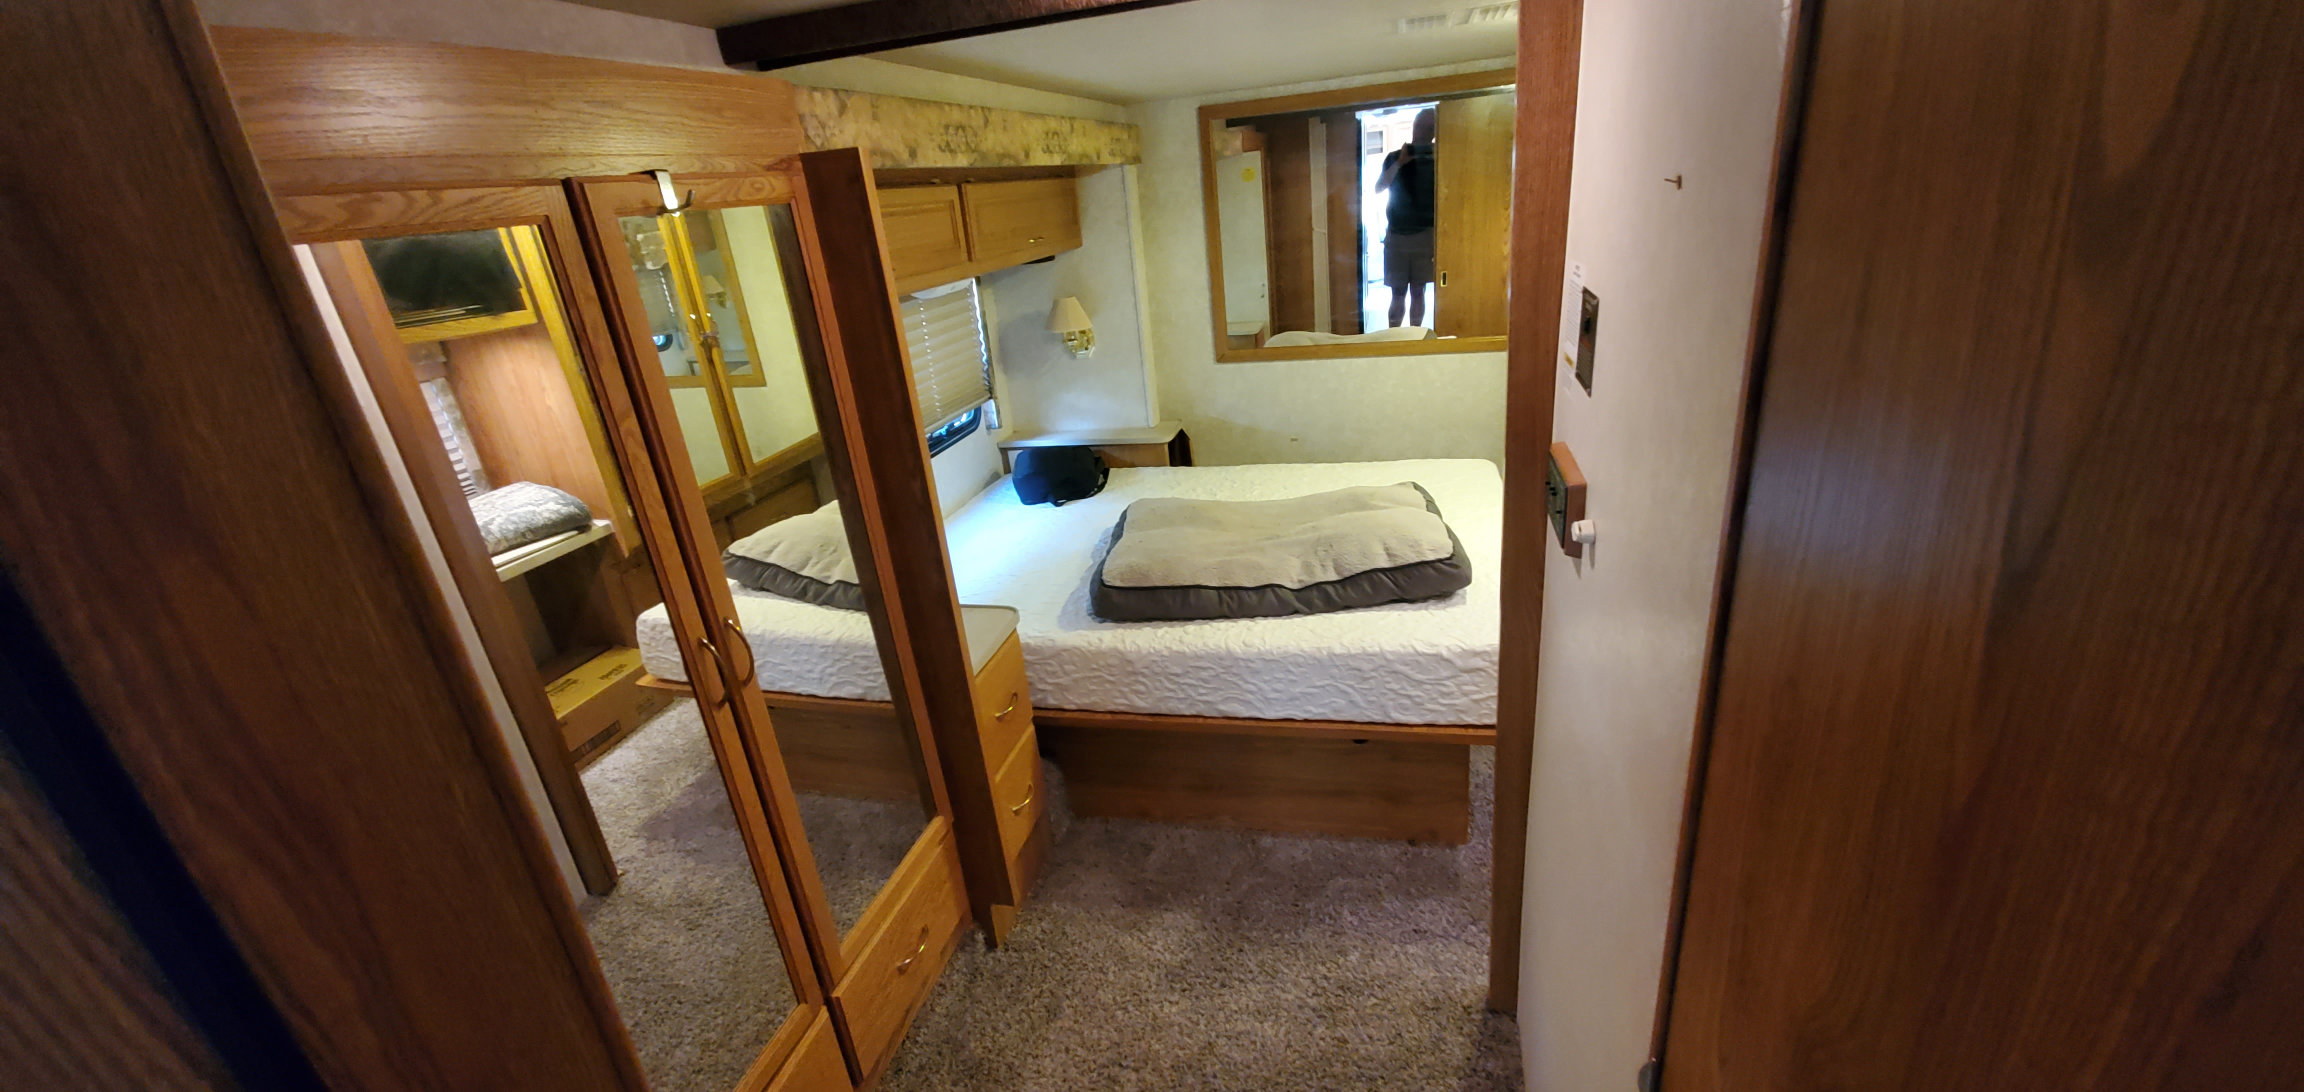
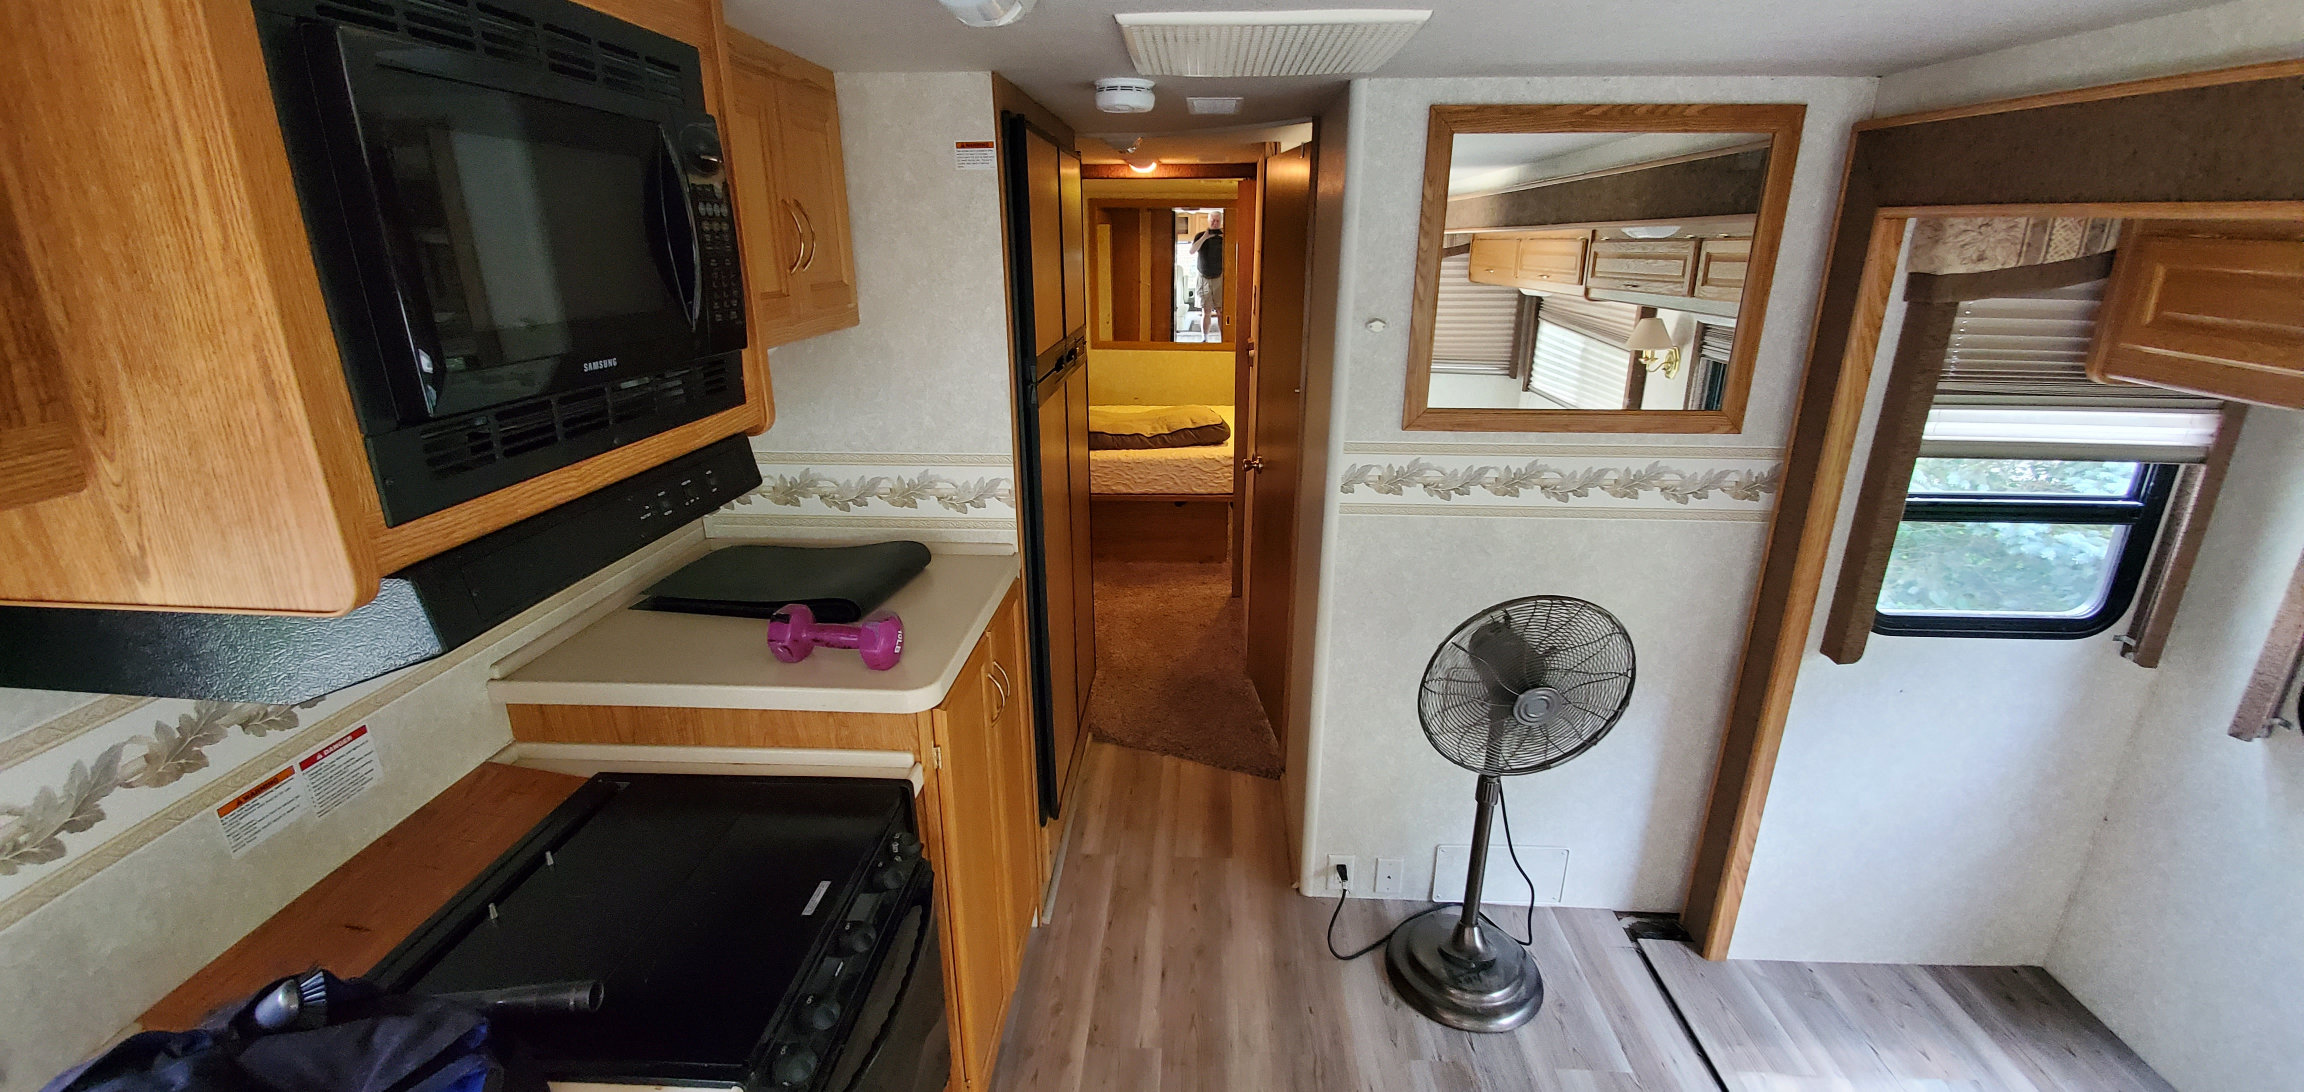
Bedroom
In addition, we chose to keep the carpeting in the bedroom (replaced). Again, it just seemed to be a “warmer” solution. The carpet goes from the bathroom to the back of the rig and is nice to feel when you have that mid-night bathroom run.
The Steps
Since the carpet went down into the step area, I had to remove this as well. I decided to have the vinyl go down the stairs. I tried to keep the “grain” of the vinyl consistent going down the stairs.
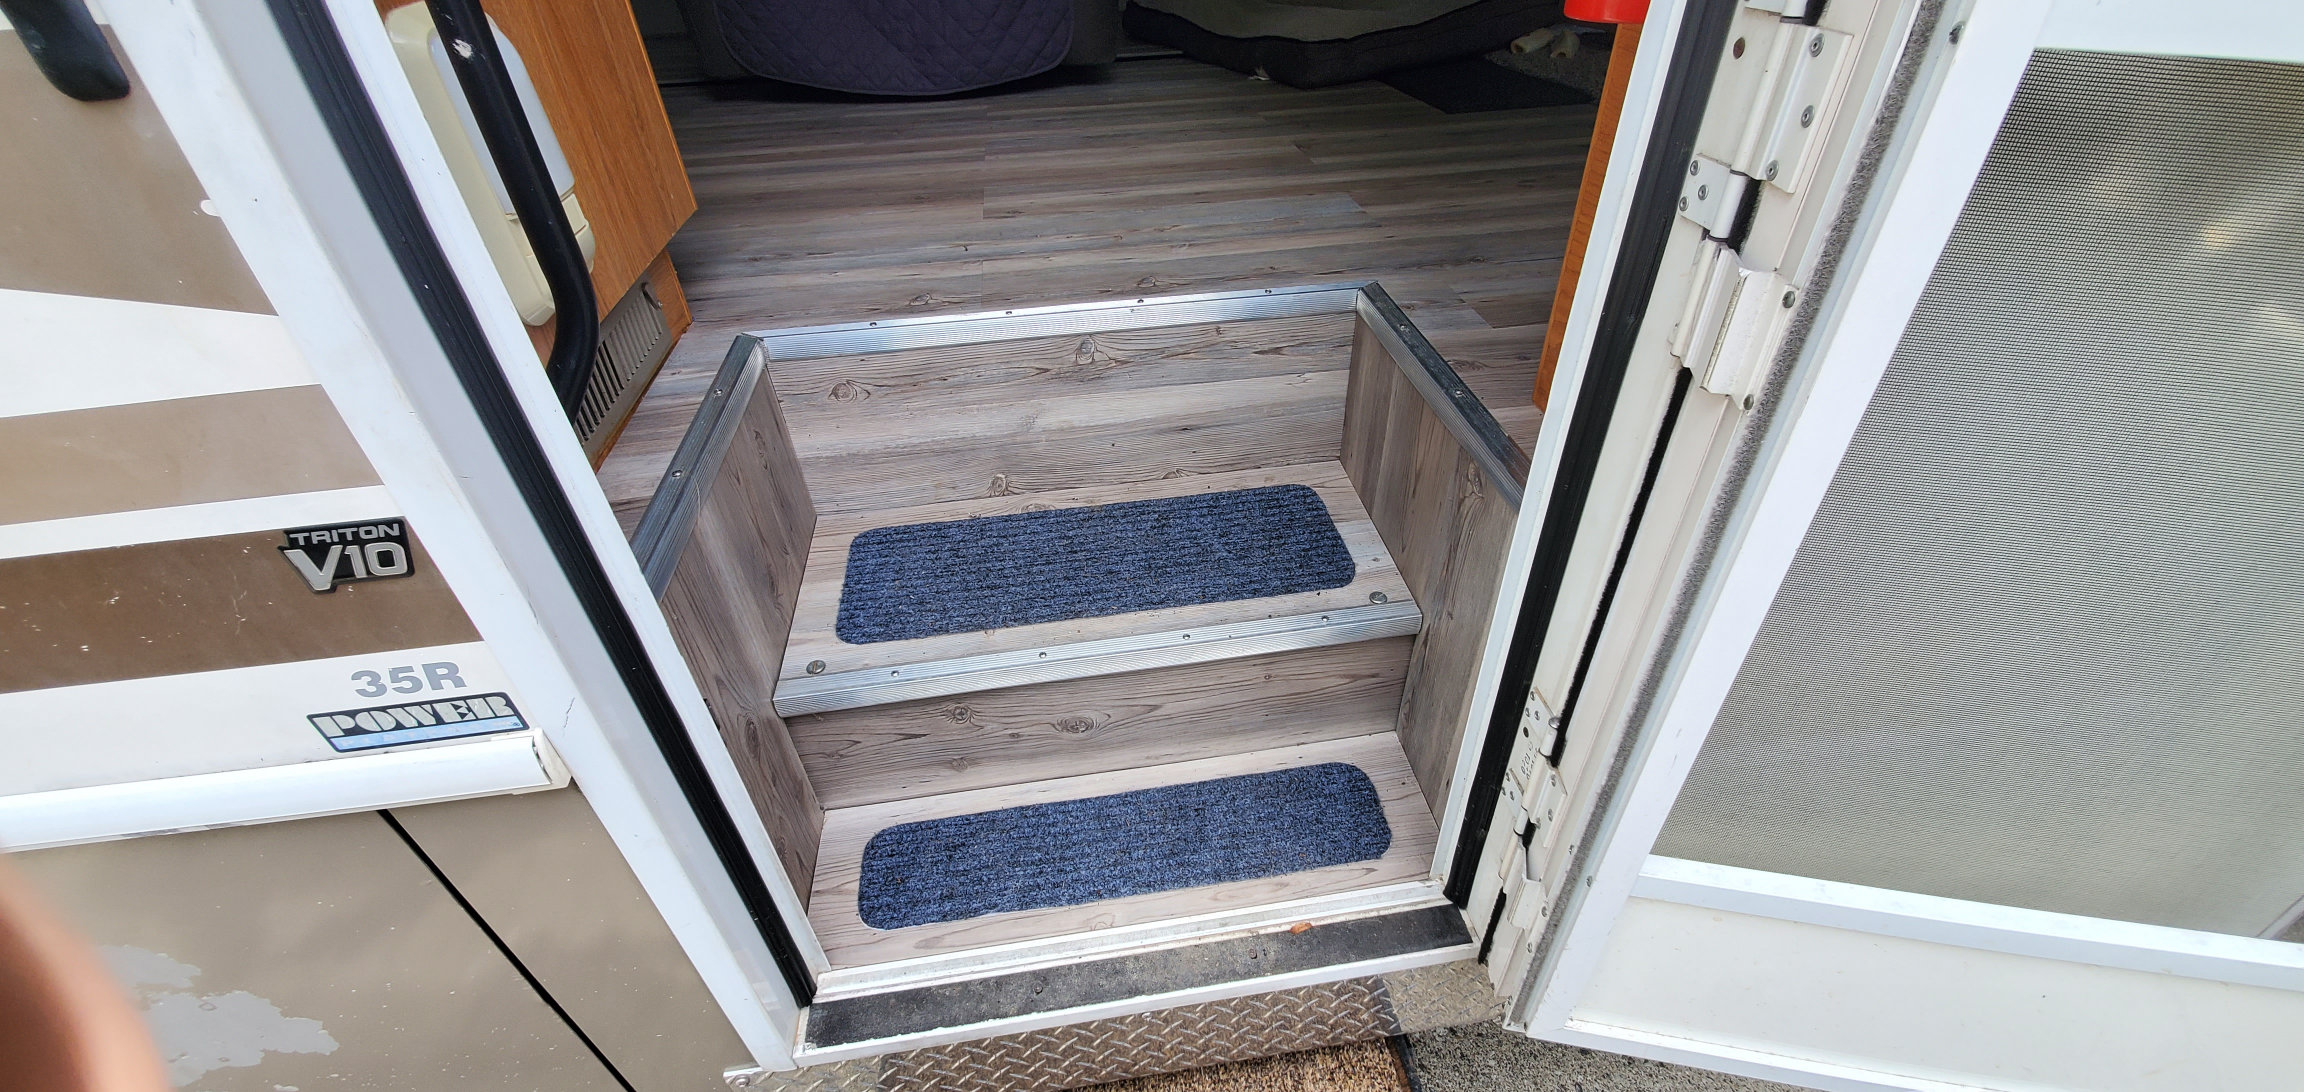
The Steps
The tread you see on the steps was purchased from Amazon here:
https://www.amazon.com/gp/product/B08L5LQPL9
However, I found an option to purchase two 8″x30″ pieces for $12. I don’t see that option right now but you may be able to dig for it. I cut them to size and applied them to the steps using an adhesive spray.
Conclusion
Overall I enjoyed putting down this floor. I have done many residential floors as well as travel trailers in the past. The RV flooring presented a number of challenges I had not needed to deal with but were overcome none-the-less. It does not take great skill to do a floor like this, just patience and some forethought.
Looking back, I wish I had test the subfloor solution a bit more before going that route and having to rip it all up. It was a learning experience for sure.
I am happy to answer any questions you may have working on your floor. Feel free to comment below.
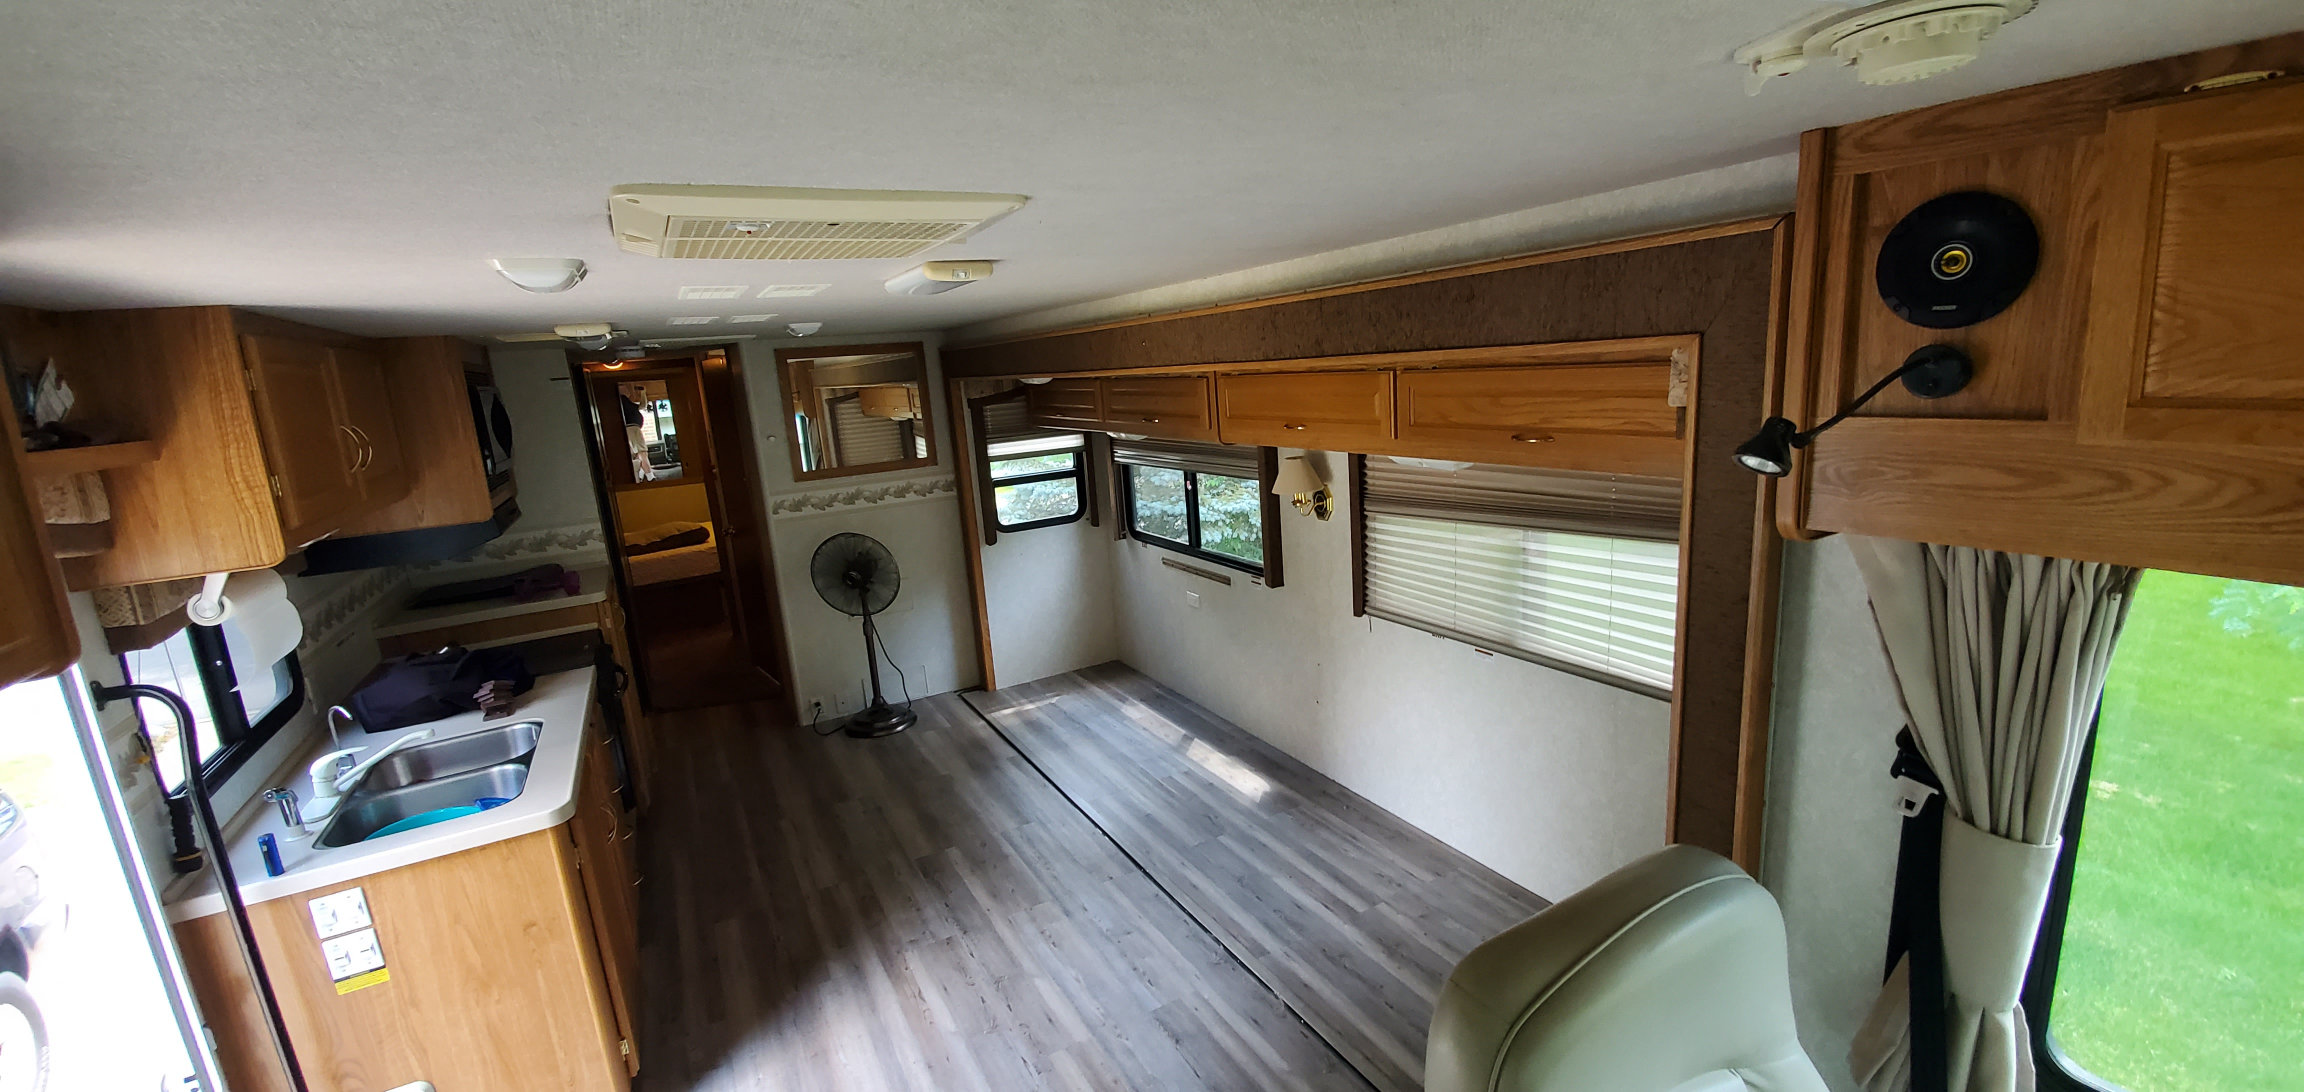
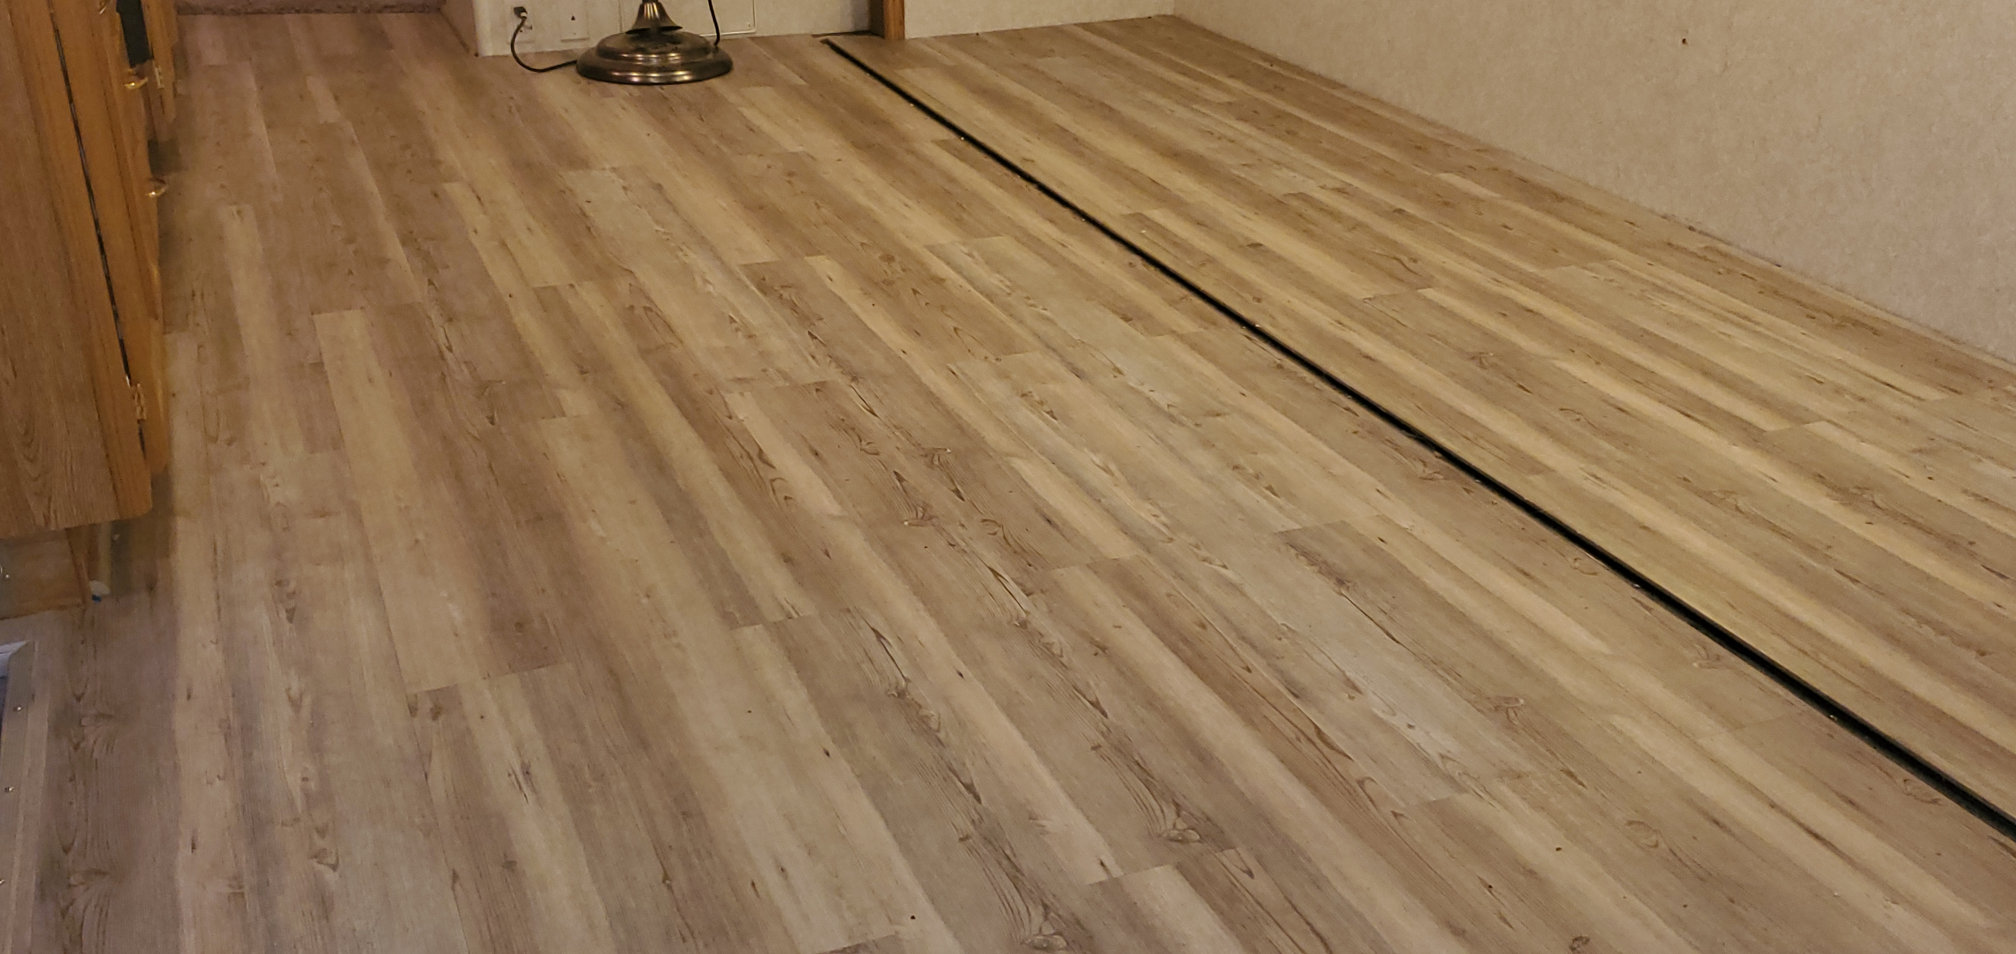
More Finished Pictures
Here are a few more photos of the finished floor:
 |
 |
 |
 |
4 comments
Outstanding job! I made the mistake of not removing the booth and created a bunch of extra work for myself. Your transition at the lip is excellent.
Thanks! It was definitely a learning experience!! You mean the dinette? It was uncomfortable from the get-go so out it went. I think I’ll be putting a small desk in there.
Very nice! I have a 35R as well. I noticed you have a different radio in the dash. If you don’t mind me asking, what kind is it? I need to replace the cassette player radio with something that has Bluetooth.
Hi Wayne, take a look at this article about the stereo: https://mybounder.com/2021/02/14/upgrading-your-stereo/