

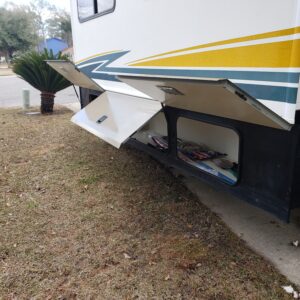
Falling Cargo Door
Are some of your cargo compartment doors falling down or won’t stay open? Maybe they don’t open enough. There is a fix!
If your struts are worn out and will not keep the door open or you just want to have the door open a bit more replace them with a strut that is a bit longer. I found this on Youtube in a video by Kevin Caudill. https://www.youtube.com/watch?v=0mt57gmL8OU&t=443s Thank you Kevin! He has a 2004 (?) Winnebago on a Workhorse W24 chassis so some of his great videos actually pertain to the Bounder. The struts to order came from Amazon; https://www.amazon.com/gp/product/B007MUY5V6/ref=ppx_yo_dt_b_asin_title_o03_s00?ie=UTF8&psc=1

New strut from Amazon C16-06867 17.1″ Gas Prop/Strut 60 lbs
Removing the old strut is pretty easy. Slide a small flat screwdriver under the spring clips top and bottom and the strut will pop off the 10mm ball mount. A word of caution. PROP THE CARGO DOOR OPEN BEFORE REMOVING THE STRUT! You will get a smack on the noggin if you don’t. The lower mount needs to be removed and lowered about 3/4″. See the picture below. There should be two self-tapping screws holding it in place. You may need to drill a couple pilot holes or get some new self-tapping screws if the old ones no longer self tap.
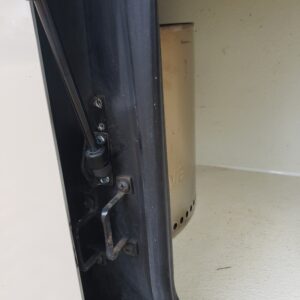
Notice the old mounting holes. The new holes are about 3/4″ lower.
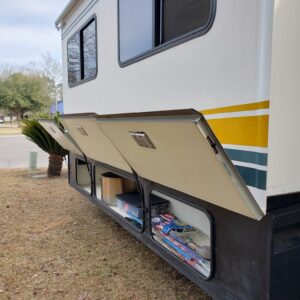
My slide out for the living area has three cargo doors. The center door is the largest and heaviest. For this door I actually installed a new longer strut on the left and then added a good used strut to the right hand side. Now there are two struts on that big heavy door. Installing on the right side was a little more involved. Using the center of the mounts from the left side of the door to the right as a guide, I was able to figure out the locations. Again, the bottom mount needs to be 3/4″ lower if you use a new longer strut. I had ordered a set of mounting brackets but I could only use the bottom one. https://www.amazon.com/gp/product/B07QZTSV3G/ref=ppx_yo_dt_b_search_asin_title?ie=UTF8&th=1
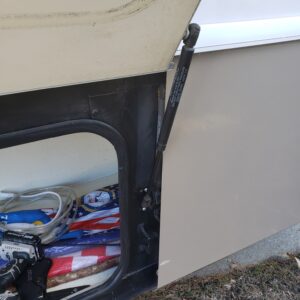
Large Cargo Door 2nd Strut on RH side
The top mount must be mounted on the door itself. I had to modify a mounting bracket so it would fit on the side of the door in the flat space on the end. You can see by the picture below I have cut off the flange of the mount so it would fit on the side of the door. I used a reciprocating saw with a metal blade to do the cutting. Then ground it smooth on a grinder. I imagine you could also use a hacksaw and a file, but that is more manual labor than I like. I mounted the bracket using self-tapping screws.
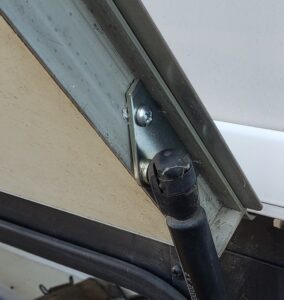
Large Cargo Door Right Hand End Top Strut Mount
Voila! Now that big heavy cargo door stays open and it opens even farther, which makes it easier to get into.
No Falling Cargo Doors
2 comments
This is great! Thanks, Wayne!
Wayne, I just went around and replaced all my struts based on your post. Thanks again!