
One of the first articles I read on this site was Jon’s article about the TV he put behind the passenger seat minus the OEM recliner. Somewhere in the history of my 2003 35R, which I purchased in November 2021, the recliner was removed, so I had a blank slate to work with.
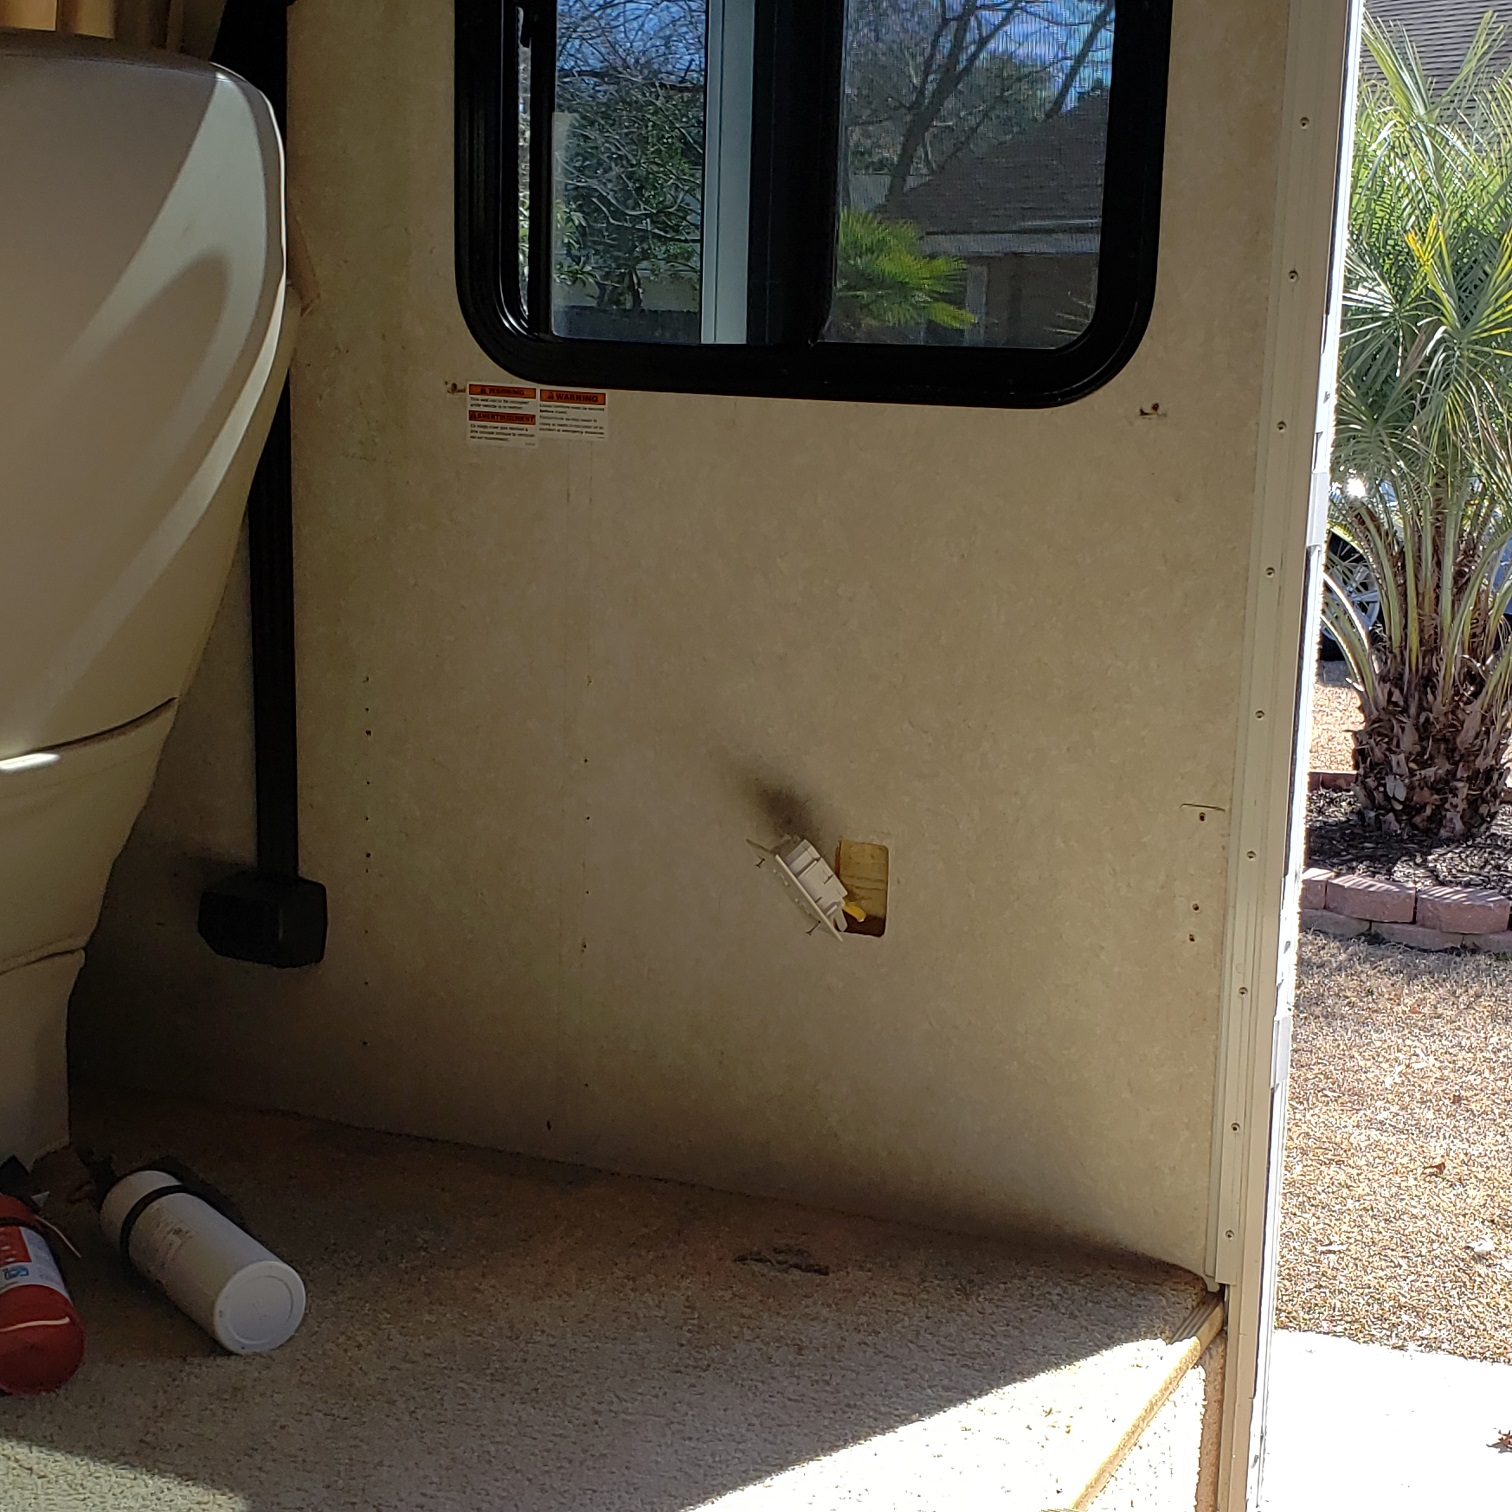
Bare Wall
It was convenient there was an electrical receptacle right there on the wall. Like many receptacles in these rigs one of the two outlets was blocked. This is done so you don’t plug too many things into the receptacle and trip that 20 amp breaker I always seem to trip. It gets tripped because I’m running the AC, vacuum, and microwave maybe all at the same time. This is why we have those switches under the kitchen sink. Those are connected to the microwave, hot water heater, and washer/dryer, if equipped.
Anyway, I shut off that 20 amp breaker and removed the receptacle from the wall I was planning on using. Note: That wall, at least mine, in the area I was working was solid 5/8″ or so thick plywood! A very solid base for my project. I drilled out the blocked off outlet in the receptacle so it was useable giving both outlets power. Now for the disclaimer. I hate I have to do this but in our litigious society it seems necessary. This article is for information and entertainment purposes only. I’m just telling you how I did the project. I’m not telling you to do it this way so if you try it and blow something up or start a fire, don’t blame me. I’m one of those mechanical guys that seems to be able to do anything mechanical. I’m not an electrician, or carpenter, but a machinist with many years of doing plumbing, electrical work, carpentry and anything else I could so as not to pay someone to do something I know I can do.
My plans for this project included the TV, the TV lift, an electric fireplace, and a soundbar. All require power and all have a remote control. My thinking was neither the tv nor the soundbar draw much power. The fireplace would draw the most power, but only when it was heating. The lift will draw power only when it is going up or down. The tv and soundbar, would not be on when the lift was moving. The fireplace could be in use at the same time as the TV and the soundbar. All this taken into consideration, makes me think there should be no issue, electrically. And there has not been. I’m sure that 20 amp breaker will let me know if there is.
I ordered a Touchstone TV Lift from Amazon. https://www.amazon.com/dp/B07L18HDKX?ref=ppx_yo2_dt_b_product_details&th=1
Yes, it was a bit expensive, but I wanted to use something that was reliable and had great reviews. I mounted the tv lift as close to the center of the window directly above as I could. Four screws into the wall and two into the floor. Very solid.
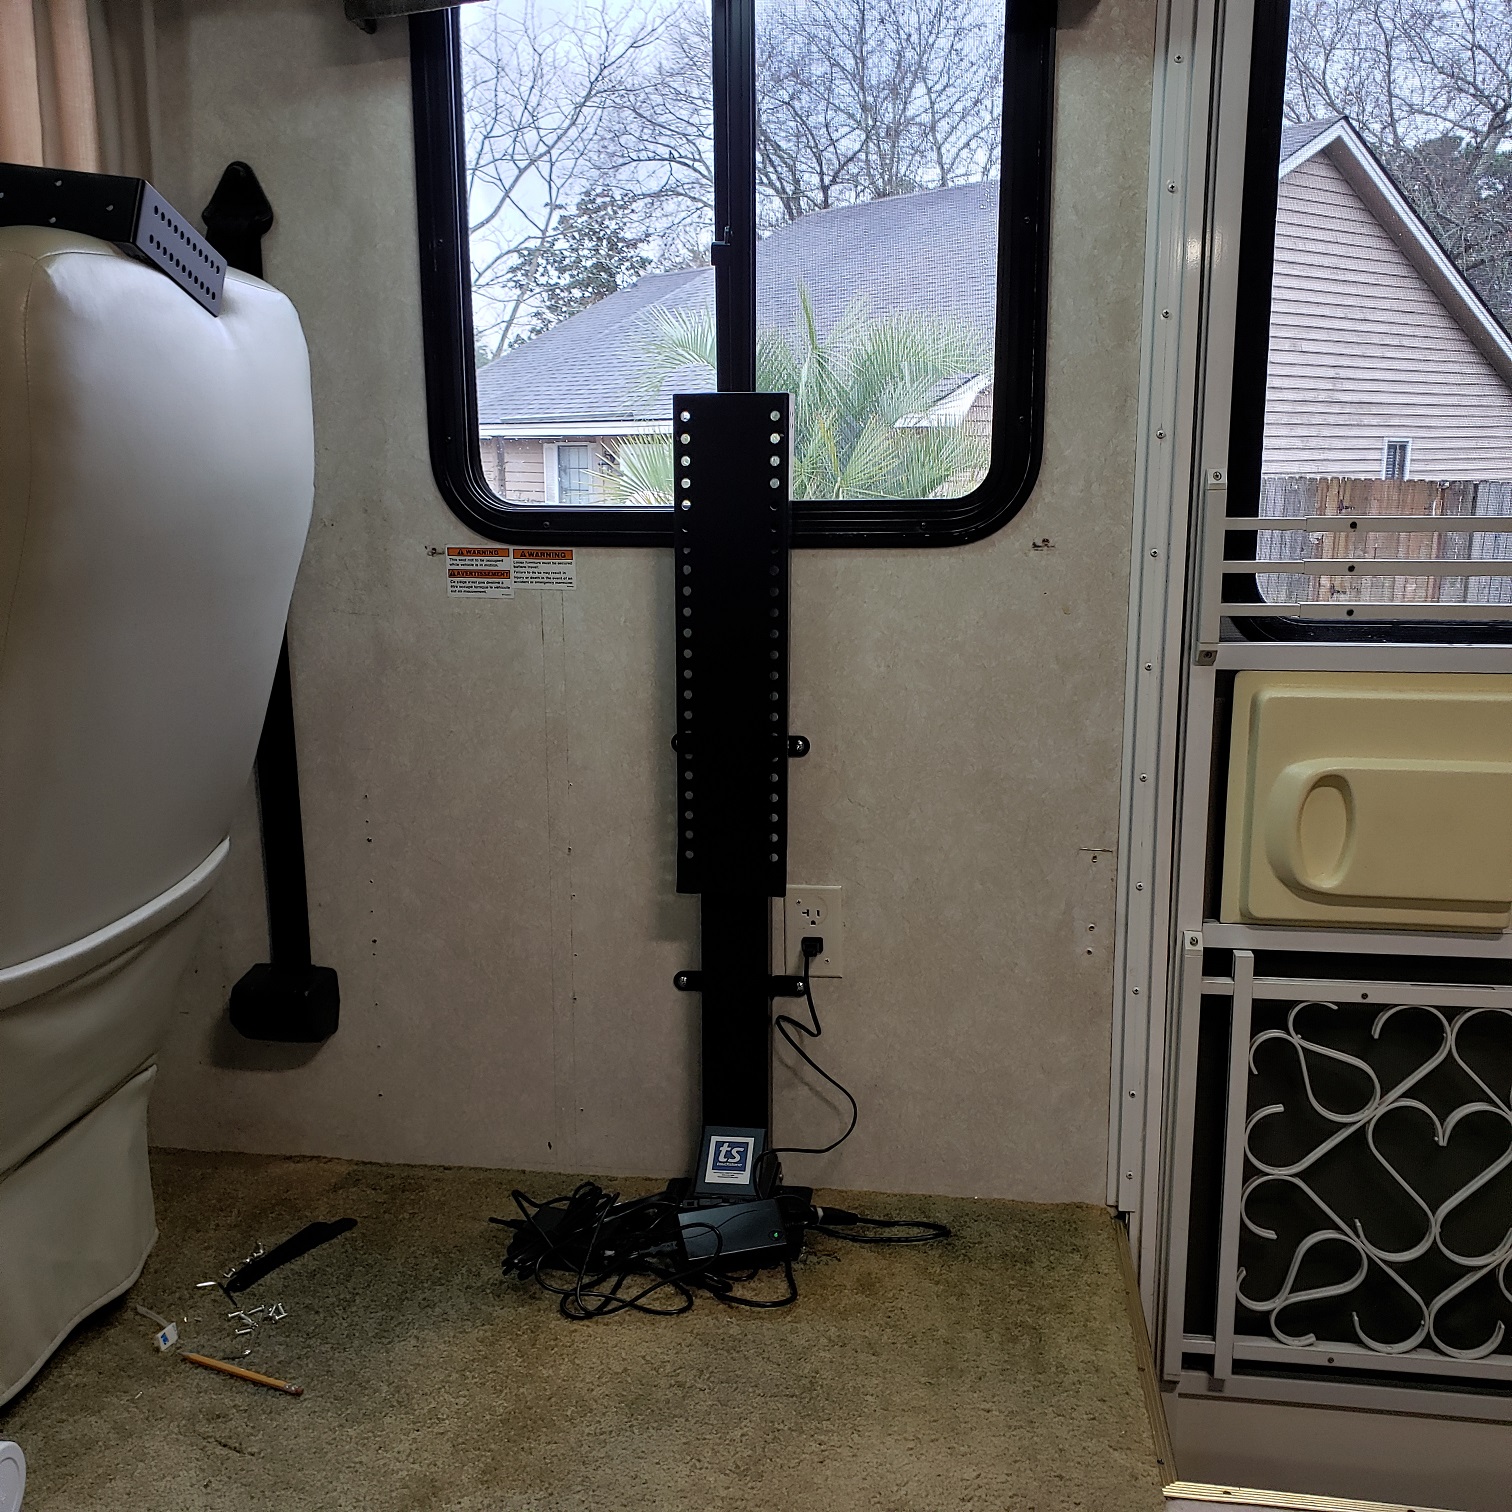
TV Lift Up

TV Lift Down
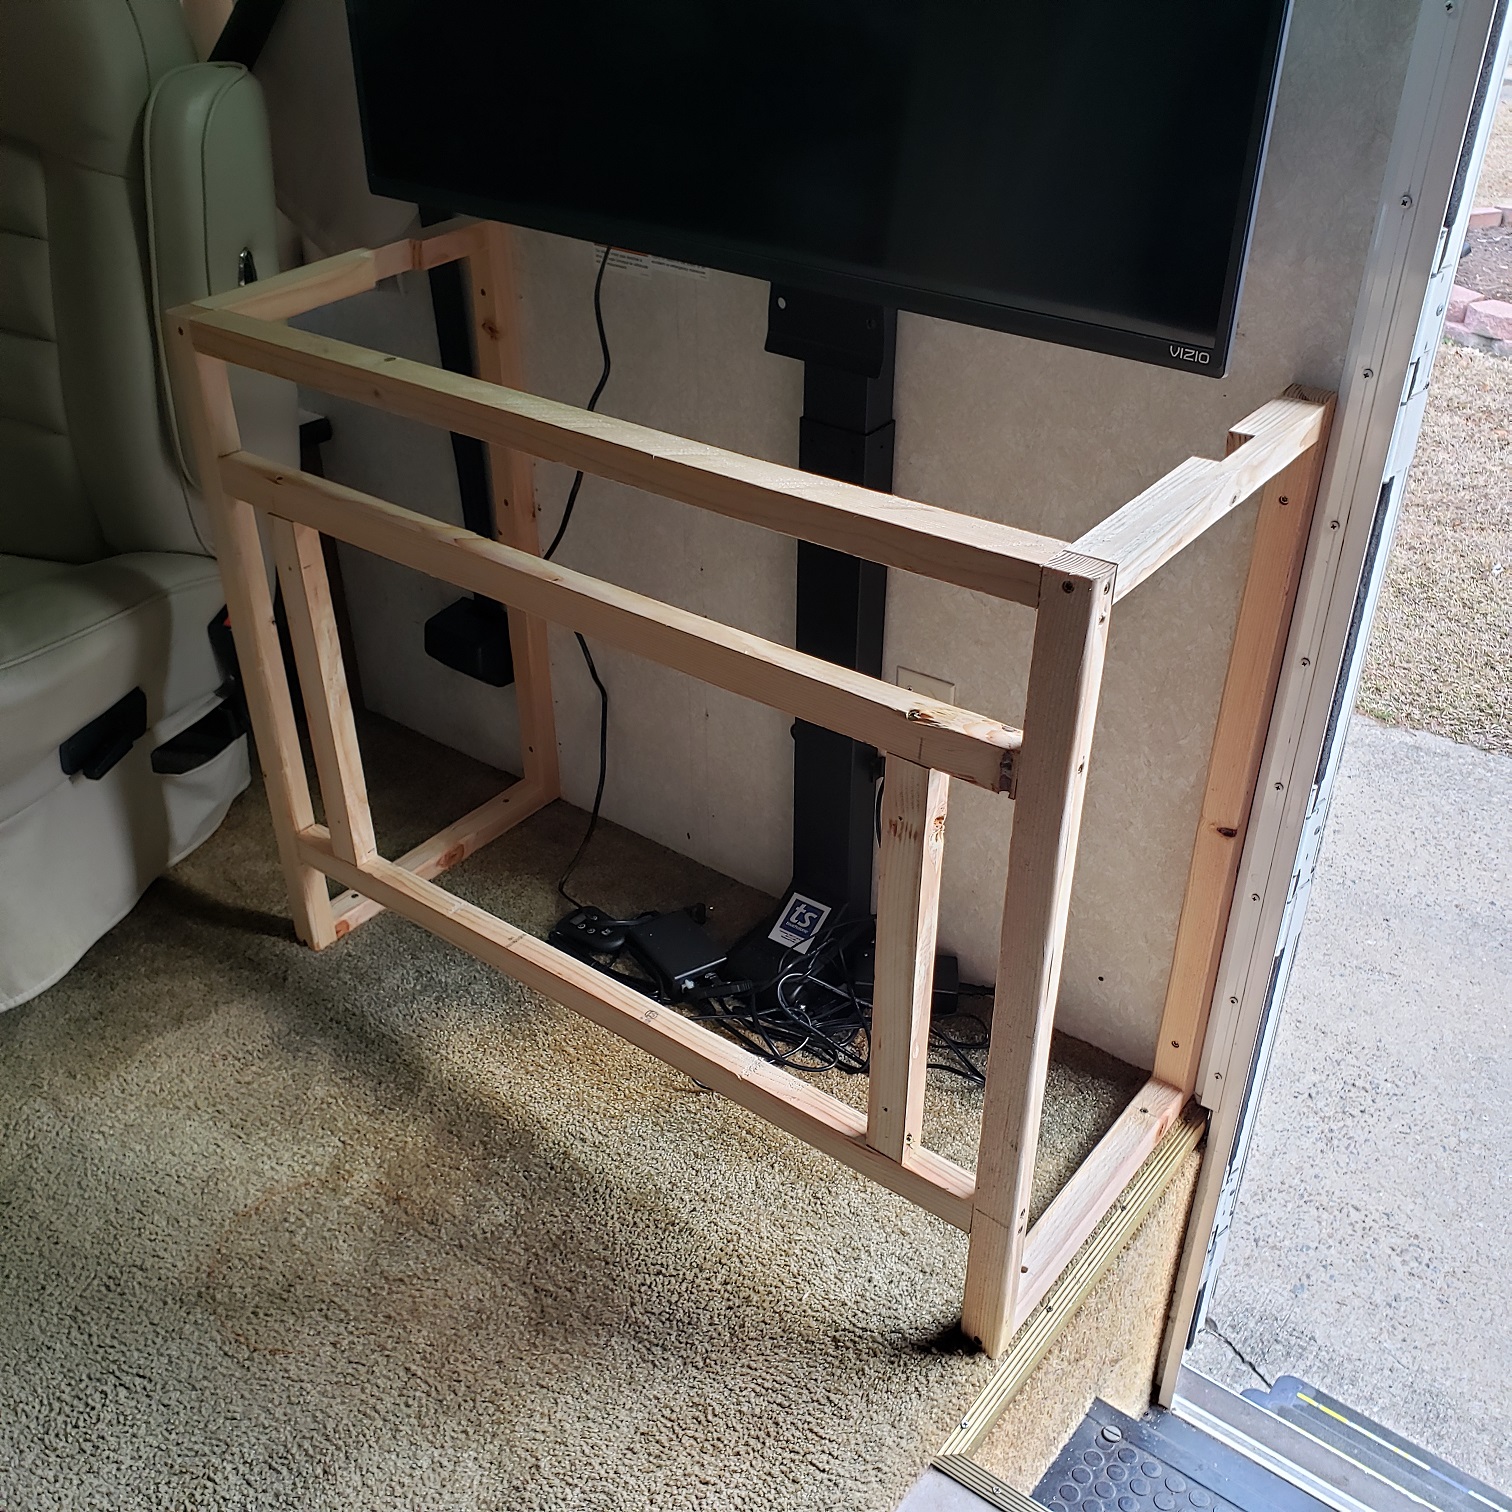
I spent some time figuring out the largest tv I could use and still have some up and back movement of the passenger seat. I decided on a 40″ Vizio flat panel smart tv that would allow adjustment up and down with the mounting on the lift. I wanted to build the cabinet with a frame and use vinyl plank flooring (VPF) on the sides and front so I could color match close to the OEM cherry colored cabinets and not have to do much painting. I wanted the frame strong but not too heavy. I used a standard 2×3 that I ripped down the middle so I ended up with almost a square piece.
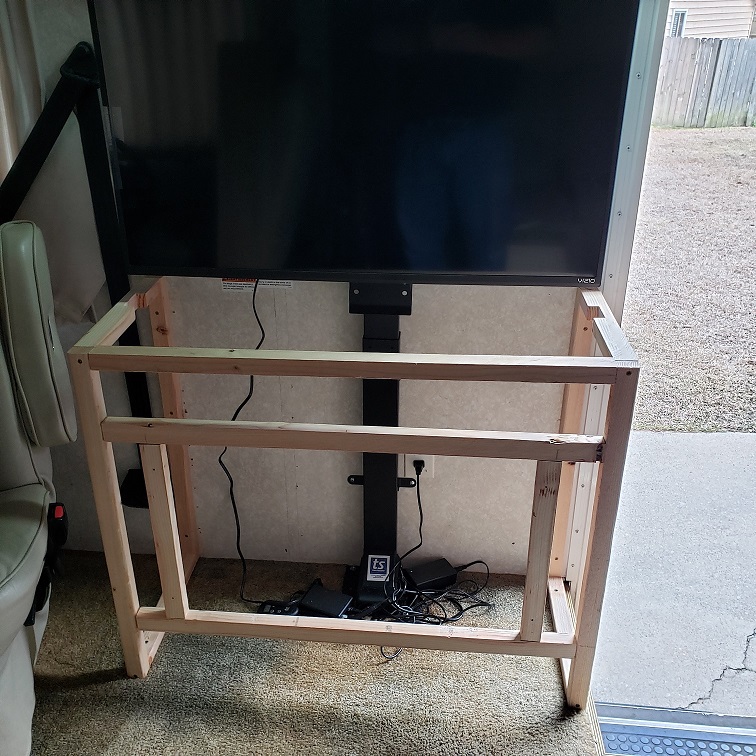
TV Lift Cabinet Frame with TV Up
I started with mounting framing to the back wall at a distance apart that would allow for the tv to go up and down in between and sit against the door frame on the right. If you look closely at the above picture you can see the notches I had to cut into the top rail of the frame to allow for the width of the tv. Ooops. I didn’t really plan it that way but if I didn’t do it I would have not been able to use a 40″ tv. Knowing I was going to use a 3/4″ thick board for the cabinet top, I adjusted the height of the TV on the mount to allow complete closing of the cabinet at the bottom and stop just shy of the modified valance on the window. The modification of the valance was just simply removing the extra piece that was covered in green cloth.
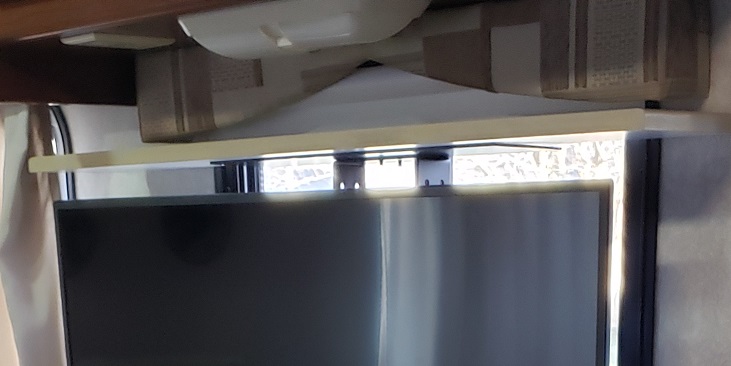
Modified Window Valance
I framed the front of the frame to fit the electric fireplace with a fairly snug fit. The fireplace could be freestanding or recess mounted. I was doing the recessed. I purchased the fireplace from Amazon https://www.amazon.com/dp/B097RF2FCW?psc=1&ref=ppx_yo2_dt_b_productdetails
I used the top crossbar of the fireplace frame for supporting the sound bar, which is a Sony HT-S100F. I did not purchase from Amazon, but they do have it https://www.amazon.com/Sony-Speaker-Integrated-Bluetooth-HTS100F/dp/B0797MY6JB/ref=sr_1_3?crid=3H1OW8O4RWNJS&keywords=sony+ht-s100f+soundbar&qid=1648661445&sprefix=Sony+HT-S100F%2Caps%2C109&sr=8-3
Completed TV Cabinet Frame Minus Vertical Posts on End
The VPF I purchased came from Home Depot. It was TrafficMaster, Cherry, 6″ wide x 36″ long. https://www.homedepot.com/b/Flooring-Vinyl-Flooring-Vinyl-Plank-Flooring/TrafficMaster/Cherry/N-5yc1vZbzjzZ5bxZ1z13fxg
I wanted to both glue and staple the VPF vertically to the frame so I added vertical posts to the frame on the ends of the cabinet. The cabinet is a little more than 16″ deep so I ended up adding two posts on each end. Installing the VPF on the ends was easy since it was just a matter of cutting them to length and cutting one to fit the remaining width. If you have never used VPF, it cuts very easy by scoring a couple times with a utility knife and then just bending along the score mark. It breaks off easily and cleanly.
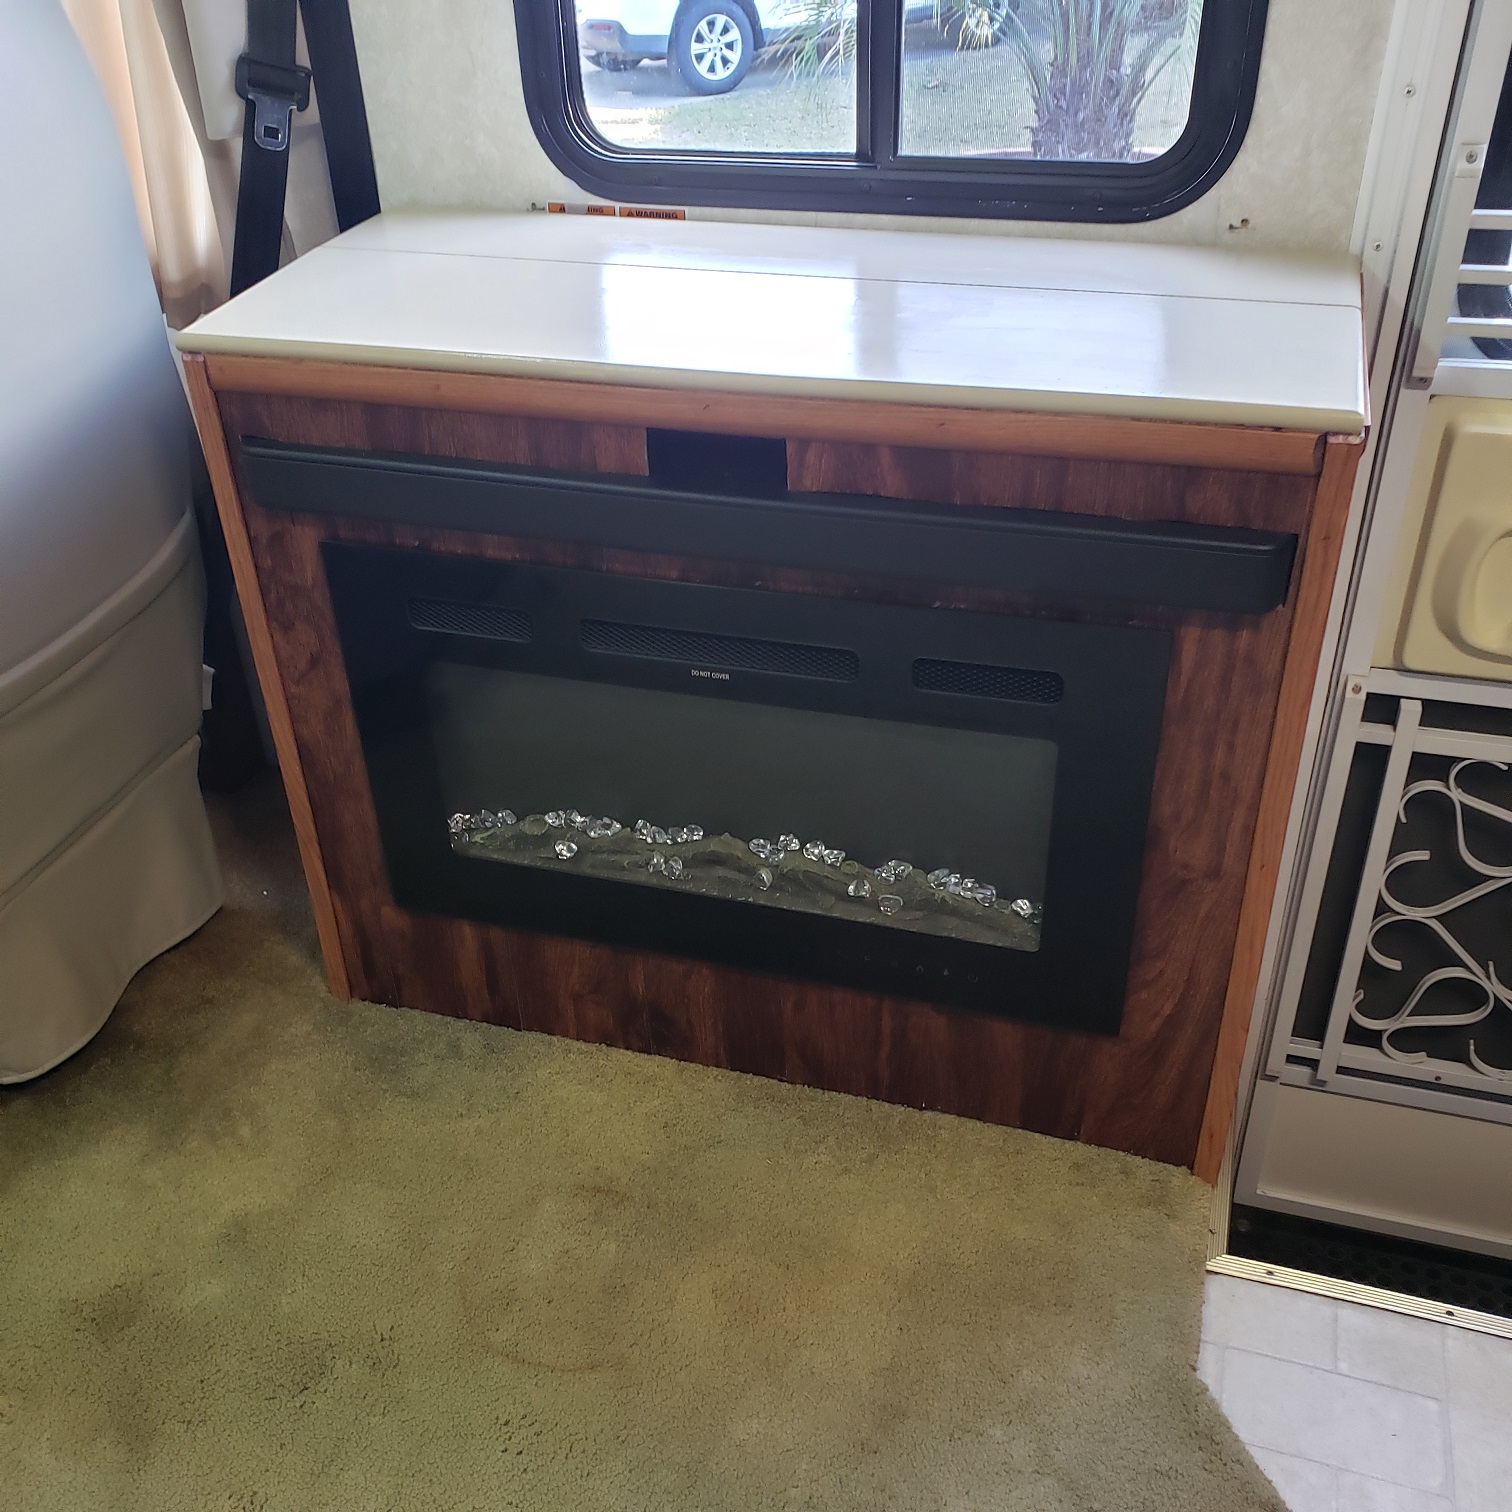
Installing the VPF on the front was a different story. I had to do a bunch of custom fitting and notching to go around the fireplace and soundbar. I left an opening on top of the soundbar because it had buttons on top I needed to have access to. Also, the frame was not wide enough for the soundbar to sit on without falling into the cabinet so I created a shelf by attaching another board to the frame so it was wide enough, with a stop block on the backside to keep the soundbar in place. The top of the cabinet was easy. It was just a matter of cutting material to length and width to accomodate the cabinet. I used two pieces. One stays attached to the cabinet while the other mounts to the top of the TV lift. The lift has the necessary adjustment ability to set it to the correct height while retracted.
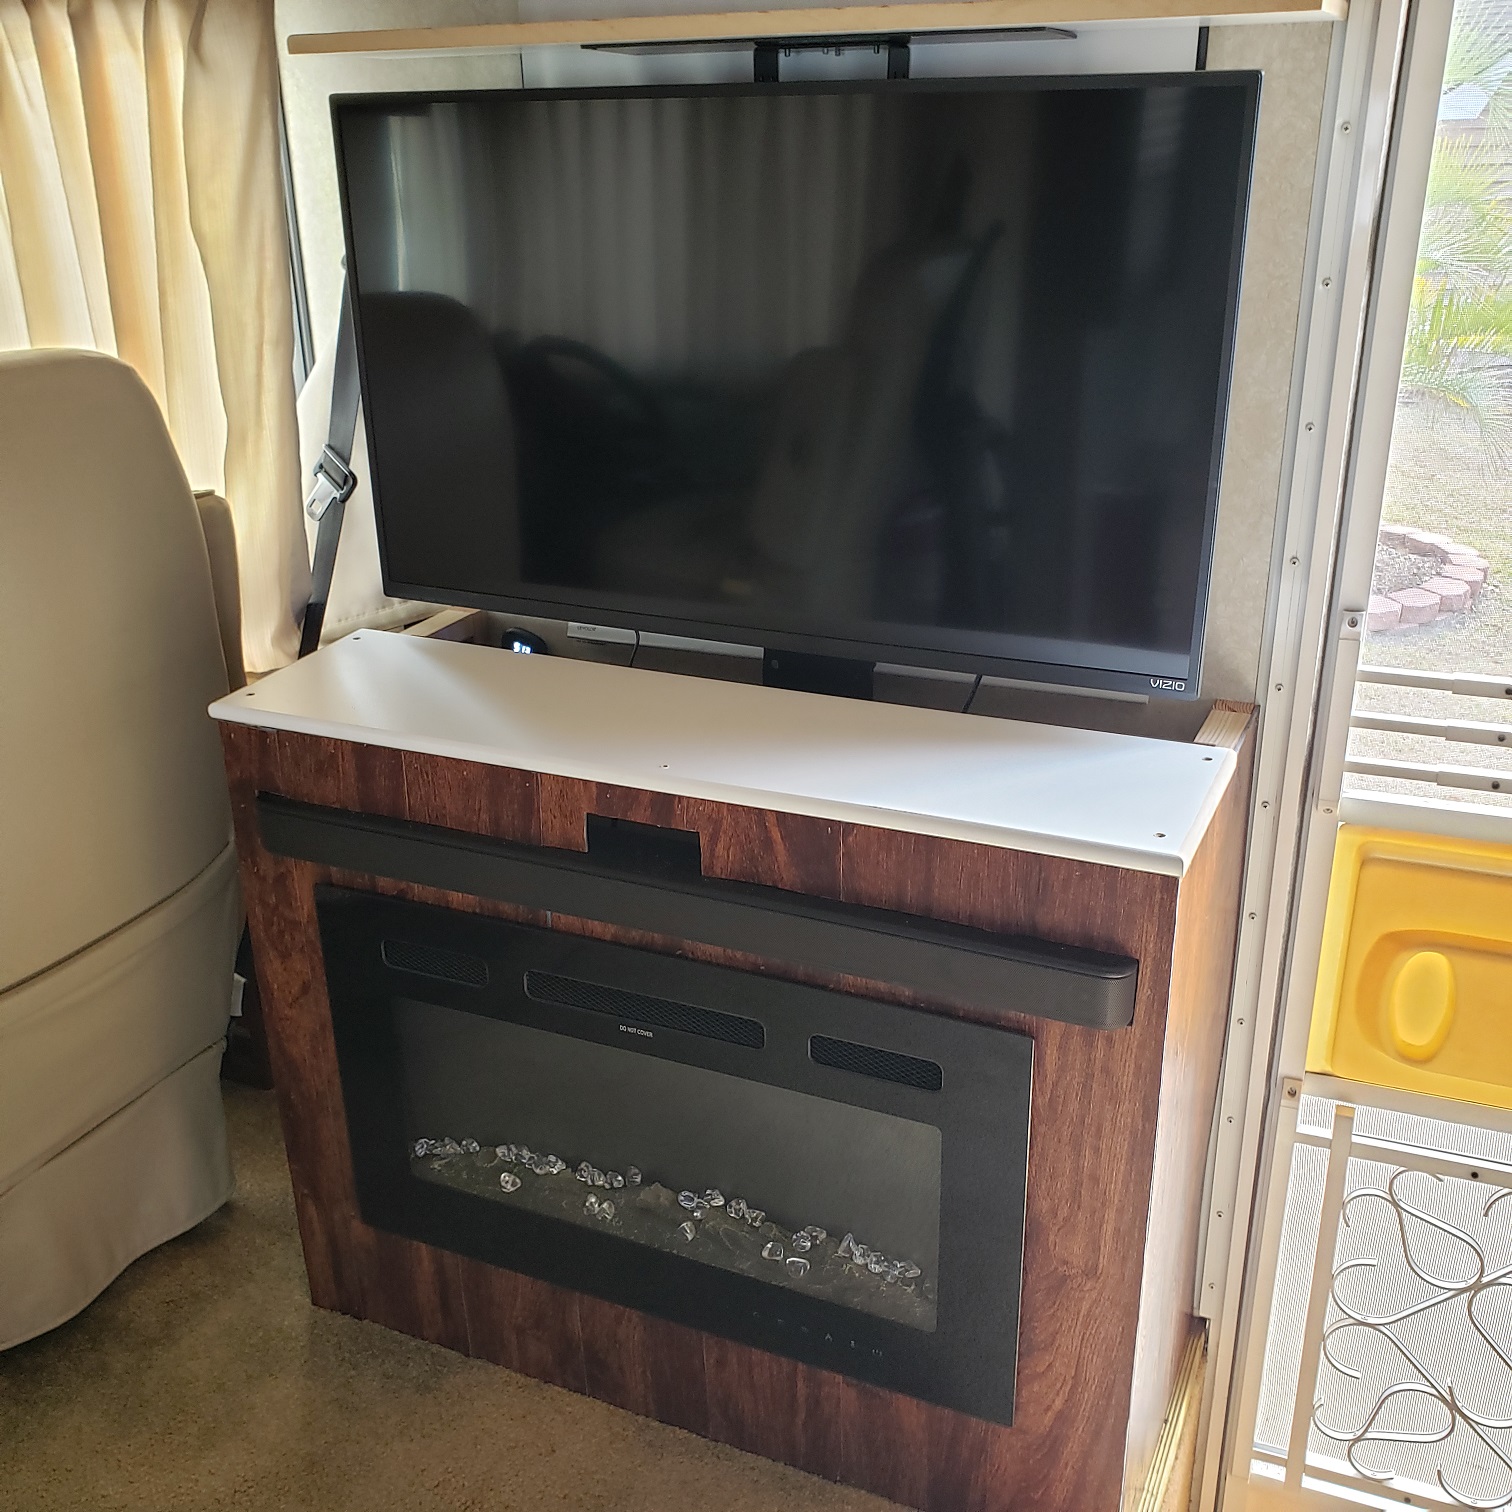
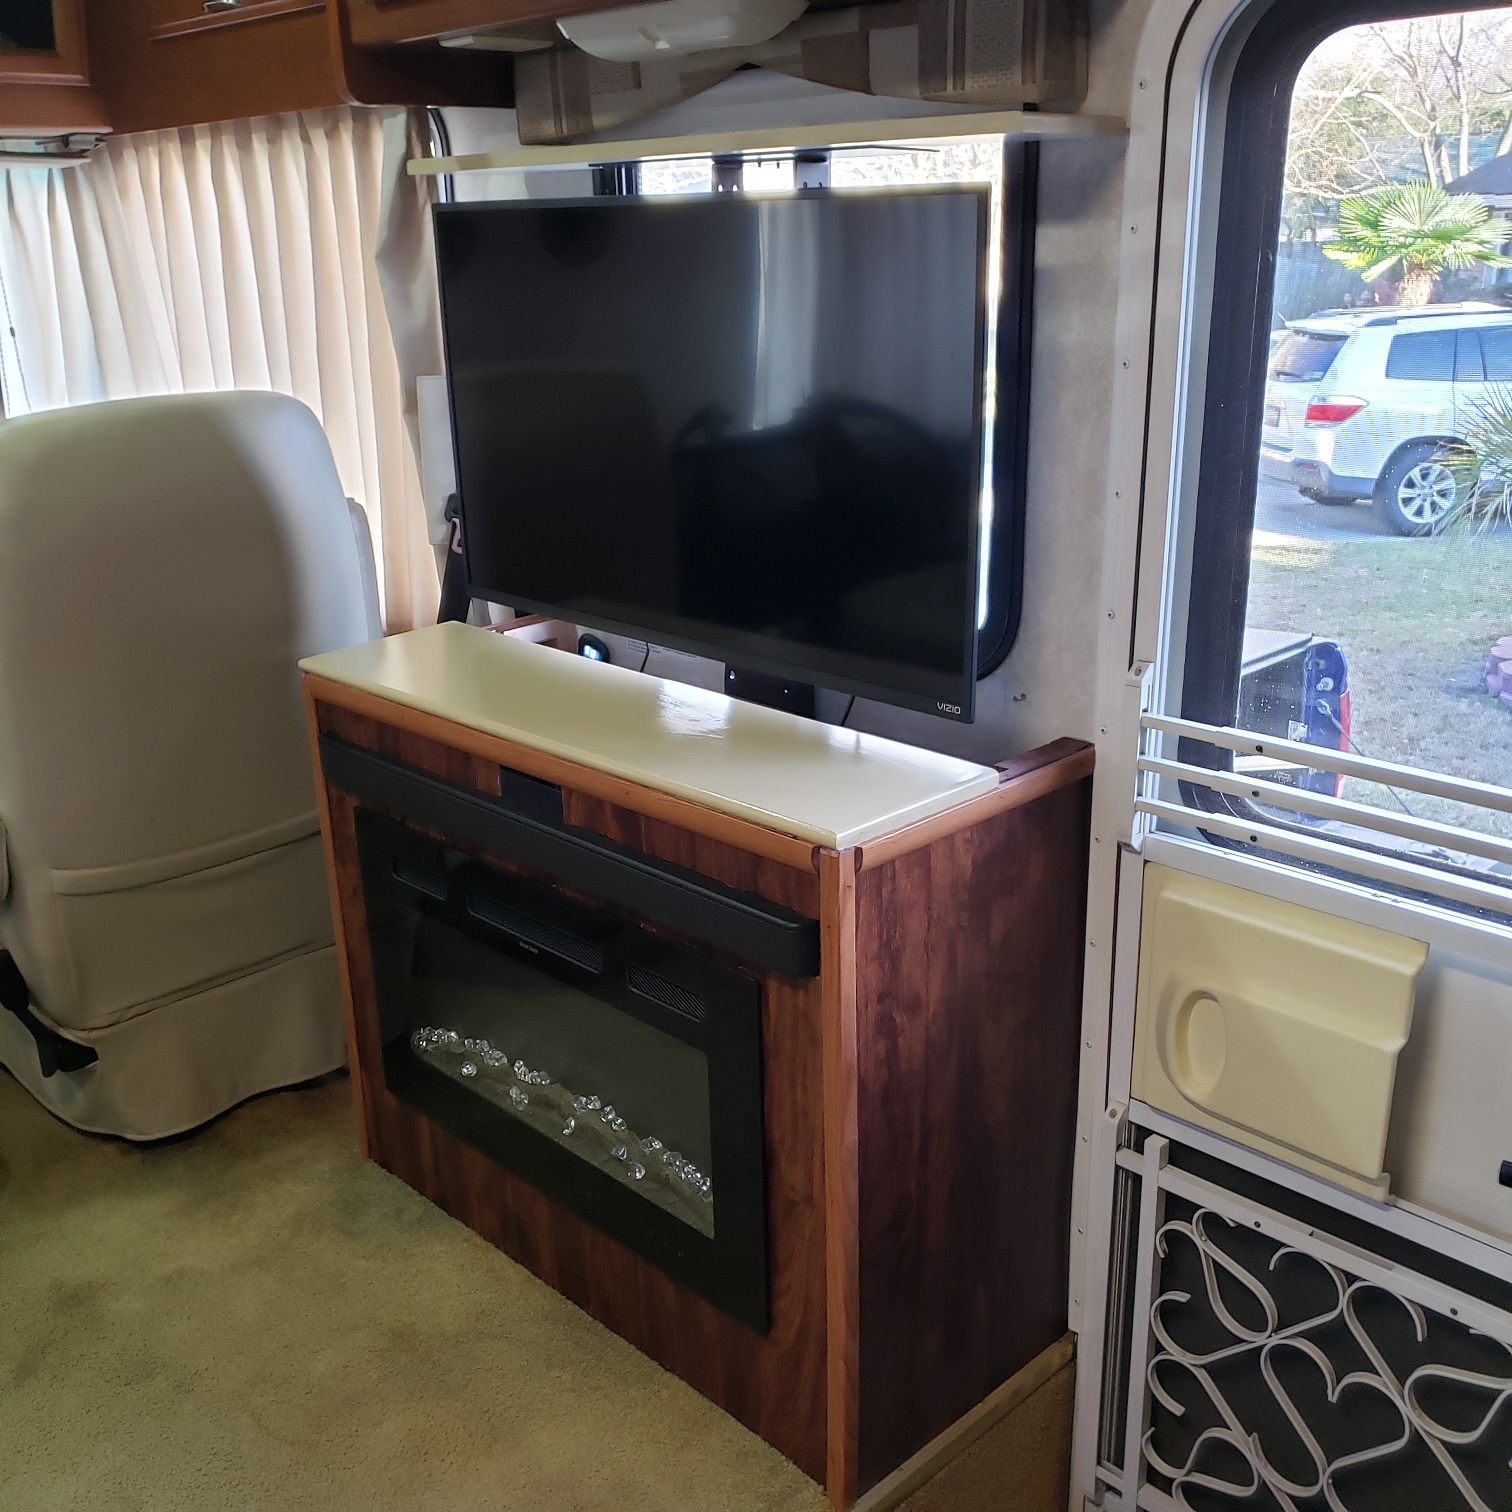
Cabinet with Sound Bar Fireplace and TV
The only thing left was to trim the cabinet to make it look decent. I found some composite moulding with a cherry covering. This looked pretty close, not perfect, but close enough for me. I used it along the top edge and the corners holding it in place with 1″ long nails for my trim nail gun.
Finished TV Lift Cabinet with Trim
One thing I have not mentioned is that the window behind the TV did not have a shade when I purchased the coach. I used a Levolor Room Darkening roller shade even before I started this project. The lift itself was so close to the shade it got hung up on the lift when it was going up. To fix this I just used some small velcro tabs on the shade and the wall. This pulled the shade in close enough to the wall it did not get caught on the lift when it was going up.
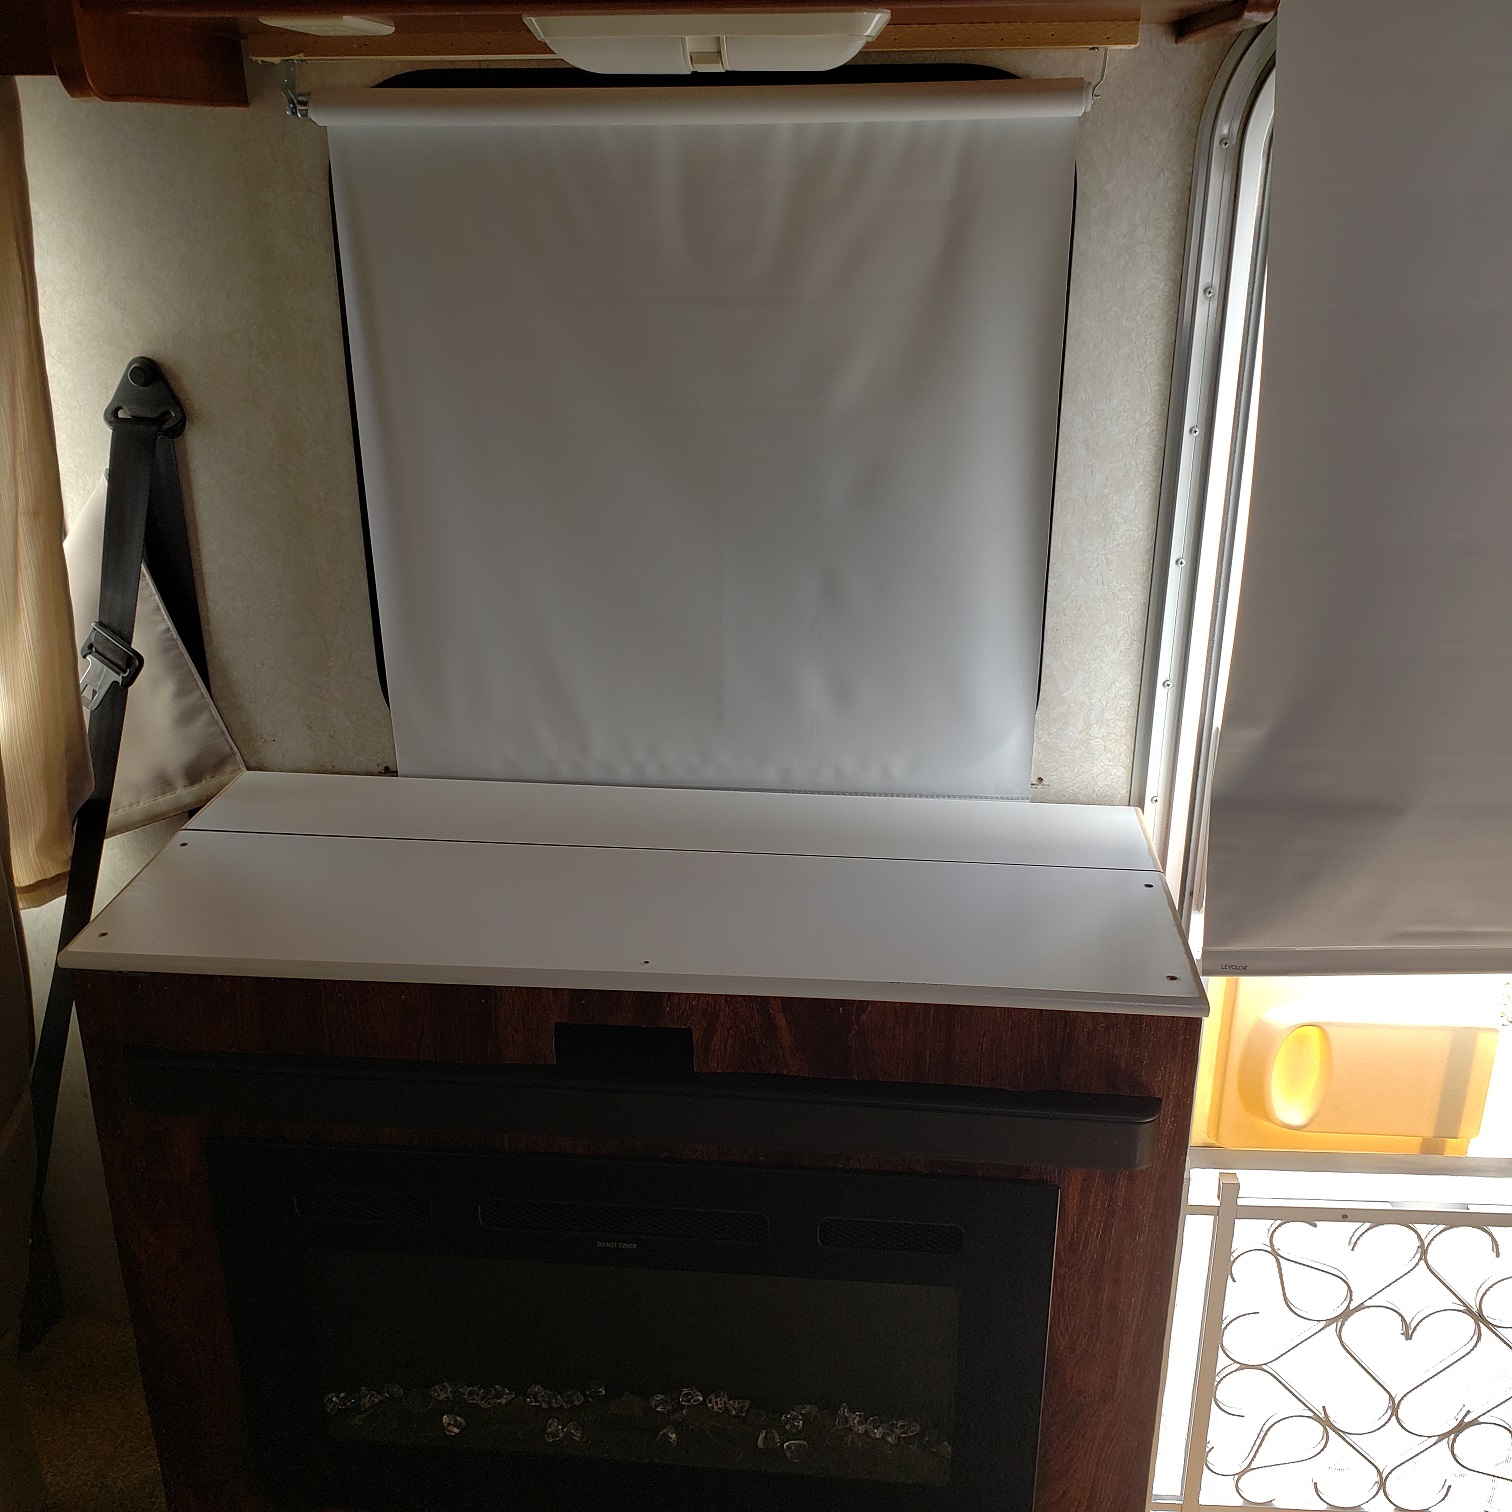
Levolor Roller Shade Minus Valance
Overall I was happy with the end result.
Finished Project