

In this article, I will talk about my experience and learning on the Front Wheel Bearings.
First, however, I recommend everyone read the safety article.
https://mybounder.com/2022/02/09/safety-first/
I also want to let everyone know that I’m not responsible for anything you do. This article is for entertainment purposes only, do not try this yourself.
I am the 3rd owner of a 1999 36S Triton V10 Bounder. I bought it in April 2020.
Safety is always first. Lifting the vehicle on jacks alone is not safe, it must have jack stands. Here, I’m using two 6 ton jack stands.
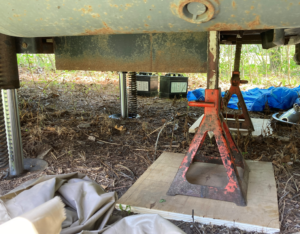
Jack Stands
Step 1, Remove the tire. First, remove the simulator (what they call hub caps on cars). Remove only 2 of the chrome nuts (the others are only decorative). The nuts to remove will have an indent in them. For this step, I used a digital torque meter to measure the torque of the bolts coming off. They were between 155 and 165, which means these wheels were probably torqued properly at 148 ft-lbs. Before removing the tires, a file can be used to mark the position of the tire on to the hub. The air valve falls between two studs, mark each stud.
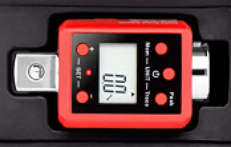
Torque Meter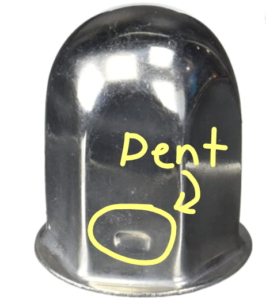
Wheel Simulator NutStep 2. Examine the hub, brakes, etc. Look at how things are put together so things can be returned upon reassembly.
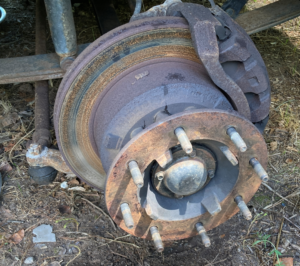
Front Wheel Hub
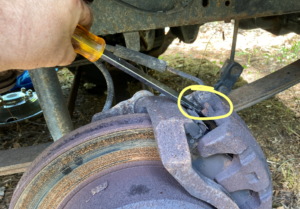
Step 3. Remove brake caliper (yellow bolts), pry out the brake caliper, pay good attention to which side to pry (the other side locks in and swivels). Hang the caliper very securely. Remove Brake bracket (blue bolts). These bolts are on with 295 ft-lbs. Mine peaked to 315 ft-lbs when removed. Turn the steering out to gain better access to these bolts.

Brake Caliper bolts
Prying out Brake Caliper, watch for pry and swivel sides.
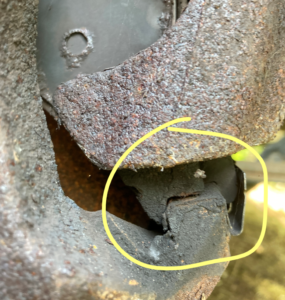
brake caliper swivel side
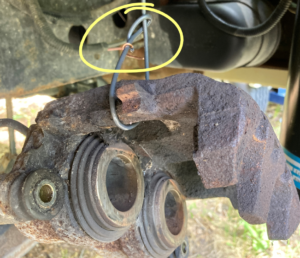
Hang Brake caliper securely to not damage flex hose.
Remove Brake Pads. Don’t worry about marking them, you will see the piston and caliper marks on the back.
Step 4. Remove hub. Start with the hub cap, remove the 4 bolts, but mark the position with a file to show where the tire air valve is (see marks on studs that you made in step 1). Mark the castle nut with the file. Straighten and remove cotter pin. Remove castle nut. Grasp the hub, lift and pull out while twisting back and forth. Put on ground facing up (if working in the dirt, use plywood for a clean work place).
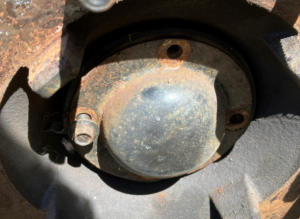
Hub Cap
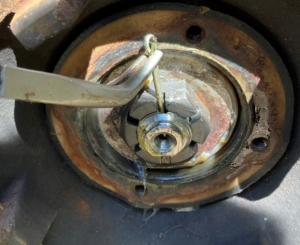
Remove Cotter pin
Remove castle nut, lift and pull
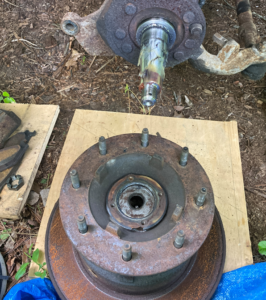
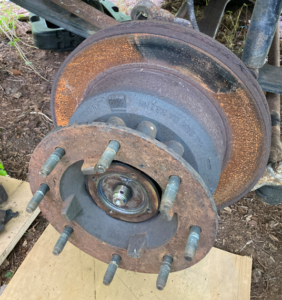
Wheel Hub Removed
Step 5. Remove bearings. The outer bearing and washer can simply be pulled out from the hub. Turn hub over and remove seal to reach inner bearing. Pry seal out carefully, work it slowly around the circle, don’t expect movement right away, just add more force as you continue around the circle to avoid damaging the seal. New seals are required C9HZ-1S190-A, but I’ve known mechanics to reuse seals if not damaged upon removal.
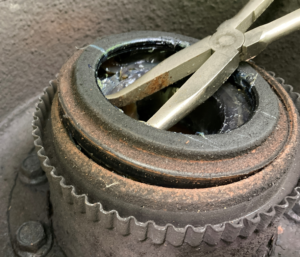
Wheel Seals

Inner Wheel Bearing
Step 6. Clean grease from bearings (aka cones), outer races (aka cups) and hub. Soak bearings in Varsol, shake out the dissolved grease, use light air pressure to blow, use brake cleaner to remove residue. Scoop out grease from hub (hand fits in), clean with rags and Varsol. Clean spindle of all grease, use brake cleaner. Lightly sand the seal surface with 400 paper to remove any burs, use a light & quick touch, 3 or 4 strokes will do.
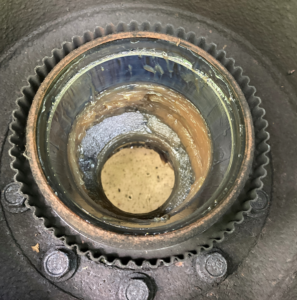
The outer race of the inner bearing. Hub seen full of grease
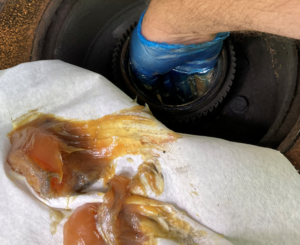
Scoop out old grease
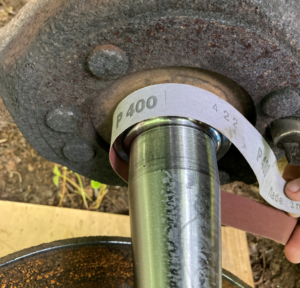
Lightly sand spindle seal surface with very fine emery cloth.
Step 7. Examine bearings for pits, chips, discolouration, spin bearing and watch for smooth operation and sound. Check outer race for pits and scores. Small lines on the bearing rollers or outer race is fine.
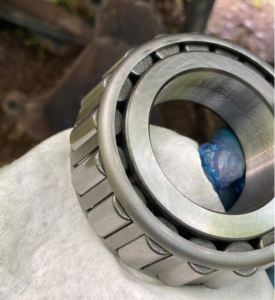
Examine bearings
Step 8. Repack the bearings! Use any method you like (hand or tool) and fill that bearing with good quality grease. Here I’m using Lucas Red ‘N Tacky grease. The cone tool isn’t filling it between the rollers, so I’ll do that part by hand. Don’t forget to grease the entire spindle and seal surface.
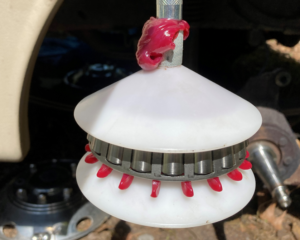
Packing Wheel Bearing with cone tool
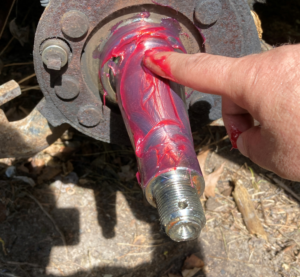
Greasing the Spindle
Step 9. Really, this is step 5 but in reverse…. fill the hub with grease (not completely full, not empty, just what you saw before), press new seal into place. This is a real trick, you need a clean block of wood to press against the seal, use a hammer to gently and evenly knock the seal into place. This seal has an odd shape, so a custom block of wood was made with tool shown in a drill.
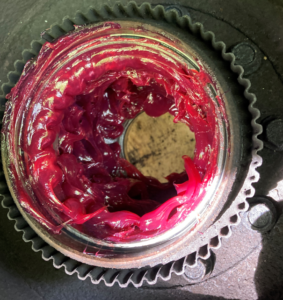
Fill Hub with Grease
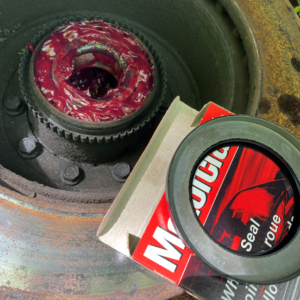
Install New Seals
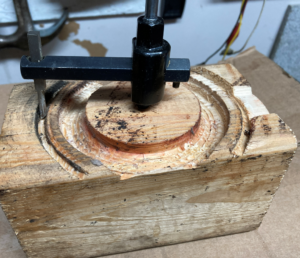
Block of wood to install / seat the wheel seal

C9HZ-1S190-A Wheel Seal
Step 10. Put the hub back on the spindle. Lift! and insert slowly, turn back and forth to get the seal into place (pre-grease the seal and seal surface). Install the washer and castle nut. Torque the castle nut to 60 ft-lbs while turning the hub. Loosen 1 turn, torque nut to 30 ft-lbs while turning hub. Loosen 1 turn, torque nut to 17 inch-lbs (INCH Pounds, not Foot Pounds). Insert cotter pin, or loosen to nearest cotter pin position. Note, Cotter pin can go into either of 2 holes in the spindle. These holes are at right angles. This permits the castle nut to be locked in 1/12 turn increments. My right side axle nut ended up in the original position (as marked), my left side axle nut ended up 1/12 turn tighter than original position. I re-checked the left side and it was correct. I am assuming the races were a bit worn. I’ll be monitoring this wheel (all the wheels) for heat on my trip (when I pull over to retorque the wheels after 100Km).
Step 11. Re-install the brakes. Press the caliper pistons in using a tool or a clamp. But first, now is a great time to flush the brake fluid. Use a vacuum pump to remove all brake fluid from reservoir. Fill reservoir with new brake fluid, my RV uses DOT 3 Super (500 degree). Break open the bleeder screw, use a vacuum pump to suck the old brake fluid. Press the caliper pistons in and watch the fluid come out of the caliper. You will need to close the bleeder screw, empty the vacuum pump tool and continue. Use brake grease on the sliders and pads. Reinstall caliper. Once done both sides, press brake pedal slowly a few times, there should be extra travel while pistons extend again. Once pedal is firm, recheck reservoir for correct level.
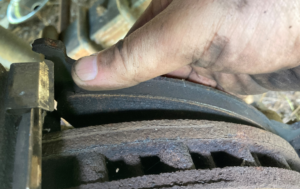
Step 12. Re-install the wheels. Follow marks to install air valve in same place to the hub. I found the wheels too heavy to install without help. I used a piece of plywood and metal bar to lift the tire onto the studs. Watch your fingers, keep them away from any danger zone. If you need to turn the hub to align the studs, use a screw driver. Put a drop of oil between washer and lug nut. Tighten with impact gun on low setting in a criss-cross pattern. When tire is on the ground, torque to 148 ft-lbs in criss-cross pattern. Re-torque in 100km. I prefer to torque (all nuts) to 120 ft-lbs, then step up to the final 148 ft-lbs. Install Wheel Simulators, I just put on those nuts with impact gun… can’t find the torque for them.
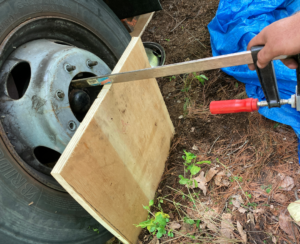
Putting Wheels On
Don’t forget to pick up all your tools, look around for anything you missed (like spare brake pads, etc), clean all the mess, remove jack stands, etc. And go for a test drive!
4 comments
We have a 2003 35r. Our wheel bearings are in an oil bath. Last fall before we left on an 8 week trip cross country,we had our brake system inspected. We needed new brakes, rotors, and calipers. When the mechanic reinstalled the seals on the wheel bearings he put them in backward. They leaked all the way from VA to CO where we finally found a mobile mechanic who would work on them. He was a nightmare in himself, charging us $3000 for lots of things he supposedly did at his shop but would provide no proof. But when your home is up in jacks with no wheels, what choice do you have??
Sorry to hear that. I have probably spent $1000 in tools and hundreds of hours learning, but it’s worth it when I hear about those $3,000 nightmares.
As a repair shop owner some advise is to use ONLY top name bearings such as Factory , Timken, etc do not use the cheaper bearings made in china they are not machined well and will not last
Thank you Dennis, great advice! After spending many hours, you really want the best chance for success and that starts with quality bearings. Timken, SKF, FAG are all quality bearings. The bearings that came in my 1999 36s F53 are Timken. They have rolled my RV for 23 years and still going strong.
Inner bearing Timken # 45284
Outer bearing Timken # 25880