

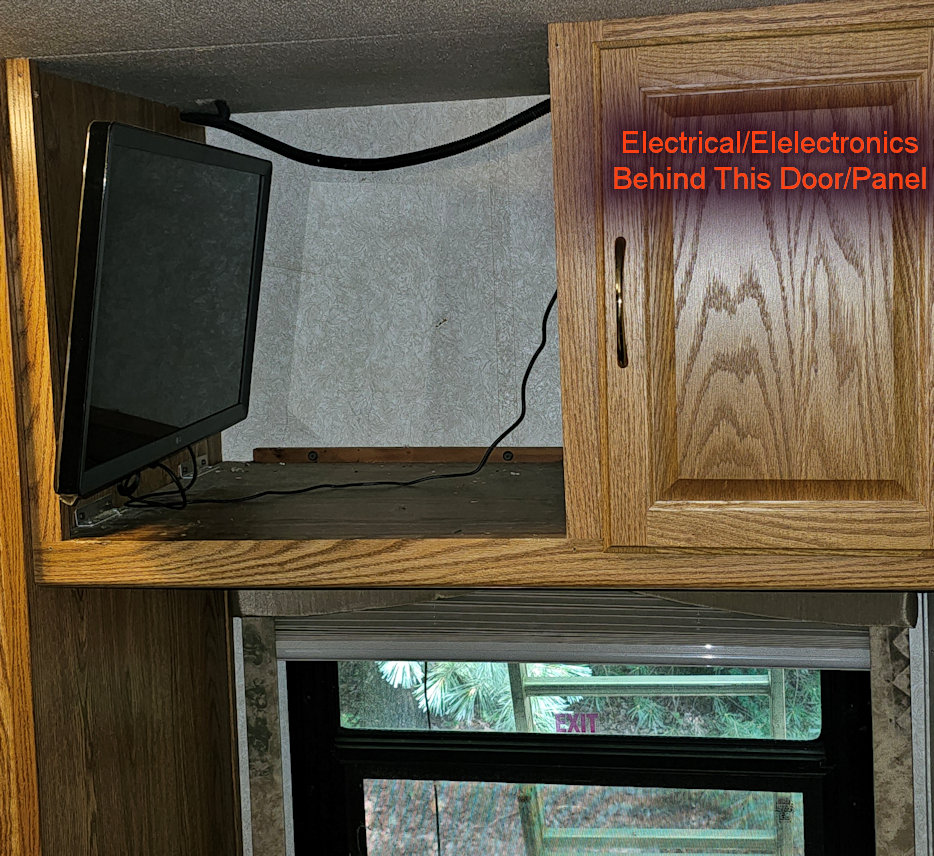
My 2003 35R bounder has always been finicky when trying to adjust the inside environment (A/C or Heating). The old, dated, control panel was somewhat confusing and when using the A/C units (2 of them) it tended to trip the 30 amp breaker at the campground.
Enter Waiter’s ECC climate controls! I will leave the history of its development to that found on his web site. I am an electrical engineer and even I was a bit daunted by the prospect of replacing this unit. Waiter took that all into consideration when designing this replacement and I gotta say, it was breeze! Very well done!
The hardest parts of my particular installation was locating the current control board, getting to it physically to remove it, dressing up the install and routing the external temperature sensor. None of these are really difficult if you spend a little time thinking about it.
Locating the Control Board
As with most RVs, there are a myriad of fuse blocks and circuit breakers as well as various control boards scattered under cabinets and behind walls. Yours may (and probably will) differ than my discoveries but the concepts will be the same.
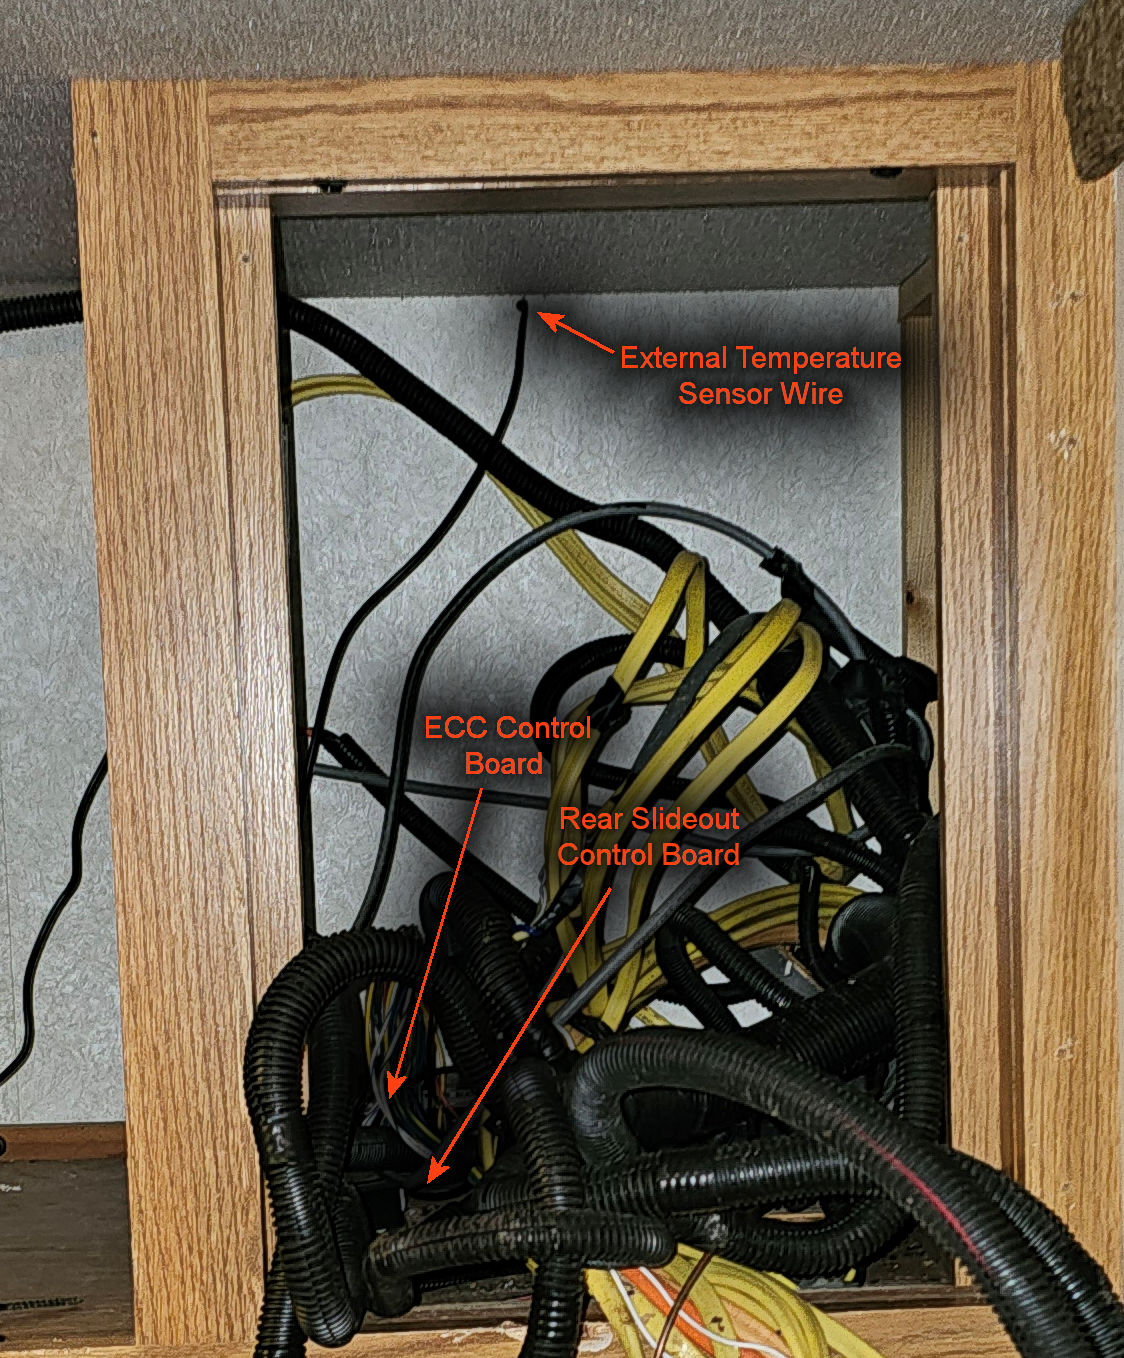
In my case I found the control board for the ECC behind the main circuit panel in the bedroom:
 |
 |
 |
 |
As you can see, it is a cramped space where the installers just crammed wires, without cutting to length, in the space. The control board was in a box mounted to the bottom of the space with screws.
BTW, there was a substantial mouse nest behind there as well. Made for a great condo!
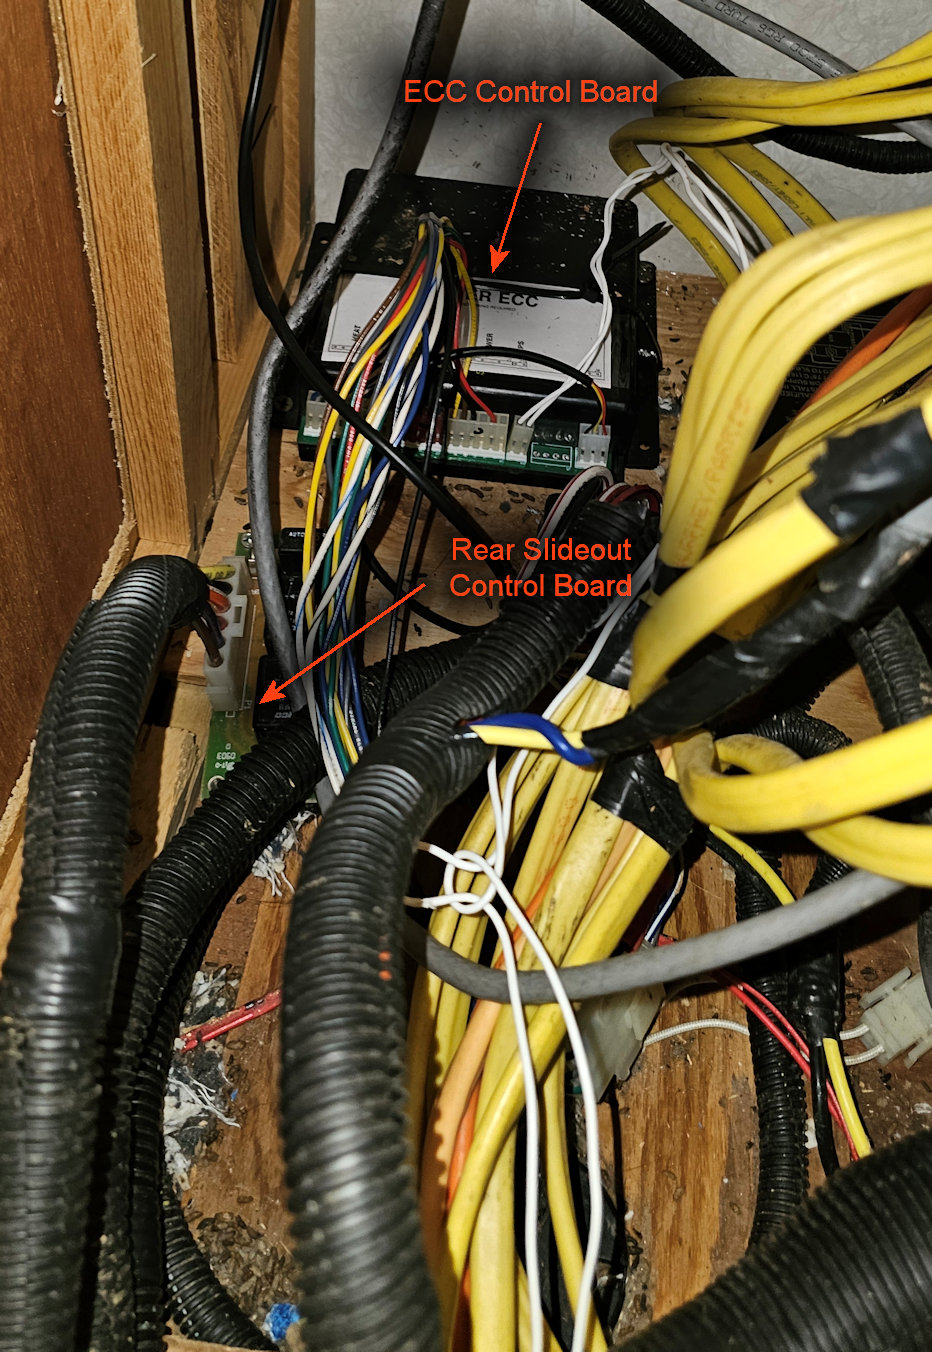
I carefully unscrewed the board, unplugged the wiring harnesses, and removed it.
Examining the old board with the new one I can see right away that the new board was designed to fit exactly in the old board’s mount. Just a couple screws, and it popped right in. Even the wiring harnesses went back in place in more-or-less the same locations as the old board except for the external temperature sensor, which the old board did not facilitate.
After attaching all the wires, I simply replaced it in the same location the old board was mounted and continued the setup.
Dressing up the Installation

Installation with Spacer
The new system relies on a Raspberry PI. This is a small computer that Waiter utilizes to be the heart of the system as well as control the display. The display itself is a small box designed to house the Raspberry PI as well as the touchscreen monitor.
The display is slightly thicker than the old control panel and requires a slightly larger hole. Making the current hole, found after removing the old panel, larger, is fairly easy using a multi-tool to cut the wall larger. There is a template in the kit that shows how large the hole needs to be to properly house the unit.
As I said it is slightly thicker and the wall you are probably destined to mount to is not very thick. This will require you to make or purchase (from Waiter) a spacer. I chose to make my own out of oak. Also, not a particularly hard task if you have any wood skills and somewhat fun to boot. It also allowed me to match the color to rest of the woodgrain in the rig.
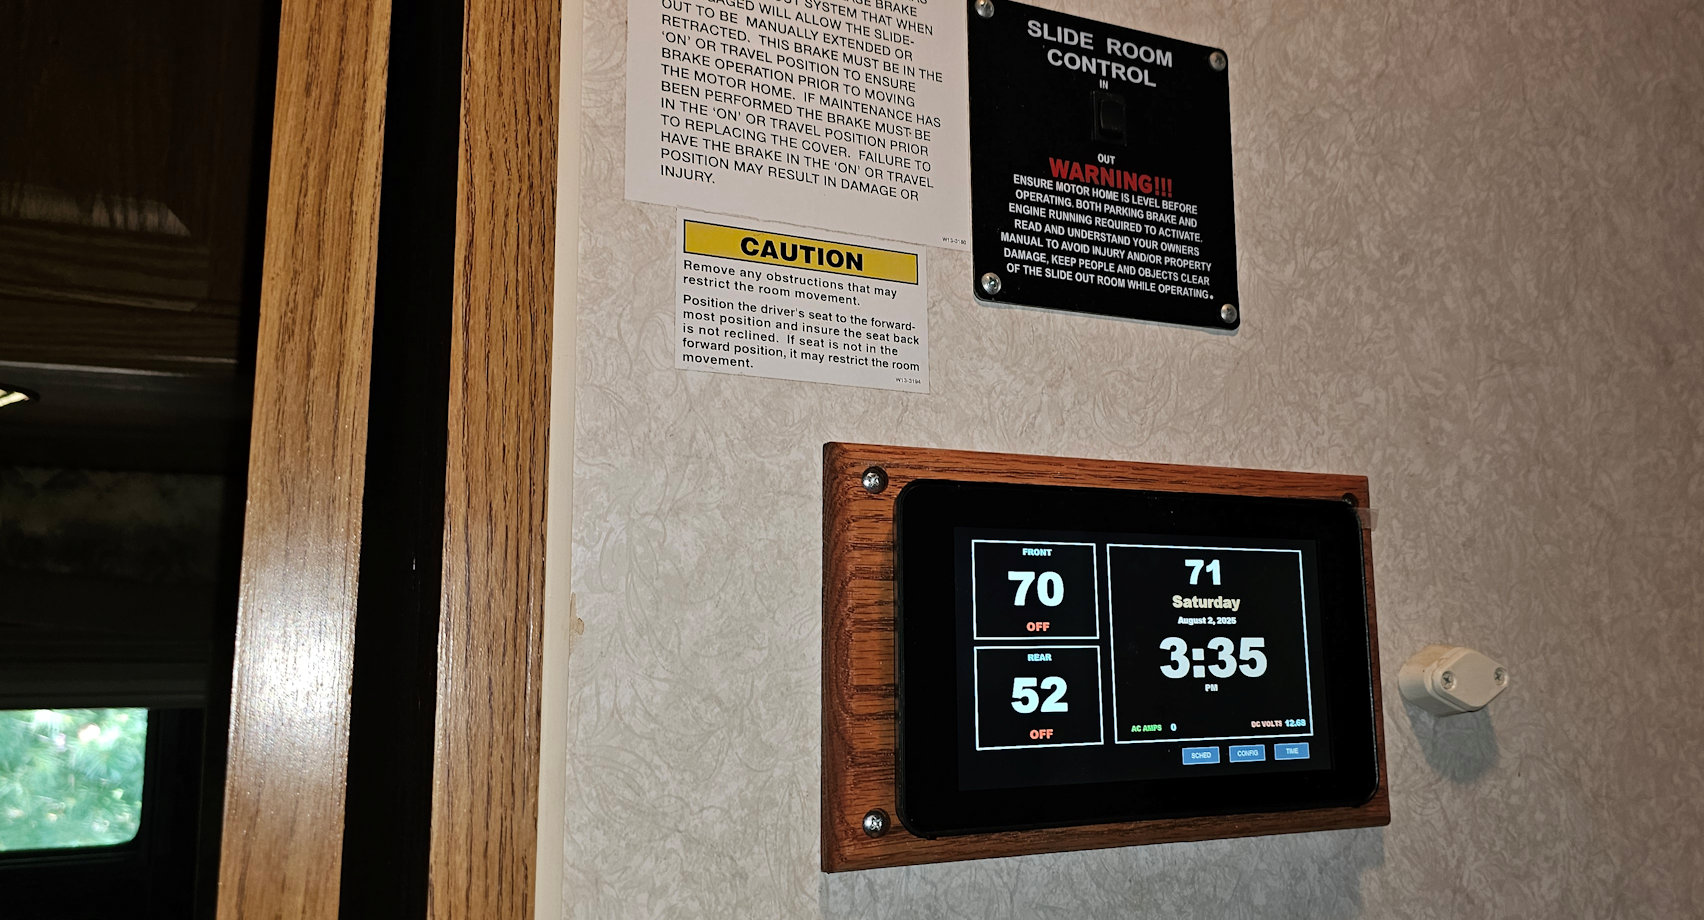
Final Look
Attaching the External Temperature Sensor
This was a little tricky. It amounts to a long wire with a sensor on the end that has to be located somewhere externally on the rig.
After thinking about it for a while, I decided to simply drill directly through wall behind the little cubby where all the wires are located (above the circuit board). I planned to run the wire outside to the back of the rig and attach the sensor somewhere there.
 |
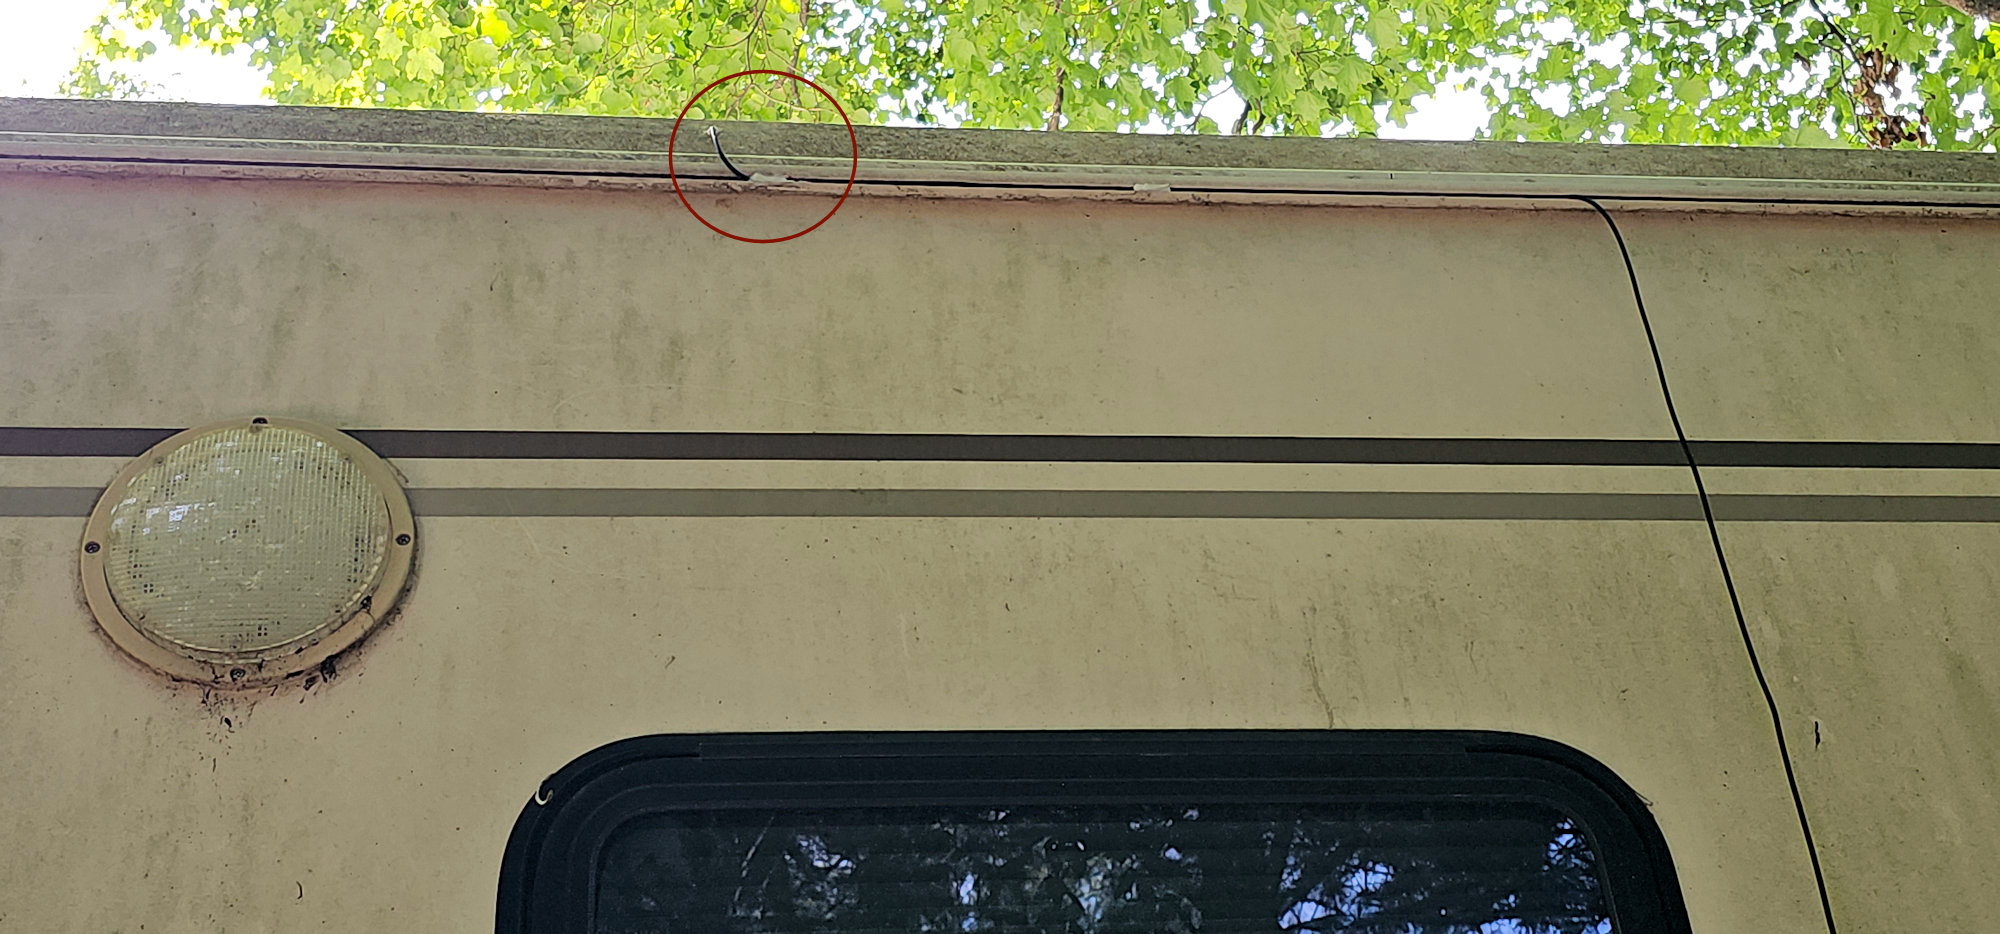 |
On my rig, there is a convenient channel that runs the length of the rig at the top that was perfect to run the wire in. Once I had it pulled through the wall, I simply laid the wire in the channel and locked it there with a little silicone at various locations. Additionally, you want to really load up the hole you made with the wire protruding with silicone to seal it from any rain/moisture.
Conclusion
I have to say this was a remarkably well-designed piece of equipment. Waiter (real name John 😊) did an outstanding job of thinking through all the potential issues and accommodating the needs of the RV owners. You can purchase yours at https://waiterecc.com/.
Finally, I want to say that my particular unit was purchased in 2021 and I did not get around to trying to install it until 2025. I had, it turns out, one of his first versions yet the install still went smoothly. I did the installation on a random Sunday and, just for kicks, thought I’d call him on the included phone number to discuss if there is anything I should be aware of in the interceding years between purchase and install. Incredibly HE ANSWERED THE PHONE! Thank you, John. We had a good discussion, and he confirmed that there was not much different between the original documentation (which was VERY concise and easy to follow) and now.